Inquire: Call 0086-755-23203480, or reach out via the form below/your sales contact to discuss our design, manufacturing, and assembly capabilities.
Quote: Email your PCB files to Sales@pcbsync.com (Preferred for large files) or submit online. We will contact you promptly. Please ensure your email is correct.
Notes: For PCB fabrication, we require PCB design file in Gerber RS-274X format (most preferred), *.PCB/DDB (Protel, inform your program version) format or *.BRD (Eagle) format. For PCB assembly, we require PCB design file in above mentioned format, drilling file and BOM. Click to download BOM template To avoid file missing, please include all files into one folder and compress it into .zip or .rar format.
What is a Microcontroller? Beginner’s Complete Guide
If you’ve ever wondered what is a microcontroller or why these tiny chips appear in everything from your coffee maker to your car’s engine management system, you’re in the right place. After spending years designing PCBs with various MCUs, I can tell you that understanding microcontroller basics opens the door to building almost anything electronic.
This guide covers everything beginners need to know about microcontrollers—how they work, what’s inside them, and how to choose one for your first project. Whether you’re a hobbyist, engineering student, or someone curious about embedded systems, this MCU explained resource will give you a solid foundation.
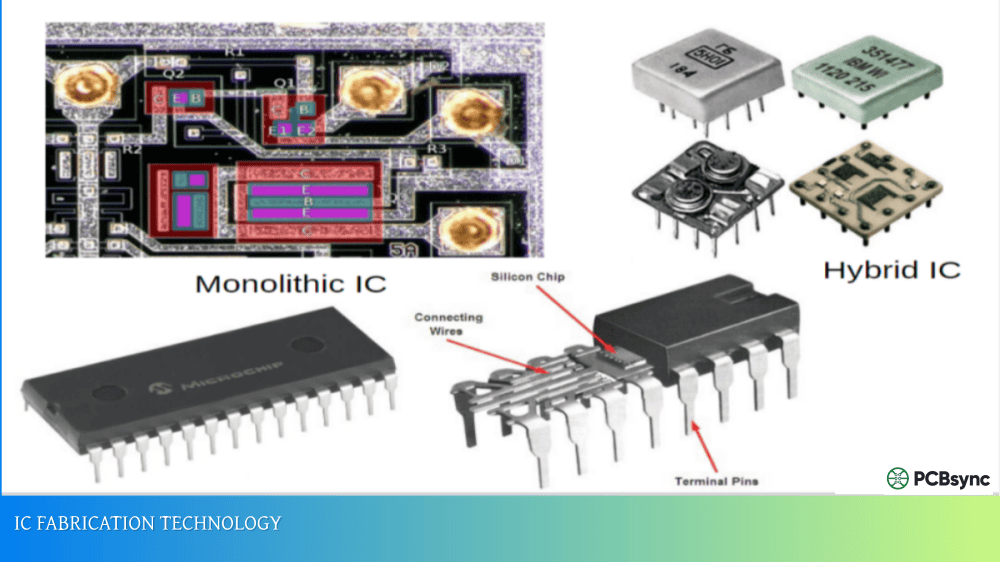
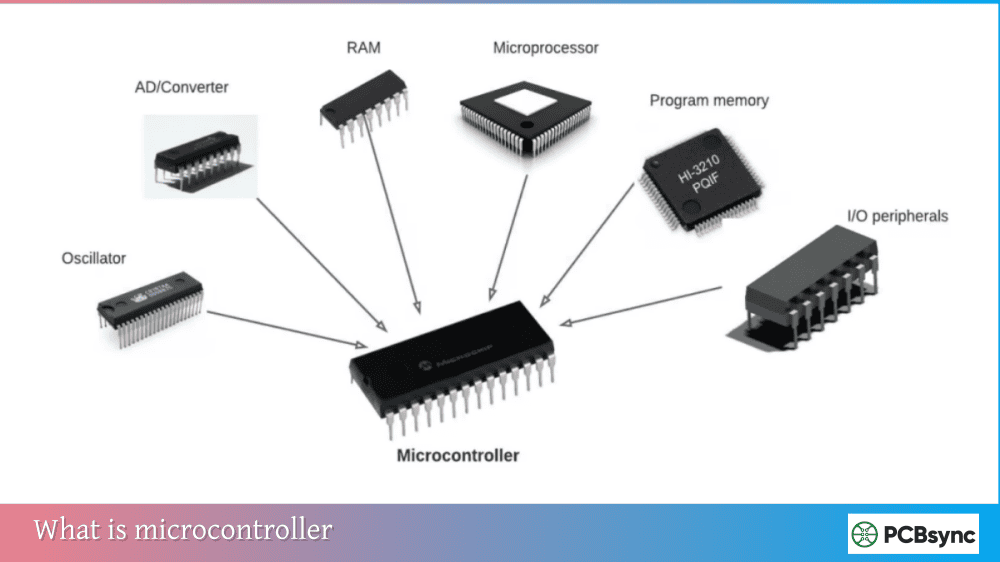
A microcontroller (MCU) is a compact integrated circuit designed to perform specific tasks within an embedded system. Think of it as a tiny, self-contained computer on a single chip. Unlike the processor in your laptop that runs multiple programs simultaneously, a microcontroller typically handles one dedicated function—and it does that function extremely well.
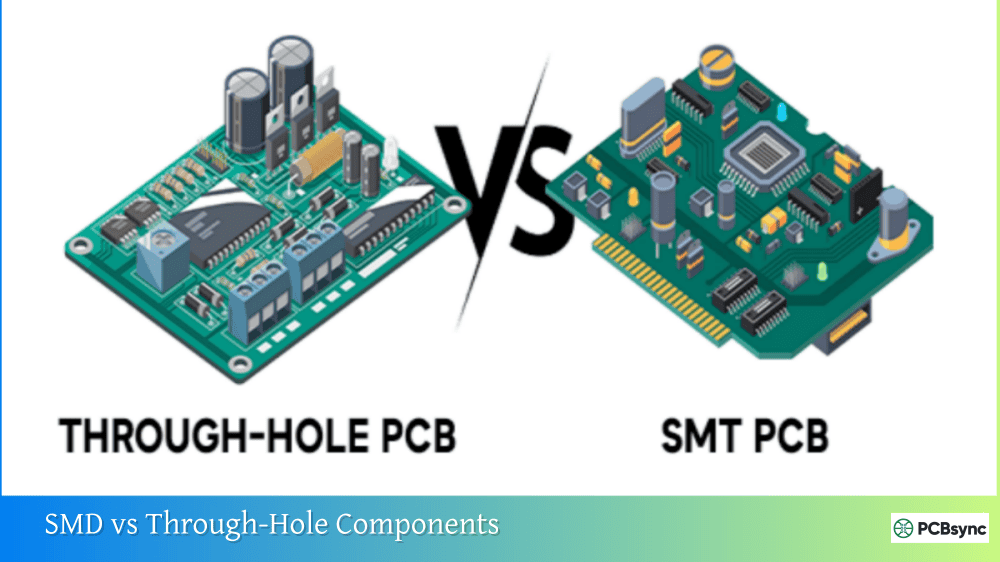
The key characteristic that defines a microcontroller is integration. An MCU combines the processor, memory, and input/output peripherals all on one chip. This means you can build a complete computing system with minimal external components—sometimes just a power supply and a few passive components.
The Mini-Computer Analogy
To understand what is a microcontroller at a fundamental level, imagine shrinking an entire computer—CPU, RAM, storage, and connection ports—onto a chip smaller than your fingernail. That’s essentially what a microcontroller does. It reads inputs (like button presses or sensor readings), processes that information according to its programmed instructions, and produces outputs (like turning on LEDs, driving motors, or sending data).
The magic happens in how efficiently MCUs perform these tasks. They boot instantly, consume minimal power, cost just a few dollars, and can run continuously for years without maintenance.
Microcontroller Architecture: What’s Inside an MCU
Understanding microcontroller basics requires knowing the key components that make up every MCU. While specific implementations vary between manufacturers, all microcontrollers share these fundamental building blocks.
Central Processing Unit (CPU)
The CPU is the brain of the microcontroller—the component that executes instructions and coordinates all operations. It contains:
Arithmetic Logic Unit (ALU): Performs mathematical calculations (addition, subtraction, multiplication) and logical operations (AND, OR, NOT comparisons). Every decision your microcontroller makes happens through ALU operations.
Control Unit: Manages instruction flow by fetching instructions from memory, decoding what they mean, and executing them in sequence. This happens millions of times per second.
Registers: Small, fast memory locations within the CPU for temporary data storage during processing. Registers enable quick access to frequently used values.
Memory Types in Microcontrollers
Microcontrollers contain two essential types of memory:
Memory Type
Purpose
Characteristics
Flash (Program Memory)
Stores your code
Non-volatile (retains data when powered off), typically 16KB to 2MB
RAM (Data Memory)
Stores variables during execution
Volatile (loses data when powered off), typically 2KB to 512KB
Flash memory holds your program permanently—even when power is removed. When the microcontroller powers up, it immediately begins executing instructions from Flash. RAM provides workspace for variables and temporary data while your program runs.
Input/Output (I/O) Peripherals
Peripherals are the interfaces that connect your microcontroller to the outside world. They’re what make an MCU actually useful for controlling things.
Peripheral
Function
Common Uses
GPIO (General Purpose I/O)
Digital input and output pins
Reading buttons, driving LEDs
ADC (Analog-to-Digital Converter)
Converts analog signals to digital values
Reading sensors, measuring voltages
DAC (Digital-to-Analog Converter)
Converts digital values to analog signals
Audio output, voltage generation
Timer/Counter
Measures time intervals, counts events
PWM generation, event timing
UART
Serial communication
PC communication, GPS modules
SPI
High-speed serial interface
Displays, SD cards, sensors
I2C
Two-wire serial interface
Sensors, EEPROMs, RTCs
PWM
Pulse Width Modulation output
Motor speed control, LED dimming
The beauty of having these peripherals integrated on-chip is that they operate independently of the CPU. While the ADC converts an analog reading, the CPU can process previous data. This parallel operation enables responsive, real-time systems.
How a Microcontroller Works: The Execution Cycle
Understanding what is a microcontroller means understanding how it actually processes your program. Every microcontroller follows a continuous cycle:
Fetch: The control unit retrieves the next instruction from program memory (Flash) using the address stored in the Program Counter register.
Decode: The control unit interprets the instruction to determine what operation needs to happen and which components are involved.
Execute: The ALU performs the required operation—whether that’s a calculation, data movement, or I/O interaction.
Update: The Program Counter advances to point to the next instruction, and the cycle repeats.
This fetch-decode-execute cycle happens continuously while the microcontroller is powered. A typical MCU running at 16MHz executes roughly 16 million instructions per second. Higher-performance 32-bit MCUs running at 100MHz+ process over 100 million instructions per second.
Types of Microcontrollers
Microcontrollers come in various configurations optimized for different applications. Understanding these categories helps you select the right MCU for your project.
Classification by Bit Width
Type
Data Bus
Typical Speed
Memory Range
Best For
8-bit
8-bit data processing
8-20 MHz
1KB-64KB Flash
Simple control tasks, cost-sensitive applications
16-bit
16-bit data processing
16-40 MHz
16KB-256KB Flash
Motor control, instrumentation
32-bit
32-bit data processing
48-480 MHz
64KB-2MB Flash
Complex applications, IoT, graphics
Bit width determines how much data the processor handles per operation. An 8-bit MCU processes numbers from 0-255 in single operations, while a 32-bit MCU handles values up to 4.2 billion natively. For many embedded applications, 8-bit MCUs provide more than adequate performance at the lowest cost.
Classification by Architecture
Harvard Architecture: Separates program memory from data memory with dedicated buses for each. This allows simultaneous instruction fetch and data access, improving real-time performance. Most modern MCUs use Harvard architecture.
Von Neumann Architecture: Uses shared memory for both program and data with a single bus. Simpler design but creates a bottleneck when accessing instructions and data sequentially.
RISC (Reduced Instruction Set Computer): Uses simple instructions that execute in single clock cycles, emphasizing software efficiency. ARM Cortex-M and AVR are RISC architectures.
CISC (Complex Instruction Set Computer): Uses complex instructions that may require multiple clock cycles but accomplish more per instruction. The 8051 family uses CISC architecture.
Popular Microcontroller Families for Beginners
When learning microcontroller basics, choosing the right platform dramatically affects your experience. Here are the most beginner-friendly options:
Arduino (AVR-Based)
Specification
Arduino Uno
Arduino Nano
Microcontroller
ATmega328P
ATmega328P
Architecture
8-bit AVR
8-bit AVR
Clock Speed
16 MHz
16 MHz
Flash Memory
32 KB
32 KB
RAM
2 KB
2 KB
Digital I/O
14 pins
14 pins
Analog Inputs
6 channels
8 channels
Price Range
$20-25
$5-15
Arduino revolutionized hobbyist electronics by making microcontrollers accessible. The Arduino IDE provides a simplified C/C++ programming environment with thousands of libraries for sensors, displays, and communication modules. If you’re asking “what is a microcontroller” for the first time, Arduino is where most people start.
ESP32
Specification
ESP32-WROOM
Architecture
32-bit Xtensa dual-core
Clock Speed
Up to 240 MHz
Flash Memory
4 MB (external)
RAM
520 KB
Wireless
Wi-Fi + Bluetooth
Digital I/O
34 GPIO pins
Price Range
$5-10
The ESP32 dominates IoT projects because it includes Wi-Fi and Bluetooth on-chip. For connected devices—smart home sensors, weather stations, remote monitoring—ESP32 offers incredible value. It’s Arduino-compatible, so the learning curve from basic Arduino projects is gentle.
STM32 (ARM Cortex-M)
Specification
STM32F103 (Blue Pill)
STM32F4
Architecture
32-bit ARM Cortex-M3
32-bit ARM Cortex-M4
Clock Speed
72 MHz
168 MHz
Flash Memory
64-128 KB
512KB-1MB
RAM
20 KB
192 KB
Digital I/O
37 GPIO
82+ GPIO
Price Range
$2-5
$10-20
STM32 microcontrollers offer professional-grade performance at hobbyist prices. They’re widely used in industrial applications, drones, 3D printers, and robotics. The learning curve is steeper than Arduino, but STM32 skills translate directly to professional embedded development.
Raspberry Pi Pico (RP2040)
Specification
Raspberry Pi Pico
Architecture
32-bit ARM Cortex-M0+ dual-core
Clock Speed
133 MHz
Flash Memory
2 MB
RAM
264 KB
Digital I/O
26 GPIO
Price Range
$4-6
The Pico brought Raspberry Pi’s beginner-friendly approach to microcontrollers. It supports MicroPython for easy programming and C/C++ for performance. The dual-core processor and programmable I/O (PIO) make it surprisingly capable for its price.
Common Microcontroller Applications
Understanding where MCUs are used helps illustrate what is a microcontroller in practical terms. They’re everywhere:
Consumer Electronics
Remote controls, smart appliances, gaming controllers, digital cameras, fitness trackers, and wireless earbuds all contain microcontrollers managing their core functions.
Automotive Systems
Modern vehicles contain 50-100+ microcontrollers managing engine control, anti-lock braking, airbag deployment, infotainment, climate control, and window motors.
Industrial Automation
PLCs (Programmable Logic Controllers), motor drives, sensor networks, and process controllers rely on MCUs for reliable, real-time control.
Medical Devices
Blood glucose meters, digital thermometers, infusion pumps, pacemakers, and patient monitors use microcontrollers for precise, life-critical operations.
Internet of Things (IoT)
Smart thermostats, security cameras, environmental sensors, asset trackers, and connected devices use MCUs with wireless connectivity to link physical systems to the internet.
Getting Started: Your First Microcontroller Project
Ready to move beyond “what is a microcontroller” to actually using one? Here’s how to begin:
Step 1: Choose Your Platform
For absolute beginners, start with Arduino Uno. It’s forgiving, well-documented, and the community support is unmatched. If you want wireless connectivity from day one, the ESP32 is equally beginner-friendly.
Step 2: Gather Basic Equipment
Item
Purpose
Approximate Cost
Development Board
The microcontroller itself
$5-25
USB Cable
Programming and power
$3-5
Breadboard
Prototyping circuits
$5-10
Jumper Wires
Making connections
$5-10
LED Pack
Visual output for testing
$3-5
Resistor Kit
Current limiting, pull-ups
$5-10
Push Buttons
Input testing
$2-5
Step 3: Install Development Software
For Arduino and ESP32, download the Arduino IDE from arduino.cc. It’s free, cross-platform, and includes everything needed to write, compile, and upload code.
Step 4: Build the Classic “Blink” Project
Every microcontroller journey starts with blinking an LED. This simple project teaches you:
How to configure a pin as an output
How to control pin state (HIGH/LOW)
How to create timing delays
How the development workflow operates
Step 5: Expand Your Skills
Once you’ve blinked an LED, progress through these projects:
Reading button inputs
Analog sensor reading (potentiometer, light sensor)
Serial communication with your computer
Controlling motors with PWM
Interfacing displays
Wireless communication (for ESP32/Pico W)
Programming Languages for Microcontrollers
Different MCU platforms support various programming approaches:
Language
Platforms
Best For
C/C++
All MCUs
Professional development, maximum performance
Arduino (C++ subset)
Arduino, ESP32, STM32
Beginners, rapid prototyping
MicroPython
ESP32, Pico, Pyboard
Quick experiments, education
CircuitPython
Adafruit boards
Beginners, easy library access
Assembly
All MCUs
Maximum control, optimization
Most beginners start with Arduino’s simplified C++ or MicroPython. Both provide enough abstraction to be productive quickly while teaching fundamental programming concepts.
Resources and Downloads for Learning Microcontrollers
Official Documentation
Resource
URL
Description
Arduino Reference
arduino.cc/reference
Complete Arduino language documentation
ESP-IDF Documentation
docs.espressif.com
Official ESP32 development framework
STM32 Documentation
st.com/stm32
STM32 datasheets, reference manuals
Raspberry Pi Pico Docs
raspberrypi.com/documentation
RP2040 and Pico resources
Development Tools
Tool
Platform
Purpose
Arduino IDE
All platforms
Beginner-friendly development
PlatformIO
VS Code extension
Professional multi-platform development
STM32CubeIDE
STM32
Official STM32 development
Thonny
MicroPython
Python IDE for microcontrollers
Learning Platforms
Platform
Focus
Cost
Arduino Project Hub
Project tutorials
Free
Adafruit Learning System
Comprehensive guides
Free
Random Nerd Tutorials
ESP32/ESP8266 projects
Free
Coursera/edX
Formal embedded courses
Free/Paid
Frequently Asked Questions
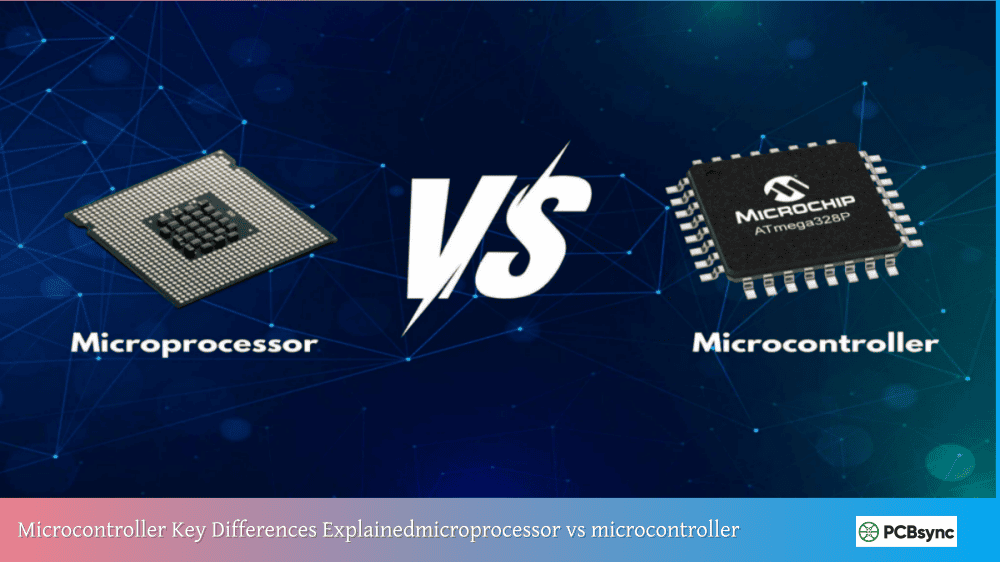
What is the difference between a microcontroller and a microprocessor?
A microcontroller integrates the CPU, memory (RAM and Flash), and peripherals on a single chip—it’s a complete computing system. A microprocessor contains only the CPU and requires external chips for memory and I/O. This makes MCUs self-sufficient for embedded applications while microprocessors need supporting circuitry to function. Think of a microcontroller as a complete kitchen (cooking, storage, and serving in one unit), while a microprocessor is just the chef who needs a separate kitchen.
Which microcontroller should a beginner start with?
Arduino Uno remains the best starting point for most beginners. Its simple interface, extensive documentation, and massive community make troubleshooting easy. If you specifically want to build IoT projects with wireless connectivity, start with ESP32 instead—it’s almost as beginner-friendly but includes Wi-Fi and Bluetooth. Avoid jumping to complex platforms like bare STM32 until you’ve completed several Arduino projects.
Can microcontrollers run operating systems like Linux?
Standard microcontrollers cannot run full operating systems like Linux—they lack the memory and processing power required. However, MCUs can run Real-Time Operating Systems (RTOS) like FreeRTOS, which provide task scheduling and timing guarantees for complex embedded applications. For Linux capability, you need a microprocessor-based system like Raspberry Pi. Some advanced MCUs blur this line, but generally, if your project needs Linux, a microcontroller isn’t the right choice.
How do I choose the right microcontroller for my project?
Consider these factors in order: First, identify your I/O requirements—how many digital pins, analog inputs, and communication interfaces you need. Second, estimate processing and memory requirements based on your application complexity. Third, evaluate power constraints—battery operation requires low-power MCUs. Fourth, consider ecosystem factors like available libraries, community support, and development tool costs. Finally, check pricing for your expected production volume. For learning, choose popular platforms; for products, match specifications to requirements.
What programming language should I learn for microcontrollers?
Start with Arduino’s simplified C++ if you’re completely new to programming—it removes complexity while teaching essential concepts. Once comfortable, learning proper C gives you skills applicable to any microcontroller platform. MicroPython is excellent for rapid prototyping and education but may be too slow or memory-intensive for some applications. Ultimately, C and C++ remain the industry standards for professional embedded development, so invest time learning them properly.
Common Mistakes Beginners Make
Learning from others’ mistakes accelerates your progress. Here are pitfalls to avoid when working with MCUs:
Electrical Mistakes
Forgetting current-limiting resistors: LEDs require resistors to prevent damage. Without them, you’ll burn out LEDs and potentially damage MCU pins. A 220Ω to 1kΩ resistor works for most standard LEDs.
Exceeding pin current limits: Most MCU pins can source or sink only 20-40mA. Driving motors, relays, or high-power LEDs directly from GPIO pins damages the microcontroller. Use transistors or driver ICs for higher current loads.
Voltage mismatches: Connecting 5V signals to 3.3V MCU inputs can destroy input pins. Always verify voltage compatibility between your microcontroller and external components.
Programming Mistakes
Blocking delays in critical code: Using long delay() functions stops everything else from executing. Learn interrupt-driven programming and non-blocking timing techniques early.
Ignoring variable types: Using wrong data types wastes memory and causes subtle bugs. An 8-bit variable cannot store values above 255—overflows happen silently.
Not debouncing buttons: Mechanical switches bounce, causing multiple triggers from single presses. Software debouncing or hardware filtering prevents erratic behavior.
Microcontroller Selection Criteria for Projects
When moving beyond learning to actual project development, systematic MCU selection becomes important.
Project Requirements Checklist
Requirement
Questions to Ask
I/O Count
How many digital pins? Analog inputs?
Communication
UART, SPI, I2C, USB, wireless?
Processing
Complex calculations? Real-time response?
Memory
Large data tables? Complex program?
Power
Battery operation? Sleep modes needed?
Environment
Temperature range? Noise immunity?
Cost
Per-unit budget? Volume pricing?
Availability
Long-term supply? Second sources?
For hobbyist projects, optimize for learning and community support. For products, prioritize long-term availability, appropriate specifications, and cost at your expected volumes.
Conclusion
Understanding what is a microcontroller opens a world of possibilities for creating interactive electronic projects. These remarkable chips—combining processors, memory, and peripherals on single integrated circuits—power everything from simple LED blinkers to sophisticated industrial systems.
The microcontroller basics covered in this guide provide the foundation you need: CPU architecture, memory types, peripheral interfaces, and popular MCU families. Whether you choose Arduino for its accessibility, ESP32 for wireless connectivity, or STM32 for professional capability, you now understand what’s happening inside these tiny but powerful chips.
Start with a simple project—blink that LED. Read a button. Measure a sensor. Each small success builds the skills and confidence for increasingly ambitious projects. The MCU in your first blinking LED project uses the same fundamental principles as the microcontrollers in spacecraft, medical devices, and industrial robots.
With this MCU explained foundation, you’re ready to begin your embedded systems journey. The components are affordable, the tools are often free, and the community is welcoming. Your next project awaits.
Inquire: Call 0086-755-23203480, or reach out via the form below/your sales contact to discuss our design, manufacturing, and assembly capabilities.
Quote: Email your PCB files to Sales@pcbsync.com (Preferred for large files) or submit online. We will contact you promptly. Please ensure your email is correct.
Notes: For PCB fabrication, we require PCB design file in Gerber RS-274X format (most preferred), *.PCB/DDB (Protel, inform your program version) format or *.BRD (Eagle) format. For PCB assembly, we require PCB design file in above mentioned format, drilling file and BOM. Click to download BOM template To avoid file missing, please include all files into one folder and compress it into .zip or .rar format.


