Inquire: Call 0086-755-23203480, or reach out via the form below/your sales contact to discuss our design, manufacturing, and assembly capabilities.
Quote: Email your PCB files to Sales@pcbsync.com (Preferred for large files) or submit online. We will contact you promptly. Please ensure your email is correct.
Notes: For PCB fabrication, we require PCB design file in Gerber RS-274X format (most preferred), *.PCB/DDB (Protel, inform your program version) format or *.BRD (Eagle) format. For PCB assembly, we require PCB design file in above mentioned format, drilling file and BOM. Click to download BOM template To avoid file missing, please include all files into one folder and compress it into .zip or .rar format.
After 15 years of troubleshooting production lines, I can tell you that solderability testing is the single most overlooked quality control step that can make or break your PCB assembly yield. I’ve seen million-dollar production runs halted because someone skipped incoming solderability verification on a batch of components that looked perfectly fine but wouldn’t wet properly during reflow. The frustration of watching production technicians struggle with tombstoning issues and cold solder joints when the root cause was simply poor component solderability is something no manufacturing engineer should have to experience.
Solderability testing evaluates how well metal surfaces—whether component leads, terminations, or PCB pads—can be wetted by molten solder. When solder flows smoothly across a surface and forms a strong metallurgical bond, you get reliable electrical connections and mechanical joints. When it doesn’t, you’re looking at cold joints, tombstoning, opens, and the kind of intermittent failures that haunt field service teams for years. The physics is straightforward, but the consequences of ignoring it are severe.
This comprehensive guide covers everything production engineers, quality managers, and process technicians need to know about solderability testing—from the fundamental physics of wetting to practical implementation of industry standards like J-STD-002 and J-STD-003. Whether you’re establishing a new testing program or optimizing an existing one, you’ll find actionable guidance here.
What is Solderability Testing and Why Does It Matter?
Solderability testing is a controlled evaluation process that determines whether electronic components and PCB surfaces can form reliable solder joints during assembly. The fundamental principle is simple: molten solder must wet the base metal surface, spreading evenly to create a continuous, adherent film that forms an intermetallic compound at the interface. This intermetallic layer is what gives a solder joint its mechanical strength and electrical conductivity.
The wetting process is governed by surface tension and adhesive forces between the solder and substrate. When adhesive forces dominate cohesive forces within the solder, the liquid metal spreads across the surface—this is good wetting. When cohesive forces win, the solder beads up and refuses to flow—this is non-wetting, and it’s a production killer. The wetting angle, which is the angle formed between the solder surface and the substrate at the point of contact, provides a direct measure of wetting quality. Angles below 90 degrees indicate acceptable wetting, while angles approaching 0 degrees represent ideal wetting behavior.
Understanding the science behind solderability helps explain why testing is so critical. Solder wetting is a time-dependent process that involves flux activation, oxide dissolution, solder spreading, and intermetallic formation. Each step must proceed correctly for a reliable joint to form. Any contamination, oxidation, or metallurgical incompatibility that disrupts this sequence will result in a defective joint—even if everything else in your process is perfectly controlled.
Critical Importance of Solderability Testing in Manufacturing
Solderability testing directly impacts three areas that every manufacturing operation cares about deeply:
First-pass yield: Poor solderability increases defect rates, rework costs, and production delays. Components that won’t wet properly create opens, insufficient fillet, and weak joints that fail inspection. In high-volume production, even a 1% increase in defect rate translates to thousands of reworked assemblies and significant cost impact.
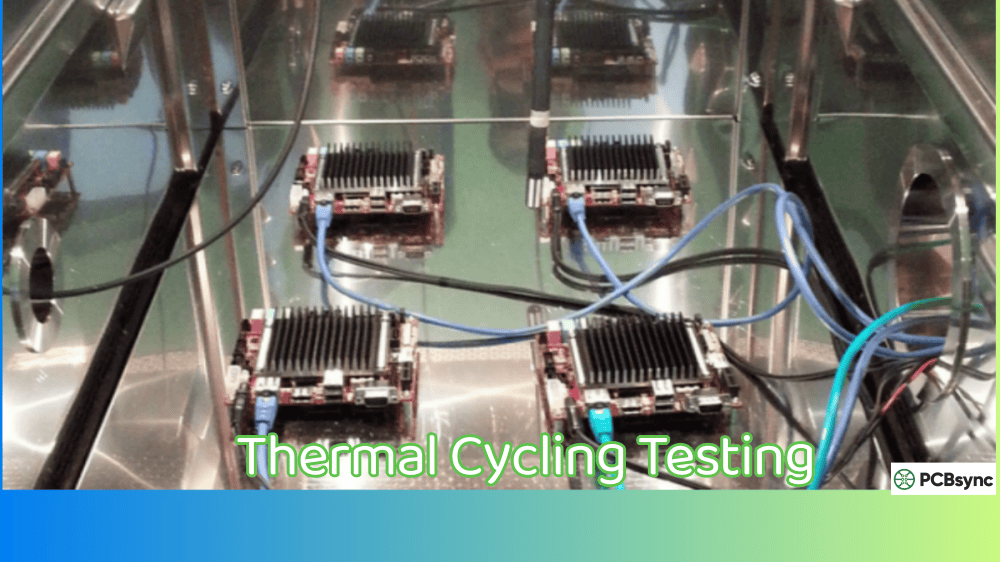
Field reliability: Marginal solder joints might pass visual inspection but fail under thermal cycling or vibration. The intermetallic layer formed during poor wetting is weak and prone to crack propagation. These failures often don’t manifest until products are in customers’ hands, leading to warranty claims and reputation damage.
Supply chain quality: Incoming inspection with solderability testing catches bad lots before they contaminate your production line. A few hundred dollars in testing can prevent six-figure scrap costs. It also provides leverage with suppliers to maintain quality standards.
Consider this real-world scenario: A contract manufacturer received a shipment of 10,000 capacitors from a new supplier. The components looked identical to previously qualified parts and passed visual inspection. Without solderability testing, they went straight to the production line. The result? A 15% tombstoning rate on the first production run, requiring complete rework of 2,000 assemblies. Post-mortem analysis revealed the capacitor terminations had degraded due to improper storage at the supplier’s warehouse. A simple dip-and-look test on incoming samples would have caught the problem before it became a catastrophe.
Industry Standards for Solderability Testing
The electronics industry has developed comprehensive standards that define test methods, acceptance criteria, and best practices for solderability evaluation. Understanding these standards is essential for establishing a robust quality program that meets customer requirements and regulatory compliance.
J-STD-002: Solderability Tests for Component Leads and Terminations
J-STD-002 (EIA/IPC/JEDEC) is the primary industry standard for testing component solderability. The current revision, J-STD-002E, prescribes test methods, defect definitions, and acceptance criteria for evaluating leads, terminations, lugs, terminals, and wires. It’s the standard that component manufacturers and EMS companies worldwide rely on for qualifying solderability performance.
The standard covers both tin-lead (SnPb) and lead-free solder processes, which is critical since the transition to RoHS-compliant assemblies introduced new solderability challenges with higher melting point alloys like SAC305. Lead-free solders have different wetting characteristics and require adjusted test parameters to ensure meaningful results.
Key test methods defined in J-STD-002 include:
Test A/A1: Dip and Look test for leaded components (SnPb and lead-free) – the most widely used method for production quality control
Test B/B1: Dip and Look test for leadless components such as chip resistors and capacitors
Test S/S1: Surface Mount Process Simulation test that replicates actual reflow conditions
Test E/F/G: Wetting Balance tests for quantitative analysis of wetting force and kinetics
Test D: Resistance to Dissolution/Dewetting of Metallization – critical for verifying plating integrity
The standard also defines coating durability categories that specify preconditioning requirements based on expected storage and handling conditions. Category 1 represents minimum durability for components that will be soldered quickly after receipt, while Category 3 represents extended durability for components that may be stored for extended periods before assembly.
While J-STD-002 focuses on components, J-STD-003 addresses PCB solderability. The standard verifies that board fabrication processes and storage haven’t degraded the solderability of pads, surface conductors, and plated-through holes. Even if your components are perfectly solderable, you can’t make good joints on a board with compromised pad surfaces.
J-STD-003 evaluates various surface finishes including HASL (Hot Air Solder Leveling), ENIG (Electroless Nickel Immersion Gold), OSP (Organic Solderability Preservative), immersion tin, and immersion silver. Each finish has different aging characteristics and solderability windows. The standard prescribes specific test methods and acceptance criteria for each finish type.
The tests in J-STD-003 use test coupons that are processed as part of the production panel and then separated for testing. This ensures the test specimen reflects actual production conditions rather than idealized laboratory samples. For plated-through holes, the solder float test evaluates how well solder wicks through the hole, which is critical for wave soldering and selective soldering applications.
Standards Comparison Table
Standard
Test Focus
Primary Application
J-STD-002E
Component leads, terminations, wires
Incoming component inspection
J-STD-003D
PCB pads, PTH, surface finish
Board qualification, vendor audit
MIL-STD-883 Method 2003
Microcircuit/component leads
Military/aerospace applications
IEC 60068-2-69
SMD wetting balance
International/European compliance
J-STD-004
Flux classification
Flux selection for testing
Solderability Testing Methods Explained
Several test methods exist for evaluating solderability, each with specific advantages and applications. The choice depends on component type, production volume, and whether you need qualitative pass/fail results or quantitative wetting data. Understanding the strengths and limitations of each method helps you select the right approach for your specific needs.
Dip and Look Test Method
The dip and look test is the most widely used solderability test method due to its simplicity and cost-effectiveness. It’s a qualitative visual inspection method that provides clear pass/fail results. For most production environments, this is the go-to method for incoming inspection and process monitoring. The equipment investment is modest, training requirements are minimal, and results are obtained quickly.
Dip and Look Test Procedure
Preconditioning: Steam age components for 8 hours (or as specified by coating durability category) to simulate extended storage. This accelerates oxidation and reveals latent solderability problems that would otherwise only appear after months of warehouse storage.
Flux application: Apply activated rosin flux (as specified in J-STD-004) to leads or terminations. The flux type must match the test standard requirements—typically ROL0 or ROL1 classification.
Solder dipping: Immerse specimen in molten solder bath at specified temperature (typically 245°C for SnPb or 255°C for lead-free SAC305) for specified dwell time (typically 5 seconds). Immersion speed and angle are controlled.
Withdrawal and cooling: Remove specimen at controlled speed and allow to cool to room temperature before inspection.
Visual inspection: Examine under magnification (10X-20X) and evaluate wetting coverage against acceptance criteria. Document any defects observed.
The acceptance criterion for most applications is 95% minimum solder coverage with a continuous, smooth coating. MIL-STD-883 Method 2003 uses this same threshold for military/aerospace components. Any dewetting, non-wetting, pinholes, or discontinuities in the solder coating constitute defects that must be evaluated against the applicable specification.
Wetting Balance Analysis Method
The wetting balance test provides quantitative measurement of solderability by recording the forces acting on a specimen during immersion in molten solder. This method generates a wetting curve that reveals not just whether wetting occurs, but how quickly and how strongly. It’s the gold standard for engineering analysis and process development.
The wetting curve is essentially a fingerprint of solderability performance. It captures the entire wetting sequence: initial buoyancy force as the specimen enters the solder, the transition through zero force as wetting begins, and the final positive wetting force as surface tension pulls the specimen into the solder. Engineers can extract multiple parameters from this curve to characterize solderability in detail.
Wetting Balance Test Procedure
Mount specimen on a sensitive force transducer capable of measuring micro-Newton level forces. Calibrate the system before each test session.
Apply flux and allow to dry per standard requirements. Flux coverage must be complete and uniform.
Lower specimen at controlled speed (typically 10-25 mm/sec) into temperature-regulated solder bath.
Record force vs. time as solder wets the specimen surface. Data acquisition rate should be sufficient to capture wetting dynamics.
Analyze wetting curve parameters: time to zero crossing (t0), maximum wetting force (Fmax), wetting rate (dF/dt).
The wetting curve initially shows negative force (buoyancy) as the specimen enters the solder. As wetting progresses, surface tension pulls the specimen into the solder, creating positive force. The time to reach positive force (time-to-wetting or t0) and the maximum force achieved indicate solderability quality. Faster wetting and higher maximum force correlate with better solderability.
For SMD components, a variation called the globule test uses a small solder ball on a heated stage rather than a solder bath. This approach is better suited to testing individual terminations on small components where bath immersion isn’t practical. The same force-vs-time measurement principle applies.
Surface Mount Process Simulation Test
The surface mount simulation test (Test S/S1 in J-STD-002) replicates actual SMT assembly conditions more closely than dip testing. It’s particularly valuable for components that can’t be dip tested, such as BGAs and CSPs where solder balls are the termination. This method answers the practical question: will this component solder properly in our actual production process?
In this test, solder paste is screen-printed onto a ceramic substrate, components are placed, and the assembly goes through a controlled reflow profile matching production conditions. After reflow, wetting is evaluated visually based on solder coverage and fillet formation. The ceramic substrate provides a consistent baseline that eliminates variables from the PCB surface finish.
This test is especially valuable for evaluating components with area array packages. BGA solder balls must collapse during reflow and form strong joints with the substrate pads. The SMT simulation test verifies that ball metallurgy and size are compatible with your reflow process parameters.
Solderability Test Methods Comparison
Method
Type
Best For
Equipment Cost
Dip and Look
Qualitative
Production QA, incoming inspection
Low ($5K-15K)
Wetting Balance
Quantitative
Engineering analysis, R&D
High ($30K-80K)
SMT Simulation
Qualitative
BGA, CSP, area array packages
Medium ($15K-40K)
Solder Float (PTH)
Qualitative
PCB plated-through holes
Low ($5K-15K)
Globule Test
Quantitative
Small SMD, fine-pitch leads
High ($30K-80K)
Common Solderability Defects and Root Causes
Understanding solderability defects and their causes is essential for both testing and process improvement. The two primary defect categories are non-wetting and dewetting, which have distinct mechanisms and solutions. Being able to distinguish between them is critical for effective root cause analysis.
Non-Wetting Defects in PCB Assembly
Non-wetting occurs when molten solder fails to form a metallurgical bond with the base metal surface. The solder either beads up completely or only partially covers the intended surface, leaving bare metal exposed. According to IPC standards, non-wetting is defined as the inability of molten solder to form a metallic bond with the basis metal. This is the most severe form of solderability failure.
Common causes of non-wetting include:
Oxidation on PCB pads or component leads that creates a barrier preventing solder contact with clean metal. This is the most frequent cause and accelerates with improper storage.
Contamination from oils, fingerprints, mold release agents, solder mask residue, or other process residues that prevent flux from reaching the metal surface.
Inadequate flux activity or expired/degraded flux that can’t effectively remove surface oxides within the available reflow time.
Insufficient reflow temperature or time preventing proper wetting kinetics—the solder never gets hot enough or stays hot long enough to wet.
Poor surface finish quality, thin plating (under 5 microns), or improper plating preparation that exposes base metal.
Incorrect base metal preparation—brass components, for example, require copper underplating to prevent zinc migration.
Dewetting Defects in PCB Assembly
Dewetting is a different phenomenon where solder initially wets the surface but then recedes during or after solidification, leaving irregularly-shaped mounds separated by thin solder films. Unlike non-wetting, the base metal typically isn’t exposed—there’s a thin solder coating—but the joint lacks proper fillet formation and mechanical strength. Dewetting indicates that wetting occurred initially but couldn’t be sustained.
Dewetting typically results from:
Poor base metal solderability beneath an acceptable surface finish—the plating looks fine but the underlying material won’t hold solder.
Intermetallic formation that creates a non-wettable layer during extended reflow—too much time at temperature causes excessive IMC growth.
Excessive soldering temperature or time that degrades the surface finish or consumes the entire solderable coating.
Inhomogeneous oxide layer on immersion tin finishes that cracks and causes localized dewetting during second reflow.
Outgassing from the PCB substrate or contamination trapped beneath the surface finish.
Solderability Defects Quick Reference
Defect Type
Visual Appearance
Primary Causes
Non-wetting
Bare metal exposed, solder beads up
Heavy oxidation, contamination, inactive flux
Dewetting
Thin film + irregular mounds, no bare metal
Poor base metal, excessive heat, IMC growth
Partial wetting
Incomplete coverage, <95% wetted
Localized contamination, thin plating
Pinholes
Small holes in solder coating
Outgassing, plating porosity
Best Practices for Solderability Testing Implementation
Implementing an effective solderability testing program requires attention to when and how tests are performed, proper equipment maintenance, and integration with your broader quality management system. The following guidelines will help you establish a program that delivers reliable results.
When to Perform Solderability Testing
Strategic timing of solderability testing maximizes its value while controlling costs. Not every component or board requires testing, but critical checkpoints should never be skipped:
Incoming inspection: Test samples from each lot of critical components, especially those with known solderability sensitivities (OSP finish, long lead times, new suppliers). Use AQL-based sampling plans appropriate to your quality requirements.
After extended storage: Components stored beyond their recommended shelf life or in non-controlled environments should be tested before use. This is non-negotiable for aerospace and medical device applications.
New supplier qualification: Always verify solderability as part of supplier approval process. Don’t assume a new supplier matches the performance of your existing qualified sources.
Process troubleshooting: When experiencing elevated solder defects, test components and PCBs to isolate whether materials or process is the root cause. This saves hours of chasing phantom process issues.
Design validation: During NPI (New Product Introduction), verify solderability of all unique components. Catch problems before they become production issues.
Periodic requalification: Even qualified components should be retested periodically, especially if supplier processes or materials change.
Controlling the Test Environment
Consistent, repeatable results require controlled test conditions. Variability in test environment can mask real solderability problems or create false failures. Pay attention to these factors:
Maintain solder bath temperature within ±2°C of target. Use calibrated temperature measurement and verify daily.
Monitor solder bath contamination levels per J-STD-006 limits (copper <0.3%, gold <0.2% for SAC305). Test monthly or after high-volume testing.
Use fresh flux from properly sealed containers; track opened container age. Flux degrades with air exposure.
Store reference standards and test specimens in nitrogen or dry cabinet when not in use. Ambient humidity affects test results.
Handle specimens with clean gloves to prevent contamination from fingerprint oils.
Surface Finish Considerations for Solderability Testing
Different PCB surface finishes have varying solderability characteristics and shelf lives that affect testing strategy. Understanding these differences helps you set appropriate test parameters and interpret results correctly:
Surface Finish
Typical Shelf Life
Reflow Cycles
Key Concerns
HASL (SnPb)
12+ months
Multiple
Flatness for fine pitch
ENIG
12+ months
Multiple
Black pad risk
OSP
6 months
1-2 max
Degrades with thermal cycles
Immersion Tin
6-12 months
1-2 max
Self-dewetting on 2nd reflow
Immersion Silver
6-12 months
Multiple
Tarnish, sulfur exposure
How to Improve Component and PCB Solderability
When solderability testing reveals problems, there are several approaches to improve wetting performance:
Store components and PCBs in controlled environments with temperature between 20-25°C and humidity below 60% RH. Use nitrogen cabinets or desiccant storage for sensitive items.
Implement first-in-first-out (FIFO) inventory management to prevent extended storage times that degrade solderability.
Consider using nitrogen in reflow ovens to reduce oxidation during the heating process—this significantly improves wetting on marginal materials.
Select more active flux formulations when solderability is borderline, but be aware of cleaning requirements and residue concerns.
Work with PCB suppliers to ensure minimum plating thickness of 5 microns for solderable finishes.
For components with marginal solderability, re-tinning (hot solder dip) can restore wetting performance—but this should be a last resort, not standard practice.
Useful Resources and Standards Documents
The following resources provide detailed specifications and additional guidance for implementing solderability testing programs:
Industry Standards (Available from IPC)
IPC/EIA/JEDEC J-STD-002E: Solderability Tests for Component Leads, Terminations, Lugs, Terminals and Wires
IPC J-STD-003D: Solderability Tests for Printed Boards
IPC J-STD-004: Requirements for Soldering Fluxes
IPC J-STD-006: Requirements for Electronic Grade Solder Alloys
IPC-A-610: Acceptability of Electronic Assemblies
IPC-TM-650: Test Methods Manual (free download from IPC website)
Steam Aging Equipment: Available from dip-and-look equipment vendors
Online Resources
IPC Standards Shop: shop.ipc.org – Purchase official standards documents
GlobalSpec Standards Database: standards.globalspec.com – Standards references and technical information
SMTA (Surface Mount Technology Association): smta.org – Technical papers and training resources
Frequently Asked Questions About Solderability Testing
What is the acceptance criterion for solderability testing?
The most common acceptance criterion is 95% minimum solder coverage with a continuous, smooth coating. This applies to both J-STD-002 visual tests and MIL-STD-883 Method 2003. For wetting balance testing, acceptance criteria are often based on time-to-wetting and maximum wetting force, but these vary by component type and are typically established by engineering evaluation rather than standardized pass/fail thresholds. Some high-reliability applications may require stricter criteria, while others may accept lower coverage with documented rationale.
How often should solderability testing be performed?
Testing frequency depends on risk tolerance and component criticality. For incoming inspection, sample testing per lot (AQL-based sampling) is typical. Components with known solderability sensitivities (OSP finish boards, components stored beyond 6 months) warrant 100% lot testing. Periodic revalidation should occur if components remain in stock beyond their original qualification period—generally annually for controlled storage environments. High-reliability applications may require more frequent testing, while commercial products may test less often based on demonstrated supplier performance.
Is solderability testing destructive?
Yes, solderability testing is destructive—the tested components cannot be used in production assemblies. However, the cost of testing a few samples is trivial compared to the cost of scrapping an entire production lot due to solderability-related defects. Statistical sampling plans allow qualification of incoming lots while minimizing sample destruction. For high-value components, this trade-off is still worthwhile given the cost of rework and field failures.
What causes poor solderability on new components?
New components can exhibit poor solderability due to inadequate plating thickness, poor plating adhesion to the base metal, contamination during manufacturing or handling, improper storage conditions before shipment, or simply using an inherently difficult-to-solder base metal or finish. Brass components, for example, require proper copper underplating to prevent zinc migration that degrades the tin-lead surface. Components manufactured in facilities with poor environmental controls may arrive with compromised solderability even when fresh from the production line.
Can poor solderability be recovered?
In some cases, yes. Light oxidation can sometimes be removed by re-tinning (hot solder dip) or using more aggressive flux during assembly. However, this is a risky remediation—if the underlying plating is compromised or contamination has penetrated the surface, re-tinning may mask problems that will manifest as field failures. The safer approach is to reject non-conforming material and work with suppliers to address root causes. Re-tinning should only be used when the root cause is well understood and the remediation is documented and validated.
Conclusion
Solderability testing is a fundamental quality control tool that every PCB assembly operation should incorporate into their process. While it’s tempting to skip testing in the interest of time and cost, the consequences of poor solderability—production delays, field failures, and damaged customer relationships—far outweigh the modest investment required.
Start with dip-and-look testing for incoming inspection and production monitoring. Consider adding wetting balance capability for engineering analysis and supplier qualification. Most importantly, use testing results to drive continuous improvement in your supply chain and assembly processes. Document your test procedures, maintain your equipment, and train your staff on proper techniques.
Remember: the goal isn’t just to pass solderability tests—it’s to build assemblies with reliable solder joints that will perform throughout the product’s expected service life. Testing is simply the tool that gives you confidence you’re on the right track. When combined with proper material handling, storage practices, and process control, solderability testing becomes a cornerstone of manufacturing excellence.
Inquire: Call 0086-755-23203480, or reach out via the form below/your sales contact to discuss our design, manufacturing, and assembly capabilities.
Quote: Email your PCB files to Sales@pcbsync.com (Preferred for large files) or submit online. We will contact you promptly. Please ensure your email is correct.
Notes: For PCB fabrication, we require PCB design file in Gerber RS-274X format (most preferred), *.PCB/DDB (Protel, inform your program version) format or *.BRD (Eagle) format. For PCB assembly, we require PCB design file in above mentioned format, drilling file and BOM. Click to download BOM template To avoid file missing, please include all files into one folder and compress it into .zip or .rar format.


