Inquire: Call 0086-755-23203480, or reach out via the form below/your sales contact to discuss our design, manufacturing, and assembly capabilities.
Quote: Email your PCB files to Sales@pcbsync.com (Preferred for large files) or submit online. We will contact you promptly. Please ensure your email is correct.
Notes: For PCB fabrication, we require PCB design file in Gerber RS-274X format (most preferred), *.PCB/DDB (Protel, inform your program version) format or *.BRD (Eagle) format. For PCB assembly, we require PCB design file in above mentioned format, drilling file and BOM. Click to download BOM template To avoid file missing, please include all files into one folder and compress it into .zip or .rar format.
A practical guide from the workbench — everything you need to know about designing and selecting PCBs for your robotics projects
After spending over a decade designing circuit boards for everything from simple line-following bots to industrial automation systems, I’ve learned that the robot PCB is where your project either comes together or falls apart. It’s not just a piece of copper-clad fiberglass — it’s the nervous system that connects your sensors, processors, and actuators into a working machine.
In this guide, I’ll walk you through everything I wish someone had told me when I started: the different types of robot PCBs, the components that make them tick, and the design practices that separate reliable systems from frustrating debugging sessions. Whether you’re building your first competition bot or scaling up to production-grade industrial robotics, this information will save you time, money, and a lot of headaches.
A robot PCB (Printed Circuit Board) is a specialized circuit board designed specifically for robotic applications. Unlike the PCB in your TV remote or laptop, a robot PCB must handle some unique challenges: high-current motor drives, sensitive sensor inputs, constant vibration, and often harsh environmental conditions — all while fitting into a compact, lightweight package.
Think of the robot PCB as the central nervous system of your robot. It coordinates communication between the microcontroller (the brain), sensors (the senses), and actuators (the muscles). A poorly designed robot PCB will cause random resets, motor interference, sensor noise, and reliability problems that can take weeks to diagnose.
Use solid ground planes on both top and bottom layers for better EMI performance, heat dissipation, and signal integrity. Keep motor driver circuits separate from sensitive analog sections.
⚠️
Power and Signal Separation
Always separate high-current motor power traces from low-voltage signal traces. Use at least 20 mil spacing for different voltage domains to prevent crosstalk and interference.
Layout Guidelines
Component Placement
Group related components together. Place decoupling capacitors as close as possible to IC power pins (within 5mm ideally).
Trace Routing
Use 45° angles instead of 90° for high-speed signals. Keep critical traces short and direct, especially for motor encoder signals.
Thermal Management
Add thermal vias under motor drivers, voltage regulators, and power MOSFETs. Use copper pours for heat dissipation.
Connector Placement
Position connectors on board edges. Group power connectors away from signal connectors to minimize interference.
Critical Design Considerations
EMI/EMC Protection
Add ferrite beads on motor power lines, RC snubbers across motor terminals, and proper shielding for communication lines.
ESD Protection
Include TVS diodes on all external-facing connectors. Add ESD protection on USB, sensor inputs, and communication interfaces.
Decoupling Strategy
Use 0.1µF ceramic caps for high-frequency noise and 10-47µF tantalum/electrolytic for bulk storage near power inputs.
Test Points
Include test points for critical signals: power rails, motor outputs, sensor inputs, and communication buses for debugging.
💡
Design for Manufacturing (DFM)
Maintain minimum trace width of 6-8 mil for signal traces, 15-30 mil for power traces. Keep drill holes at least 10 mil from trace edges. Use standard component footprints when possible.
Layer Stack-up Recommendations
Layers
Configuration
Best For
Approximate Cost
2-Layer
Top Signals + Bottom Ground/Signals
Simple robots, hobby projects
$
4-Layer
Signal/Power/Ground/Signal
Most industrial robots, drones
$$
6-Layer
S/G/S/S/G/S
High-speed comm, complex robots
$$$
Robot PCB Architecture & Control Systems
How Many Control PCBs Does a Robot Need?
The number of PCBs depends on robot complexity, modularity requirements, and system architecture:
Single PCB (Monolithic)
Use for: Simple robots, hobby projects, educational robots Pros: Lower cost, simpler assembly, fewer connectors Cons: Difficult to upgrade, single point of failure
2-3 PCBs (Distributed)
Use for: Mid-complexity robots, mobile platforms Typical: Main controller + Motor driver board + Sensor hub Pros: Modular, easier troubleshooting
4+ PCBs (Modular)
Use for: Industrial robots, humanoids, complex systems Typical: Main computer + Joint controllers + Power management + I/O boards Pros: High flexibility, scalable
Hierarchical (Multi-tier)
Use for: Advanced autonomous robots Typical: High-level computer + Mid-level MCUs + Low-level motor drivers Pros: Best performance, distributed computing
Common Robot PCB Architectures
🏗️
Architecture 1: Centralized Control
Single main controller PCB handles all computation, with separate power distribution boards and motor driver modules. Common in wheeled mobile robots and simple manipulators. Communication via I2C, SPI, or CAN bus.
🏗️
Architecture 2: Distributed Control
Multiple microcontrollers with dedicated tasks: motion control MCU, sensor processing MCU, communication MCU. Connected via CAN bus or Ethernet. Used in industrial robots and autonomous vehicles.
🏗️
Architecture 3: Hybrid (Common in Modern Robots)
Single Board Computer (SBC) for high-level planning + Real-time MCU for control loops + Dedicated motor drivers. Example: Raspberry Pi + STM32 + custom motor controller boards.
PCB System Breakdown
PCB Type
Purpose
Key Components
Typical Count
Main Controller
Central processing, decision making
MCU/SBC, Flash, RAM, Power management
1
Motor Driver Board
Motor control, power switching
H-bridges, Gate drivers, Current sensing
1-4
Sensor Hub
Sensor interface, signal conditioning
ADCs, Op-amps, Filter circuits
1-2
Power Management
Voltage regulation, distribution
Buck/Boost converters, LDOs, Protection
1-2
Communication Board
Wireless/wired connectivity
WiFi, BLE, CAN, Ethernet modules
0-1
Joint Controller
Per-joint servo control
Small MCU, Encoder interface, Driver
Varies (per joint)
⚡
Communication Bus Selection
I2C: Simple, 2-wire, good for sensors (up to 3.4 Mbps) SPI: High-speed, point-to-point, good for displays and memory (up to 50+ Mbps) CAN Bus: Robust, multi-master, ideal for industrial robots (up to 1 Mbps) RS-485: Long distance, industrial environments (up to 10 Mbps) Ethernet: High bandwidth, TCP/IP support, best for vision and high data rates
MCU Selection Guide for Robot PCBs
Popular MCU Families for Robotics
MCU Family
Core
Speed
Best For
Price Range
STM32F4
ARM Cortex-M4
180 MHz
General robotics, motor control, drones
$3-$8
STM32H7
ARM Cortex-M7
480 MHz
High-performance robots, vision processing
$8-$15
ESP32
Xtensa Dual-Core
240 MHz
WiFi/BLE robots, IoT applications
$2-$5
Teensy 4.1
ARM Cortex-M7
600 MHz
Hobby robotics, rapid prototyping
$25-$30
Arduino Due
ARM Cortex-M3
84 MHz
Educational robots, beginners
$30-$40
NXP i.MX RT
ARM Cortex-M7
600 MHz
Industrial robots, real-time control
$6-$12
TI C2000
C28x DSP
200 MHz
Precision motor control, industrial
$5-$10
Raspberry Pi Pico
ARM Cortex-M0+
133 MHz
Low-cost projects, education
$4-$6
MCU Selection Criteria
Processing Power
Consider: Number of motors to control, sensor fusion requirements, real-time constraints, vision processing needs. Minimum 32-bit for serious robotics.
Peripherals
Required: PWM timers (4-16 channels), ADC (12-bit+), UART/SPI/I2C, Hardware encoder inputs, DMA controllers, FPU for math operations.
Memory
Flash: 256KB minimum, 512KB+ recommended. RAM: 64KB minimum, 128KB+ for complex algorithms. External memory support for data logging.
Connectivity
Built-in options: USB, CAN, Ethernet. External modules: WiFi (ESP32), Bluetooth (HC-05/nRF52), LoRa, cellular. Consider development ecosystem.
Power Consumption
Battery-powered robots need low-power modes. Check sleep current (µA range), active current (mA/MHz), and wake-up time requirements.
Development Tools
IDE support (STM32CubeIDE, Arduino, PlatformIO), debugger availability (SWD/JTAG), community size, library ecosystem, documentation quality.
🎯
Recommended MCU by Robot Type
Line Following Robot: ESP32, STM32F1 Wheeled Mobile Robot: STM32F4, Teensy 4.0 Quadcopter Drone: STM32F4, STM32H7 Robot Arm: STM32F4, i.MX RT1060 Humanoid Robot: STM32H7, i.MX RT + Raspberry Pi Industrial AGV: i.MX RT, TI C2000 + PLC
Advanced Features to Consider
Real-Time Capabilities
RTOS support (FreeRTOS, Zephyr), deterministic interrupt response, hardware timers with microsecond precision, DMA for non-blocking I/O.
Safety Features
Watchdog timers, brown-out detection, memory protection unit (MPU), ECC memory, redundant operation for critical systems.
Motor Control Specific
Advanced PWM generation, quadrature encoder inputs, FOC (Field-Oriented Control) support, current sensing ADC, position feedback interfaces.
PCB Requirements: Motor drivers (2-6 channels), IMU sensor, wheel encoders, ultrasonic/LIDAR interface, battery management, wireless communication Typical MCU: STM32F4, ESP32 Key Challenges: Power efficiency, EMI from motors, vibration resistance Examples: AGVs, delivery robots, cleaning robots
✈️
Flying Robots (Drones/UAVs)
PCB Requirements: High-speed ESCs (4-8), 9-axis IMU, GPS, barometer, RC receiver, FPV camera interface, telemetry radio Typical MCU: STM32F4/F7, STM32H7 Key Challenges: Weight constraints, vibration isolation, EMI from ESCs, real-time control loops (1-8 kHz) Flight Controller Software: Betaflight, PX4, ArduPilot
🦾
Robotic Arms (Manipulators)
PCB Requirements: Servo/stepper drivers per joint (3-6+), encoder feedback, force/torque sensors, safety interlocks, precise position control Typical MCU: STM32F4, i.MX RT, TI C2000 Key Challenges: Synchronous motion, inverse kinematics computation, safety systems, cable management Common DOF: 3-6 axis for industrial, 1-3 for hobby
🤖
Humanoid Robots
PCB Requirements: 12-30+ motor controllers, multiple IMU sensors, pressure sensors in feet, vision processing, distributed control network Typical MCU: STM32H7 + Jetson Nano/Xavier Key Challenges: Balance control, distributed computing, power distribution, complex kinematics, sensor fusion Architecture: Multi-tier with CAN bus or Ethernet backbone
🏊
Underwater Robots (ROVs/AUVs)
PCB Requirements: Waterproof enclosure interfacing, thruster controllers, depth sensor, camera interface, tether communication or acoustic modem Typical MCU: STM32F4, Teensy 4.1 Key Challenges: Waterproofing connectors, pressure compensation, corrosion resistance, limited communication bandwidth Special Considerations: Conformal coating, sealed pressure vessels
Robot Complexity vs PCB Design
Robot Type
Complexity
PCB Count
Typical Layers
Development Time
Line Following
Beginner
1
2-layer
1-2 weeks
Obstacle Avoiding
Beginner
1
2-layer
2-3 weeks
Autonomous Car
Intermediate
2-3
4-layer
1-2 months
Racing Drone
Intermediate
1-2
4-layer
1-2 months
6-DOF Robot Arm
Advanced
2-4
4-layer
2-4 months
Biped Robot
Advanced
3-6
4-6 layer
3-6 months
Industrial AGV
Professional
4-8
4-6 layer
6-12 months
📋
Starting Your Robot PCB Project
1. Define robot requirements (payload, speed, autonomy level)
2. Calculate power budget and battery requirements
3. Select appropriate MCU and sensors
4. Design modular architecture for scalability
5. Create detailed schematics with proper simulation
6. Design PCB layout with EMI/thermal considerations
7. Prototype with development boards first
8. Order small batch (5-10 pcs) for testing
9. Iterate based on testing results
10. Document everything for future revisions
Power Management Design
Power Distribution Architecture
Proper power design is critical for robot reliability and performance. Most robots require multiple voltage rails:
Main Battery Rail (12-48V)
Direct connection to motors and high-power devices. Requires robust protection: reverse polarity, overcurrent, overvoltage. Use XT60/XT90 connectors for high current.
Motor Driver Rail (12-24V)
Often same as battery or stepped down. Include bulk capacitors (1000-4700µF) near each motor driver. Add LC filters to reduce noise feedback to battery.
Logic/MCU Rail (3.3-5V)
Clean, regulated power for microcontroller. Use LDO for low-noise or buck converter for efficiency. Add ferrite beads to isolate from noisy rails.
Sensor Rail (3.3-5V)
Separate regulator from MCU rail recommended. Prevents sensor noise from affecting MCU. Critical for analog sensors and IMUs.
Battery Selection Guide
Battery Type
Voltage/Cell
Energy Density
Best For
Pros/Cons
LiPo
3.7V nominal
150-200 Wh/kg
Drones, racing robots
High discharge rate, lightweight / Requires careful handling
Li-Ion 18650
3.6V nominal
200-265 Wh/kg
Mobile robots, longer runtime
Safe, longer life / Lower discharge rate
LiFePO4
3.2V nominal
90-120 Wh/kg
Industrial robots, safety-critical
Very safe, long cycle life / Lower voltage, heavier
NiMH
1.2V nominal
60-120 Wh/kg
Educational, hobby robots
Inexpensive, safe / Memory effect, lower density
⚡
Battery Protection Circuits (BMS)
Always include Battery Management System for Li-Ion/LiPo batteries:
• Over-voltage protection (4.2V/cell for LiPo)
• Under-voltage cutoff (3.0V/cell minimum)
• Over-current protection (based on C-rating)
• Cell balancing for multi-cell packs
• Temperature monitoring
• Short-circuit protection
Voltage Regulator Selection
Linear Regulators (LDO)
When to use: Low current (< 500mA), low noise required, small voltage drop (< 3V) Efficiency: 30-60% typical Examples: AMS1117, LM1117, MIC5219
Buck Converters (Step-Down)
When to use: High current (> 500mA), efficiency critical Efficiency: 85-95% Examples: LM2596, MP1584, TPS54360 Note: Can introduce switching noise
Boost Converters (Step-Up)
When to use: Need higher voltage from battery Efficiency: 80-90% Examples: MT3608, XL6009, TPS61088 Use case: 5V from 3.7V LiPo
Buck-Boost Converters
When to use: Battery voltage varies around output voltage Efficiency: 75-88% Examples: TPS63000, LTC3115 Use case: Wide input range tolerance
Power Design Checklist
✅
Essential Power Design Elements
☑ Reverse polarity protection (diode or P-FET)
☑ Bulk capacitance at power input (>1000µF)
☑ Decoupling caps on all ICs (0.1µF + 10µF)
☑ Power-on sequencing if required
☑ Soft-start circuits for high inrush current
☑ Current monitoring on critical rails
☑ Emergency stop circuit (E-stop)
☑ Power LED indicators for each rail
☑ Fuses or PTC resettable fuses
☑ Proper trace width for high-current paths
Common Power Issues & Solutions
Voltage Brownouts
Symptom: MCU resets during motor acceleration Solution: Add larger bulk capacitors, increase trace width, use separate power rails, implement soft-start for motors
Ground Loops
Symptom: Noise on sensor readings, unstable communication Solution: Star ground topology, separate analog/digital grounds, use ground planes, minimize ground return path
EMI from Motors
Symptom: MCU glitches, corrupted sensor data Solution: RC snubbers on motors, ferrite beads on power lines, shielded motor cables, LC filters
Thermal Issues
Symptom: Regulators overheating, thermal shutdown Solution: Proper heatsinking, thermal vias, copper pours, forced air cooling, lower regulator current
Engineering Resources & Tools
Recommended Design Tools
PCB Design Software
KiCad: Free, open-source, full-featured Eagle: Industry standard, extensive libraries Altium Designer: Professional, advanced features EasyEDA: Web-based, integrated with JLCPCB
Simulation Tools
LTspice: Free, accurate analog simulation MATLAB/Simulink: Control system design Proteus: Mixed-mode simulation ANSYS: Thermal and EMI analysis
Development Platforms
STM32CubeIDE: For STM32 MCUs Arduino IDE: Beginner-friendly PlatformIO: Multi-platform, VS Code ROS: Robot Operating System
Testing Equipment
Oscilloscope: Signal debugging Logic Analyzer: Digital comm debugging Multimeter: Basic measurements Power Supply: Bench testing
• “Robot Builder’s Bonanza” by Gordon McComb
• “Making Things Move” by Dustyn Roberts
• “The Art of Electronics” by Horowitz & Hill
• STM32 Reference Manuals and Application Notes
• PCB Design Tutorial by Phil’s Lab (YouTube)
• Robert Feranec PCB Design Channel
🎓
Online Courses & Communities
• Coursera: Control of Mobile Robots (Georgia Tech)
• edX: Robot Mechanics and Control (Seoul National Univ)
• Udemy: PCB Design courses
• Reddit: r/robotics, r/PrintedCircuitBoard
• EEVblog Forums, Element14 Community
• Stack Exchange: Electrical Engineering, Robotics
Ready to start your robot PCB project?
1. Use our calculators to size your components
2. Review design tips for your robot type
3. Select appropriate MCU and architecture
4. Prototype with development boards
5. Design custom PCB with proper power management
6. Test thoroughly before scaling up
7. Document and iterate based on results
Key Functions of a Robot PCB
Function
Description
Components Involved
Control Processing
Executes algorithms, processes sensor data, makes decisions
Microcontrollers, processors, memory
Power Distribution
Delivers stable voltage to all subsystems
Voltage regulators, DC-DC converters, capacitors
Motor Control
Drives motors with precise speed and direction control
Motor drivers, H-bridges, MOSFETs
Sensor Integration
Collects and conditions data from various sensors
ADCs, signal amplifiers, filters
Communication
Enables data exchange with other systems
UART, SPI, I2C, CAN bus, wireless modules
Types of Robot PCBs
Choosing the right type of PCB is one of the most important decisions in your robotics project. Each type has its strengths and trade-offs. Here’s what you need to know:
Single-Layer Robot PCB
Single-layer PCBs have conductive traces on only one side of the board. They’re the simplest and cheapest option.
Best for: Simple hobbyist robots, educational projects, basic sensor boards
Limitations: Limited routing space means larger board sizes and potential for long trace runs that pick up noise
Typical cost: $2-5 for prototype quantities
I generally only recommend single-layer boards for very simple circuits or when you’re learning the basics. Once you add a microcontroller and a few sensors, you’ll quickly run out of routing space.
Double-Layer Robot PCB
Double-layer PCBs have traces on both sides, connected through plated through-holes (vias). This doubles your routing real estate and allows for a ground plane on one side.
Best for: Most hobbyist and competition robots, sensor modules, motor controllers
Advantages: Ground plane reduces noise, more compact designs possible, still relatively affordable
Typical cost: $5-15 for prototype quantities
For most robotics projects, double-layer boards hit the sweet spot between capability and cost. The ground plane alone makes a huge difference in noise immunity — something you’ll appreciate when your motor PWM isn’t causing your IMU to go haywire.
Multi-Layer Robot PCB
Multi-layer PCBs stack four or more conductive layers with insulating material between them. They’re the standard for complex robotics systems.
Basic motor control with dedicated power/ground planes
Moderate
6
Mixed-signal designs with analog/digital separation
High
8+
High-speed processors, multiple communication buses
Very High
Advantages: Dedicated power and ground planes, better EMI shielding, shorter traces, higher component density
Typical cost: $20-100+ for prototype quantities
If you’re designing a system with a powerful processor, multiple motor channels, and various communication interfaces, jumping to a 4-layer board is usually worth the extra cost. The improved signal integrity and easier layout will save you debugging time.
Flexible Robot PCB (Flex PCB)
Flex PCBs use flexible polyimide substrate instead of rigid FR-4, allowing the board to bend and fold.
Best for: Robotic joints, wearable robotics, tight spaces, connections to moving parts
Key considerations:
Use rolled-annealed (RA) copper for dynamic flex applications
Minimum bend radius is typically 10x the total thickness
Add stiffeners where you need to mount components
Typical cost: $30-100+ for prototype quantities
I’ve used flex PCBs extensively in robotic arm joints where traditional cables would fail from repetitive motion. They’re more expensive, but the reliability improvement in dynamic applications is substantial.
Rigid-Flex Robot PCB
Rigid-flex PCBs combine rigid sections for component mounting with flexible sections for interconnection. They’re essentially multiple PCBs connected by integrated flex circuits.
Best for: Humanoid robots, drones, medical robotics, compact systems with moving joints
Advantages:
Eliminates connectors between boards (major reliability improvement)
3D packaging capability
Reduced assembly time and cost in production
Typical cost: $100-500+ for prototype quantities
Rigid-flex is the gold standard for professional robotics when reliability is critical. By eliminating connector failure points, you’re removing one of the most common causes of field failures.
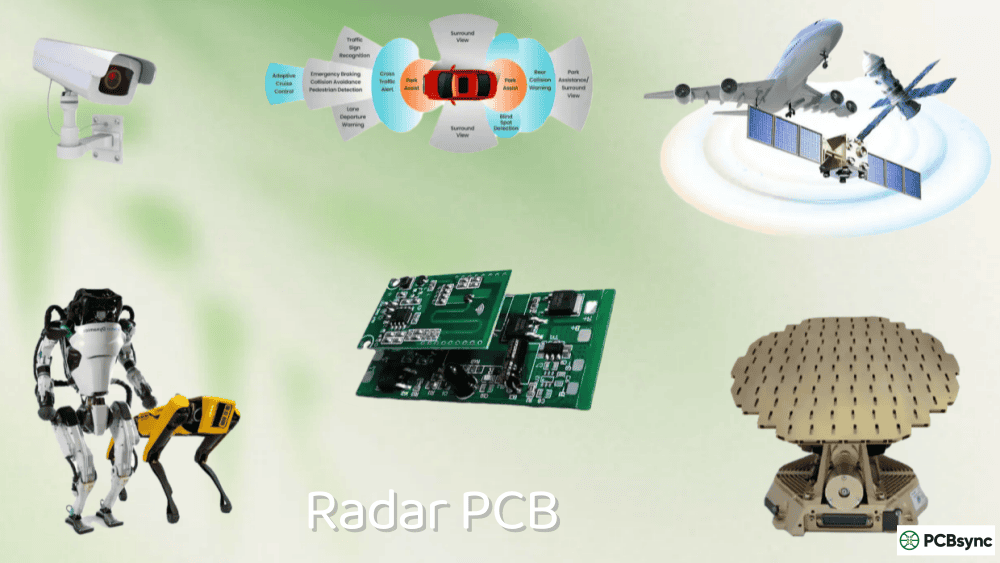
High-Frequency Robot PCB
High-frequency PCBs use specialized substrate materials (Rogers, PTFE, etc.) to maintain signal integrity at GHz frequencies.
Best for: Robots with radar, LiDAR, high-speed communication, or RF wireless systems
Unless your robot is doing wireless communication above 2.4 GHz or has radar/LiDAR systems, you probably don’t need specialized high-frequency materials.
High-Power Robot PCB
High-power PCBs feature heavy copper (2-18 oz) and enhanced thermal management for driving large motors or handling significant power conversion.
Best for: Industrial robots, high-torque actuators, power-hungry systems
Design features:
2oz+ copper for high-current traces
Thermal vias for heat dissipation
Metal-core substrates for extreme thermal loads
Robot PCB Type Comparison
PCB Type
Complexity
Cost
Flexibility
Power Handling
Best Application
Single-Layer
Low
$
None
Low
Educational robots
Double-Layer
Medium
$$
None
Medium
Competition robots
Multi-Layer
High
$$$
None
High
Industrial robots
Flex
Medium
$$$$
High
Low-Medium
Robotic joints
Rigid-Flex
Very High$
Partial
Medium-High
Humanoid robots
High-Frequency
High
$$$$
None
Medium
Radar/RF systems
High-Power
Medium
$$$
None
Very High
Large motor systems
Essential Components of a Robot PCB
Every robot PCB integrates several key component categories. Understanding what each does — and how to select the right parts — is fundamental to good design.
Microcontrollers and Processors
The microcontroller is the brain of your robot, executing control algorithms and coordinating all subsystems.
Popular choices for robotics:
Processor
Architecture
Clock Speed
ADC Channels
PWM Channels
Best For
ATmega328P
8-bit AVR
16 MHz
6
6
Simple hobby robots
STM32F4
32-bit ARM Cortex-M4
168 MHz
16
17
Competition robots
ESP32
32-bit Xtensa
240 MHz
18
16
WiFi/BLE connected robots
Raspberry Pi RP2040
32-bit ARM Cortex-M0+
133 MHz
4
16
Cost-sensitive projects
NXP i.MX RT
32-bit ARM Cortex-M7
600 MHz
16
32
Industrial automation
Selection criteria:
PWM channels for motor control (minimum 2 per motor for direction + speed)
ADC resolution and speed for analog sensors
Communication peripherals (I2C, SPI, UART, CAN)
Real-time processing capability for control loops
Power consumption for battery-powered applications
For most robotics applications, I recommend ARM Cortex-M series microcontrollers. They offer excellent real-time performance, wide peripheral selection, and extensive ecosystem support at reasonable prices.
Motor Drivers and Controllers
Motor drivers convert low-power control signals from your microcontroller into high-current drive signals for motors.
Common motor driver ICs:
Driver IC
Motor Type
Voltage Range
Current Rating
Interface
L298N
Brushed DC
5-35V
2A per channel
Logic level
TB6612FNG
Brushed DC
2.5-13.5V
1.2A per channel
Logic level
DRV8833
Brushed DC
2.7-10.8V
1.5A per channel
Logic level
A4988
Stepper
8-35V
2A
Step/Dir
TMC2209
Stepper
4.75-28V
2A
UART/Step
DRV8302
BLDC
8-60V
60A
PWM
Design considerations:
Calculate maximum motor current including stall conditions
Add 50% margin to your current ratings
Place motor drivers close to the power input to minimize voltage drops
Use wide traces (20-30 mils minimum) for high-current paths
Include flyback diodes if not built into the driver
Sensors and Signal Conditioning
Robots use a variety of sensors to perceive their environment. Each sensor type has specific interface and signal conditioning requirements.
Common robotics sensors:
Sensor Type
Output Type
Interface
Key Design Considerations
IMU (Accelerometer/Gyro)
Digital
I2C/SPI
Keep away from motors, use decoupling
Ultrasonic Distance
Pulse width
GPIO
Separate from motor noise
IR Proximity
Analog/Digital
ADC/GPIO
Shield from ambient light
Encoder (Optical)
Quadrature pulses
GPIO
Use interrupt-capable pins
Current Sensor
Analog
ADC
Low-pass filter, calibration
LiDAR
Serial
UART
High-speed UART, timing critical
Camera
Video
USB/CSI
High bandwidth, dedicated bus
Signal conditioning essentials:
Use RC low-pass filters on analog sensor inputs to reduce noise
Add ESD protection on external sensor connections
Use voltage level shifters when interfacing 3.3V and 5V systems
Buffer encoder signals to prevent loading and improve noise immunity
The power system is often the most overlooked part of robot PCB design — and frequently the source of problems.
Power system architecture:
Battery → Protection → Main DC-DC → Logic Rail (3.3V/5V) ↓ → Motor Power Rail (12V/24V) ↓ → Servo Power Rail (5V/6V high current)
Essential power components:
Component
Function
Selection Criteria
LDO Regulator
Low-noise power for analog circuits
Dropout voltage, PSRR, noise
Buck Converter
Efficient step-down conversion
Efficiency, switching frequency
Boost Converter
Step-up conversion
Current rating, output ripple
Battery Management IC
Protection and monitoring
Cell chemistry, balancing
eFuse/Current Limiter
Protection
Trip current, response time
Power design rules:
Separate analog and digital power domains
Use local decoupling capacitors (0.1µF ceramic near every IC)
Add bulk capacitance (100µF+) near motor drivers
Route power traces with adequate width for current
Consider ground plane partitioning for noisy sections
Communication Interfaces
Modern robots typically need multiple communication interfaces for sensors, actuators, and external systems.
Protocol selection guide:
Protocol
Speed
Devices
Distance
Best For
I2C
100-400 kbps
Multiple
1m max
Sensors, low-speed peripherals
SPI
10+ Mbps
Multiple (CS)
30cm typical
High-speed sensors, displays
UART
9.6k-3M baud
Point-to-point
15m typical
GPS, wireless modules
CAN Bus
1 Mbps
127 nodes
40m at 1 Mbps
Distributed motor control
Ethernet
100 Mbps+
Network
100m
High-bandwidth, industrial
USB
12-480 Mbps
Point-to-point
5m
Host communication
For distributed robot architectures (like a humanoid with many joints), CAN bus is particularly valuable. It’s robust against electrical noise and allows a single twisted-pair cable to connect dozens of motor controllers.
Robot PCB Design Best Practices
Good design practices are what separate a working prototype from a reliable product. Here’s what I’ve learned through many iterations:
Schematic Design Guidelines
Organization matters:
Use hierarchical sheets for complex designs
Group related circuits on the same sheet (power, motor control, sensors)
Use consistent labeling conventions
Add notes explaining design decisions
Protection and robustness:
Add ESD protection on all external connections
Include reverse polarity protection on power input
Use TVS diodes on motor connections for transient suppression
Add test points for critical signals
PCB Layout Strategies
Component placement priorities:
Place microcontroller centrally for short trace runs
Position motor drivers near power input
Keep sensors away from noisy sections (motors, switching regulators)
Group related components together
Reserve one edge of the board for connectors
Trace routing rules:
Signal Type
Minimum Width
Spacing
Layer Assignment
Logic signals
6 mils
6 mils
Any signal layer
High-speed digital
6 mils
2x width
Inner layers preferred
Motor power (1A)
20 mils
10 mils
Power layer
Motor power (5A)
50 mils
20 mils
Power layer
Analog sensors
10 mils
20 mils
Away from digital
Critical layout practices:
Never route signals over split ground planes
Keep motor driver traces short and wide
Use ground pour on unused areas (with proper via stitching)
Match trace lengths for differential pairs
Add thermal relief on ground connections for easier soldering
Thermal Management Techniques
Motor drivers and voltage regulators generate significant heat. Without proper thermal management, your robot PCB will throttle or fail.
Heat dissipation strategies:
Technique
Effectiveness
Complexity
Cost
Copper pour
Medium
Low
Free
Thermal vias
High
Low
Minimal
Heatsink
Very High
Medium
$2-10
Metal-core PCB
Very High
High
$$$$
Active cooling
Highest
High
$5-20
Thermal via guidelines:
Place thermal vias directly under hot components
Use 0.3mm drill size with 0.6mm pad
Array pattern (3×3 minimum) for power components
Connect to internal ground planes for heat spreading
EMI and Signal Integrity
Electromagnetic interference is a major headache in robotics. Motors, switching regulators, and wireless modules all generate noise that can corrupt sensor readings or cause microcontroller resets.
EMI mitigation strategies:
At the source:
Use PWM frequencies above 20 kHz to avoid audible motor whine
Add snubber circuits on motor connections
Keep high-current loops as small as possible
Use shielded inductors in switching regulators
In the path:
Maintain solid ground planes under all high-speed signals
Use ground stitching vias every 5mm around the board edge
Separate noisy and sensitive circuits physically
At the receiver:
Add filtering on power rails (ferrite beads + capacitors)
Use differential signaling for noise-critical connections
Shield sensitive analog circuits with guard traces
Grounding best practices:
Star ground for analog circuits
Solid ground plane for digital circuits
Single-point connection between analog and digital grounds
Never route signals over ground plane cuts
Design for Manufacturability (DFM)
Designing for manufacturability reduces assembly issues and improves reliability.
DFM checklist:
Minimum trace/space meets fab house capabilities (typically 6/6 mil)
Via size meets drill capability (0.3mm minimum)
Adequate pad-to-trace clearance (0.2mm minimum)
Component orientation consistent (all polarized parts same direction)
Coursera: “Introduction to Electronics” (University of Georgia)
Altium Academy (free videos)
Reference books:
“High-Speed Digital Design” by Howard Johnson
“PCB Design Tutorial” by David Jones (Altium)
“The Art of Electronics” by Horowitz and Hill
Communities:
EEVblog Forum (eevblog.com/forum)
Reddit r/PrintedCircuitBoard
FIRST Robotics community documentation
Frequently Asked Questions About Robot PCBs
What is the best PCB type for a beginner robotics project?
For beginners, I recommend starting with a double-layer PCB. It offers a good balance between capability and complexity. The ground plane on the bottom layer provides noise immunity that you’ll appreciate when mixing motors with sensors, while the cost is still very reasonable at $5-15 for prototype quantities from services like JLCPCB or PCBWay.
Single-layer boards are cheaper, but you’ll quickly run into routing problems once your design includes a microcontroller, motor drivers, and a few sensors. The extra layer pays for itself in reduced debugging time.
How do I calculate trace width for motor currents?
Trace width depends on three factors: current, acceptable temperature rise, and copper weight. For external layers with 1oz copper, here’s a quick reference:
1A: 10 mils minimum, 20 mils recommended
2A: 30 mils minimum
5A: 80 mils minimum
10A: Use a copper pour or bus bar
Use an online trace width calculator (like the one at 4pcb.com) for precise calculations. Always add margin — if your motor draws 2A continuous but 4A during stall, design for the stall current.
How can I reduce noise in my robot PCB from motors?
Motor noise is the most common problem I see in robotics PCB designs. Here’s my multi-layered approach:
At the motor: Add 100nF ceramic capacitors across motor terminals
At the driver: Use a low-ESR bulk capacitor (470µF+) close to the driver
Power separation: Use a ferrite bead between motor power and logic power
Ground plane: Maintain solid ground plane under signal traces
Physical separation: Keep motor driver section 1+ inches from sensitive analog circuits
Filtering: Add RC low-pass filters on analog sensor inputs
What’s the difference between rigid-flex and separate boards with connectors?
The main differences are reliability and cost:
Rigid-flex advantages:
No connector failure points (huge reliability improvement)
Lighter weight
More compact 3D packaging
Faster assembly in production
Rigid-flex disadvantages:
Higher upfront cost (3-5x typical)
Longer lead times
More complex design
Harder to modify or repair
For hobby projects and prototypes, separate boards with connectors are usually the right choice. For production robots, medical devices, or aerospace applications where connector failure is unacceptable, rigid-flex is worth the investment.
How do I choose between ARM Cortex-M and other microcontrollers for my robot?
For most robotics applications, ARM Cortex-M series (M0/M3/M4/M7) microcontrollers are the best choice because:
Wide vendor selection (STM32, NXP, TI, Microchip)
Excellent real-time performance
Rich peripheral set (multiple timers for PWM, ADCs, DMAs)
For very simple projects or educational purposes, 8-bit AVR (Arduino) remains a valid option due to its gentler learning curve.
Robot PCB Testing and Validation
Before you consider your robot PCB design complete, thorough testing is essential. I’ve seen too many projects fail in the field because they skipped proper validation.
Pre-Assembly Inspection
Before soldering any components, inspect your bare boards:
Visual inspection checklist:
Verify board dimensions match your mechanical design
Check for drill accuracy, especially on connectors
Look for any copper defects or shorts
Confirm silkscreen alignment and readability
Verify solder mask coverage and alignment
Electrical Testing Procedures
Test Type
When to Perform
What It Catches
Continuity
Before and after assembly
Open traces, bad solder joints
Power rail check
After initial power-up
Shorts, wrong polarity protection
Current draw measurement
At each power stage
Design issues, faulty components
Signal integrity
During integration
Noise, crosstalk, timing issues
Thermal imaging
Under load
Hot spots, inadequate heat dissipation
Functional Testing Approach
For robot PCBs, I follow this sequence:
Stage 1 – Power System:
Apply power with current-limited supply (500mA max initially)
Verify all voltage rails are correct
Check for abnormal current draw or heat
Stage 2 – Core Functions:
Verify microcontroller programs and runs
Test communication interfaces (I2C, SPI, UART)
Confirm all GPIO can be toggled
Stage 3 – Motor Subsystem:
Test motor drivers without motors first (measure outputs)
Connect motors and verify direction control
Check PWM range and linearity
Stage 4 – Sensor Integration:
Verify sensor power and communication
Validate sensor readings against known references
Test across expected operating range
Stage 5 – System Integration:
Run complete control loops
Test edge cases and failure modes
Perform long-duration stress testing
Environmental Testing
For production robots, environmental testing validates reliability:
Temperature cycling: -20°C to +60°C (typical consumer range)
ESD testing: IEC 61000-4-2 contact and air discharge
Common Robot PCB Mistakes and How to Avoid Them
Learning from others’ mistakes saves time and money. Here are the issues I see most frequently:
Mistake 1: Undersized Power Traces
The problem: Designer uses default 10-mil traces for motor power, causing voltage drops and overheating.
The solution: Always calculate trace width for maximum expected current, including motor stall conditions. Use the IPC-2221 standard or online calculators.
Mistake 2: Missing Decoupling Capacitors
The problem: Skipping decoupling capacitors leads to microcontroller resets and sensor noise.
The solution: Place 100nF ceramic capacitors as close as possible to every IC’s power pins. Add 10µF bulk caps at power entry points.
Mistake 3: Poor Ground Plane Design
The problem: Split or Swiss-cheese ground planes create return current problems and antenna structures.
The solution: Maintain solid, unbroken ground planes. If splits are necessary, provide clear return paths for all signals crossing the split.
Mistake 4: Ignoring Motor Noise
The problem: Motor PWM noise couples into sensor readings, causing erratic behavior.
The solution: Physical separation, filtering, and proper grounding. Add ceramic capacitors directly on motor terminals.
Mistake 5: Forgetting Thermal Management
The problem: Motor drivers and regulators overheat, causing thermal shutdown or failure.
The solution: Design thermal management from the start — thermal vias, copper pours, and heatsinks where needed.
Mistake 6: No Test Points
The problem: Cannot debug the board without removing components or probing tiny SMD pads.
The solution: Add test points on critical signals: power rails, communication buses, PWM outputs, and sensor inputs. They cost nothing and save hours of debugging.
Future Trends in Robot PCB Technology
The robot PCB landscape is evolving rapidly. Here’s where the technology is heading:
AI and Edge Computing Integration
Modern robots increasingly process AI workloads locally. This drives demand for:
High-speed memory interfaces (DDR4/DDR5)
Neural processing unit (NPU) integration
High-bandwidth sensor interfaces
Advanced power management for variable compute loads
Embedded Components
Embedding passive components within PCB layers reduces size and improves performance:
Embedded capacitors reduce parasitic inductance
Embedded resistors save surface area
Improved high-frequency performance
Advanced Manufacturing Processes
New manufacturing techniques are enabling:
Finer pitch (sub-50µm traces) through mSAP processes
3D-printed electronics for complex shapes
Additive manufacturing for rapid prototyping
Heterogeneous integration of different substrate types
Sustainability Considerations
Environmental concerns are influencing robot PCB design:
Designing a robot PCB is where electronics engineering meets mechanical constraints and real-world reliability requirements. The key takeaways from this guide:
Choose the right PCB type: Match your board construction to your application requirements — double-layer for most hobby projects, multi-layer for complex systems, rigid-flex for moving joints.
Design for your environment: Consider thermal management, EMI immunity, and mechanical stress from the start, not as afterthoughts.
Follow proven design practices: Wide power traces, solid ground planes, adequate filtering, and proper component placement will prevent most common issues.
Use appropriate tools and resources: The PCB design software ecosystem has excellent free options, and prototype manufacturing has never been more accessible or affordable.
The robotics industry continues to evolve rapidly, with increasing demands for AI processing, sensor fusion, and autonomous capability. The fundamental principles of good robot PCB design — power integrity, signal integrity, thermal management, and reliability — remain constant even as the complexity increases.
Start simple, learn from each design iteration, and don’t be afraid to ask for design reviews from experienced engineers. Every robot PCB I’ve designed has taught me something new, and that learning process never really ends.
Inquire: Call 0086-755-23203480, or reach out via the form below/your sales contact to discuss our design, manufacturing, and assembly capabilities.
Quote: Email your PCB files to Sales@pcbsync.com (Preferred for large files) or submit online. We will contact you promptly. Please ensure your email is correct.
Notes: For PCB fabrication, we require PCB design file in Gerber RS-274X format (most preferred), *.PCB/DDB (Protel, inform your program version) format or *.BRD (Eagle) format. For PCB assembly, we require PCB design file in above mentioned format, drilling file and BOM. Click to download BOM template To avoid file missing, please include all files into one folder and compress it into .zip or .rar format.


