Inquire: Call 0086-755-23203480, or reach out via the form below/your sales contact to discuss our design, manufacturing, and assembly capabilities.
Quote: Email your PCB files to Sales@pcbsync.com (Preferred for large files) or submit online. We will contact you promptly. Please ensure your email is correct.
Notes: For PCB fabrication, we require PCB design file in Gerber RS-274X format (most preferred), *.PCB/DDB (Protel, inform your program version) format or *.BRD (Eagle) format. For PCB assembly, we require PCB design file in above mentioned format, drilling file and BOM. Click to download BOM template To avoid file missing, please include all files into one folder and compress it into .zip or .rar format.
Getting a PCB trace antenna to work properly on the first spin is surprisingly difficult. I’ve seen engineers copy reference designs exactly and still end up with antennas resonating 100MHz off target. The issue isn’t the design equations, it’s understanding how your specific PCB stackup, ground plane size, and enclosure affect the antenna’s behavior.
This guide covers the practical aspects of PCB trace antenna design for 2.4GHz applications like WiFi, Bluetooth, Zigbee, and BLE. We’ll walk through the most common antenna types, dimension calculations, layout rules, and the tuning process that actually gets results.
A PCB trace antenna is a conductive pattern etched directly onto a circuit board that radiates and receives electromagnetic energy. Unlike chip antennas or external whip antennas, trace antennas are fabricated as part of the PCB manufacturing process, making them essentially free in terms of BOM cost.
The trace acts as a resonant structure, typically designed to be a quarter wavelength (λ/4) at the operating frequency. At 2.4GHz, a quarter wavelength in free space is approximately 31.25mm, though the actual trace length depends on the substrate’s dielectric constant and the antenna geometry.
The main trade-offs are the board space required and the tuning effort needed to optimize performance. If your PCB is already space-constrained, a chip antenna might be more practical despite the higher cost.
PCB Trace Antenna Types for 2.4GHz
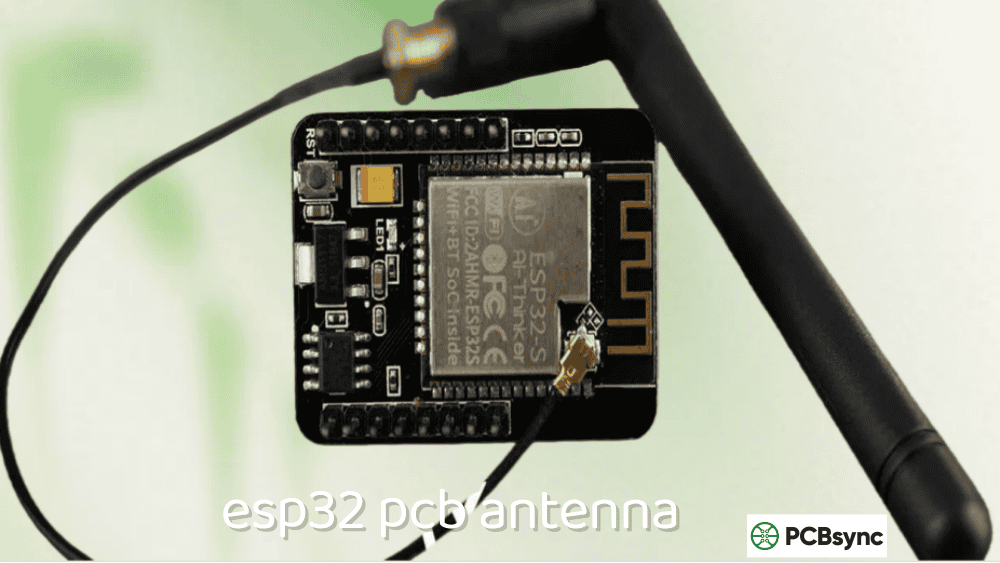
Three antenna types dominate 2.4GHz wireless applications: the Inverted-F Antenna (IFA), Meandered Inverted-F Antenna (MIFA), and meander line antenna. Each offers different trade-offs between size, performance, and complexity.
Inverted-F Antenna (IFA)
The IFA is the most efficient PCB trace antenna for 2.4GHz. It consists of a horizontal radiating element parallel to the ground plane, with a shorting pin connecting one end to ground and a feed point positioned along the element’s length.
Key characteristics:
Size: approximately 4mm × 20.5mm on 1.6mm FR4
Bandwidth: 150-250MHz (covers entire 2.4GHz ISM band)
Efficiency: highest among PCB trace antennas
Best for: applications where one dimension can be long (heart rate monitors, fitness bands)
The IFA’s efficiency comes from its physical length, which is closer to a true quarter wavelength than the compressed MIFA design.
Meandered Inverted-F Antenna (MIFA)
The MIFA folds the radiating element into a serpentine pattern, dramatically reducing the antenna footprint while maintaining reasonable performance. This is the most common PCB trace antenna for BLE and WiFi applications.
Key characteristics:
Size: approximately 7.2mm × 11.1mm on 1.6mm FR4
Bandwidth: 150-220MHz
Efficiency: lower than IFA due to meandering losses
Best for: space-constrained applications (wireless mice, keyboards, presenters)
The trade-off with MIFA is clear: you sacrifice some efficiency and bandwidth for a significantly smaller footprint.
Meander Line Antenna
A meander line antenna is essentially a quarter-wave monopole that has been folded back and forth to reduce its overall length. Unlike the IFA variants, it doesn’t include a shorting pin to ground.
Key characteristics:
Size: varies with folding pattern
Bandwidth: narrower than IFA/MIFA
Efficiency: moderate
Best for: simple implementations where matching network handles impedance
PCB Trace Antenna Comparison
Parameter
IFA
MIFA
Meander Line
Typical Size (2.4GHz)
4 × 20.5 mm
7.2 × 11.1 mm
5 × 15 mm
Relative Efficiency
Highest
Medium
Medium
Bandwidth
150-250 MHz
150-220 MHz
100-150 MHz
Design Complexity
Medium
Medium
Low
Ground Plane Sensitivity
High
High
Medium
Recommended Use
Wearables, fitness
HID, IoT sensors
Simple RF modules
PCB Trace Antenna Dimensions and Calculations
The theoretical quarter wavelength at 2.4GHz is 31.25mm, but actual antenna dimensions are always shorter due to substrate effects and the antenna geometry.
Quarter Wavelength Calculation
The basic formula for quarter wavelength:
λ/4 = c / (4 × f)
Where:
c = speed of light (3 × 10⁸ m/s)
f = frequency (2.45 × 10⁹ Hz for 2.4GHz center)
This gives λ/4 = 30.6mm in free space.
However, the PCB substrate’s dielectric constant effectively shortens the wavelength:
λeff = λ₀ / √εeff
For FR4 with εr ≈ 4.4, the effective dielectric constant for a trace above a ground plane is approximately 3.0-3.5, reducing the physical length to roughly 17-20mm for the radiating element.
Reference Dimensions for Common Antennas
These dimensions are starting points based on manufacturer reference designs. Your specific PCB may require adjustment.
The feed trace connecting the RF chip to the antenna must be designed for 50Ω characteristic impedance. The required width depends on your PCB stackup.
PCB Thickness (Antenna to Ground)
Feed Trace Width (FR4, εr=4.3)
0.2 mm
0.38 mm (15 mil)
0.4 mm
0.76 mm (30 mil)
0.8 mm
1.52 mm (60 mil)
1.0 mm
1.90 mm (75 mil)
1.6 mm
3.05 mm (120 mil)
For short feed traces (less than 3mm), you can relax these requirements and match the feed width to the antenna trace width.
PCB Trace Antenna Layout Rules
Layout mistakes cause more antenna failures than design errors. Follow these rules to avoid common problems.
Ground Plane Requirements
Every PCB trace antenna is actually a monopole that uses the ground plane as the other half of the antenna system. The ground plane size directly affects resonant frequency, bandwidth, and efficiency.
Minimum ground plane size: At least 30mm × 30mm for 2.4GHz
The ground plane should be continuous and unbroken beneath the feed trace. Slots, cuts, or missing copper under the feed line will degrade performance.
Keep-Out Zone Requirements
The area around the antenna must be free of copper on all layers. This includes ground planes, power planes, traces, and component pads.
Zone Type
Minimum Clearance
No copper beneath antenna
Entire antenna area + 2mm margin
No components
6mm from antenna traces
No ground plane
3mm from radiating element
No plastic enclosure contact
2mm air gap recommended
Critical rule: Never place ground plane directly beneath the radiating element. This turns your antenna into a transmission line instead of a radiator.
Antenna Placement Guidelines
Position the PCB trace antenna at the corner or edge of your board, away from:
Metal enclosures and shields
Battery cables and connectors
LCD displays and touch panels
High-speed digital traces
Large metal components
The antenna should radiate into free space, not into your product’s internals. If your enclosure is metal, you’ll need an opening or window for the antenna.
Feed Point and Shorting Pin Design
For IFA and MIFA antennas:
Feed arm:
Connect to 50Ω microstrip transmission line
Keep feed trace as short as practical
Use smooth transitions, no sharp corners
Shorting arm:
Must connect solidly to ground plane
Use multiple vias for low inductance connection
Keep shorting path short and direct
Impedance Matching for PCB Trace Antennas
A perfectly designed antenna is useless if it’s not matched to 50Ω. The matching network compensates for the antenna’s actual impedance and tunes the resonant frequency.
Pi-Network Matching Circuit
The most common matching topology for PCB trace antennas is the pi-network, which provides flexibility to match a wide range of impedances.
Both pi and T networks can match any impedance in the Smith chart. The choice often comes down to which component values are more practical for your frequency and starting impedance.
Use 0402 or 0201 package sizes for matching components to minimize parasitic inductance and capacitance. Larger packages like 0603 add significant parasitics at 2.4GHz.
Component
Package
Tolerance
Notes
Capacitors
0402
±0.1 pF
NPO/C0G dielectric
Inductors
0402
±5%
High-Q RF inductors
Resistors
0402
±1%
For pi-network loading if needed
Avoid general-purpose capacitors and inductors. RF-grade components have characterized performance at your operating frequency.
Tuning Your PCB Trace Antenna
Tuning is where theory meets reality. Even with perfect calculations and layout, your antenna will need adjustment based on actual measurements.
Required Equipment
Essential:
Vector Network Analyzer (VNA) with Smith chart display
Budget VNAs like the NanoVNA work well for 2.4GHz antenna tuning. You don’t need a $50,000 bench instrument for this application.
VNA Calibration Process
Proper calibration is critical. Errors here propagate through your entire tuning process.
Connect calibration standards to the end of your test cable
Perform SOL calibration: Short, Open, Load in sequence
Set frequency span: 2.0 GHz to 3.0 GHz for 2.4GHz antennas
Apply port extension if measurement point is not at calibration plane
For on-board calibration when the antenna is already mounted:
SHORT: Connect feed trace directly to ground
OPEN: Leave pi-network unpopulated
LOAD: Install 50Ω resistor between feed and ground
Reading the Smith Chart
The Smith chart displays your antenna’s impedance at a glance:
Center point (1.0): Perfect 50Ω match
Right side: High impedance (open circuit at far right)
Left side: Low impedance (short circuit at far left)
Top half: Inductive reactance
Bottom half: Capacitive reactance
Your goal is to move the impedance point to the center of the chart at your target frequency.
Step-by-Step Tuning Procedure
Step 1: Measure unmatched antenna
Install 0Ω resistor in series position, leave shunt positions open. Measure S11 and record the impedance at 2.45GHz.
Step 2: Determine required correction
If impedance is above the centerline (inductive), you need series capacitance. If below (capacitive), you need series inductance. The distance from center indicates how much reactance correction is needed.
Step 3: Add first matching component
Based on your measurement, install the first component. Typical corrections:
Inductive antenna → Add series capacitor (1-3 pF)
Capacitive antenna → Add series inductor (1-3 nH)
Step 4: Re-measure and iterate
Check the new impedance. Continue adding or adjusting components until S11 reaches -10 dB or better at your center frequency.
Step 5: Verify bandwidth
Confirm S11 stays below -10 dB across your required frequency range (2.4-2.4835 GHz for WiFi).
Common Tuning Scenarios
Starting Impedance
First Action
Second Action
75 + j50 Ω
Add 1.5 pF series cap
Add 2 nH shunt inductor
30 – j40 Ω
Add 3 nH series inductor
Add 1 pF shunt cap
50 + j100 Ω
Add 0.7 pF series cap
Adjust antenna length
100 + j0 Ω
Add shunt inductor
May need λ/4 transformer
PCB Trace Antenna Design Best Practices
These guidelines come from years of debugging wireless products that didn’t work the first time.
Design for Tuning
Always include footprints for a pi-network matching circuit, even if you think the antenna will work without it. It’s much easier to populate a few components than to respin the board.
Design checklist:
Pi-network footprints near antenna feed point
Test pad for VNA connection
Antenna trace slightly longer than calculated (easier to trim than extend)
Clear silkscreen marking antenna keep-out zone
Account for Enclosure Effects
The plastic enclosure around your product will shift the antenna’s resonant frequency downward. Design and tune with the final enclosure in place.
Typical frequency shifts:
Open air: baseline
Plastic enclosure (2mm away): -20 to -50 MHz shift
Plastic touching antenna: -50 to -100 MHz shift
User’s hand nearby: -100 to -200 MHz shift
Build in tuning margin by designing the unmatched antenna to resonate slightly high (2.5-2.55 GHz in free space).
Avoid Common Mistakes
Mistake 1: Ground plane under antenna
This is the most common error. The area under the radiating element must be completely clear of copper on all layers.
Mistake 2: Tuning in free space only
An antenna tuned perfectly on the bench may fail in the product. Always do final tuning with the production enclosure.
Mistake 3: Ignoring ground plane size
Shrinking the PCB to save cost often breaks the antenna. Maintain minimum ground plane dimensions.
Mistake 4: Sharp corners in antenna traces
Use chamfered or curved corners. Sharp 90° bends create impedance discontinuities and unwanted radiation.
Mistake 5: Copying dimensions without understanding
Reference designs are tuned for specific PCB stackups. Different substrate thickness requires different antenna dimensions.
Useful Resources for PCB Trace Antenna Design
Manufacturer Application Notes
Resource
Manufacturer
Content
AN91445
Infineon/Cypress
Complete MIFA and IFA reference designs with Gerber files
AN2731
NXP
Compact planar antennas for 2.4GHz with matching examples
AN043 (SWRA117)
Texas Instruments
Small size 2.4GHz PCB antenna with USB dongle example
AN1088
Silicon Labs
Designing with Inverted-F 2.4GHz PCB antenna
UM10992
NXP
BLE antenna design guide with test procedures
Online Calculators and Tools
Tool
URL
Use
Mantaro Microstrip Calculator
mantaro.com
50Ω trace width calculation
EEWeb Microstrip Calculator
eeweb.com/tools
Characteristic impedance
SimSmith
w0qe.com/SimSmith
Smith chart matching network design
QucsStudio
qucsstudio.de
Free RF circuit simulation
Reference Design Downloads
Most semiconductor manufacturers provide complete reference designs with Gerber files:
Infineon AN91445.zip – MIFA and IFA Gerber files for FR4
TI CC2511 USB Dongle – IFA reference with DXF files
Nordic nRF52 Reference – Multiple antenna options with layout files
What is the minimum ground plane size for a 2.4GHz PCB trace antenna?
For reliable performance, maintain at least 30mm × 30mm of continuous ground plane. Smaller ground planes will work but with reduced efficiency and shifted resonant frequency. The ground acts as the other half of the antenna system, so shrinking it below λ/4 (approximately 31mm) significantly degrades performance. If your board is smaller, consider a chip antenna or external antenna instead.
Should I use IFA or MIFA for my Bluetooth/WiFi design?
Choose IFA if you have space for a 4mm × 20mm antenna area and need maximum range. Choose MIFA if board space is tight (7mm × 11mm footprint) and moderate range is acceptable. For most BLE applications like wireless mice, keyboards, and IoT sensors, MIFA provides adequate performance in a smaller footprint. For products where wireless range is critical, the IFA’s higher efficiency is worth the extra board space.
Why does my PCB trace antenna resonate at the wrong frequency?
The most common causes are: different PCB thickness than the reference design (thicker PCB → lower frequency), ground plane size different from reference (larger ground → lower frequency), nearby metal objects or enclosure effects, and incorrect effective dielectric constant assumption. Start by verifying your PCB stackup matches the reference design. If not, adjust antenna length proportionally, keeping in mind that a 10% increase in substrate thickness typically requires 2-5% reduction in antenna length.
Do I need a matching network for every PCB trace antenna?
Technically no, but practically yes. A well-designed PCB trace antenna copied exactly from a reference design might work without matching components, but any deviation in PCB stackup, ground plane size, or enclosure will shift the impedance. Always include footprints for a pi-network (three component positions) near the antenna feed. You can populate with 0Ω jumpers and leave shunt positions open if no matching is needed, but you’ll have the option to tune if required.
How do I tune a PCB trace antenna without expensive test equipment?
Budget VNAs like the NanoVNA (under $100) work well for 2.4GHz antenna tuning. The key measurements, S11 return loss and Smith chart impedance, are available on these low-cost instruments. You’ll also need a calibration procedure and a set of RF-grade 0402 capacitors and inductors in the 0.5-10 pF and 0.5-10 nH ranges. Many engineers successfully tune production antennas using nothing more than a NanoVNA and patience.
Conclusion
Designing a working PCB trace antenna requires attention to three areas: choosing the right antenna type for your space and performance requirements, following strict layout rules for ground planes and keep-out zones, and tuning the antenna with actual measurements rather than relying purely on calculations.
Start with a proven reference design from your RF chip manufacturer. Copy the dimensions and layout exactly for your first prototype, including the recommended PCB stackup. Once you have a working baseline, you can optimize for your specific enclosure and application.
The IFA and MIFA antenna types covered in this guide handle the vast majority of 2.4GHz wireless applications. Master these designs, and you’ll have the foundation to tackle more complex multi-band and higher-frequency antennas as your projects demand.
Remember that antenna design is inherently iterative. Even experienced RF engineers expect to tune their antennas after fabrication. Build that expectation into your project timeline, include matching network footprints in your layout, and you’ll avoid the frustration of board respins due to antenna problems.
Inquire: Call 0086-755-23203480, or reach out via the form below/your sales contact to discuss our design, manufacturing, and assembly capabilities.
Quote: Email your PCB files to Sales@pcbsync.com (Preferred for large files) or submit online. We will contact you promptly. Please ensure your email is correct.
Notes: For PCB fabrication, we require PCB design file in Gerber RS-274X format (most preferred), *.PCB/DDB (Protel, inform your program version) format or *.BRD (Eagle) format. For PCB assembly, we require PCB design file in above mentioned format, drilling file and BOM. Click to download BOM template To avoid file missing, please include all files into one folder and compress it into .zip or .rar format.


