Inquire: Call 0086-755-23203480, or reach out via the form below/your sales contact to discuss our design, manufacturing, and assembly capabilities.
Quote: Email your PCB files to Sales@pcbsync.com (Preferred for large files) or submit online. We will contact you promptly. Please ensure your email is correct.
Notes: For PCB fabrication, we require PCB design file in Gerber RS-274X format (most preferred), *.PCB/DDB (Protel, inform your program version) format or *.BRD (Eagle) format. For PCB assembly, we require PCB design file in above mentioned format, drilling file and BOM. Click to download BOM template To avoid file missing, please include all files into one folder and compress it into .zip or .rar format.
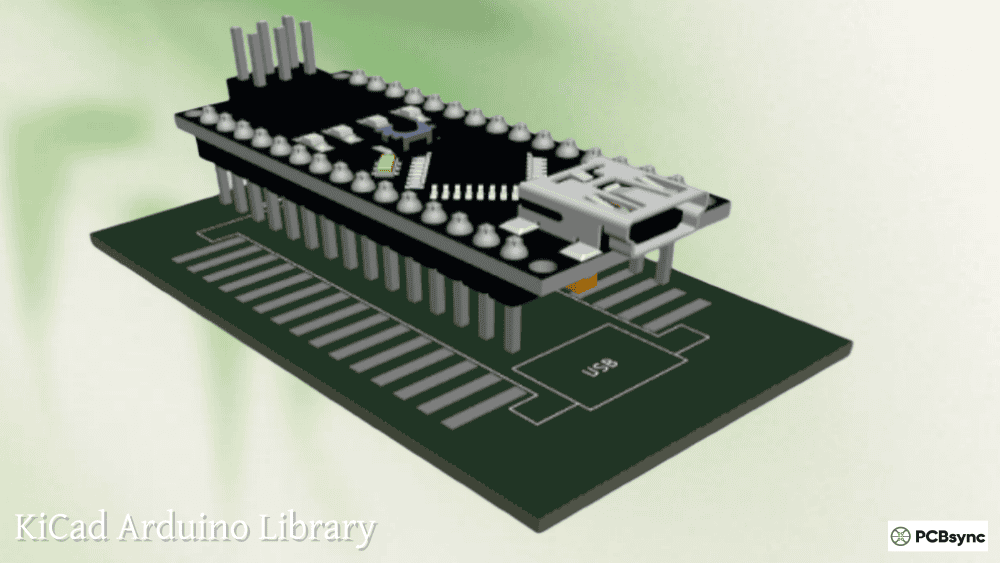
KiCad Arduino Library: Uno, Nano, Mega & Pro Micro Footprints
Designing custom PCBs that interface with Arduino boards should be straightforward, yet finding reliable KiCad Arduino libraries has frustrated makers and engineers for years. Arduino officially provides EAGLE files for their boards, but KiCad users have been left to rely on community-maintained libraries of varying quality.
The good news is that the ecosystem has matured significantly. Today you can find well-maintained KiCad libraries covering everything from the classic Arduino Uno to the compact Arduino Nano, the powerful Arduino Mega 2560, and the keyboard-favorite Arduino Pro Micro. This guide walks you through the best library sources, installation methods, and practical tips for using Arduino footprints in your PCB designs.
Whether you’re creating a custom shield, designing a carrier board, or building a complete project with an embedded Arduino module, understanding which library to use and how to install it properly will save you hours of frustration and potential board respins.
Before diving into specific libraries, understanding the different footprint types available helps you choose the right one for your application.
Shield vs Socket vs Tile Footprints
Footprint Type
Description
Use Case
Shield
Arduino plugs in from beneath your PCB
Creating add-on boards that stack on top of Arduino
Socket
Arduino plugs in from above your PCB
Carrier boards where Arduino sits on top
Tile
Arduino solders directly using SMD pads
Permanent installations, production boards
Most hobby projects use Shield footprints because they match the traditional Arduino shield concept. Socket footprints work well for test fixtures or when you need easy Arduino removal. Tile footprints provide the most compact solution but require castellated-edge Arduino boards or careful soldering.
Pin Header Configurations
Different Arduino boards use different header arrangements. Getting the dimensions wrong means your board won’t fit.
Arduino Board
Pin Count
Row Spacing
Pin Pitch
Arduino Uno R3
32 pins
Variable (not uniform)
2.54mm
Arduino Nano
30 pins
15.24mm (0.6″)
2.54mm
Arduino Mega 2560
86 pins
Variable
2.54mm
Arduino Pro Micro
24 pins
15.24mm (0.6″)
2.54mm
Arduino Micro
34 pins
15.24mm (0.6″)
2.54mm
Arduino Due
86 pins
Variable
2.54mm
The Arduino Uno has that infamous non-standard header spacing that’s caused countless frustrations. The inner headers are offset by 0.16″ (4.06mm) from the standard 0.1″ grid, a decision made early in Arduino’s history that stuck around for compatibility.
Primary KiCad Arduino Library Sources
Several well-maintained libraries cover Arduino boards. Here’s what each offers and when to use them.
Alarm-Siren Arduino KiCad Library (Recommended)
This is the most comprehensive Arduino KiCad library available, now distributed through KiCad’s official Plugin and Content Manager (PCM). The library covers virtually every Arduino board variant with both symbols and footprints.
Included Arduino Boards:
Board Family
Variants Included
Arduino Uno
R1, R2, R3, R3 SMD, R4 Minima, R4 WiFi
Arduino Nano
Classic, 33 BLE, 33 BLE Sense, RP2040 Connect
Arduino Mega
2560 R3
Arduino Micro
Standard
Arduino Due
Shield footprint
Arduino Pro Mini
Socket footprint
Arduino MKR
1000 WiFi, WiFi 1010, Zero, and more
Arduino Leonardo
Shield footprint
Clone Boards
Mega 2560 Pro, Pro Mini clones
This library uses consistent naming conventions and includes proper symbol-to-footprint associations, meaning less manual configuration work.
g200kg KiCad Arduino Library
A lightweight alternative focusing on the most commonly used small-form-factor boards. This library includes 3D models, which the Alarm-Siren library lacks in some cases.
Included Boards:
Arduino Micro
Arduino Nano
Arduino Nano Every
Arduino Pro Mini
SparkFun Pro Micro
The 3D models are provided in X3D format (exported from Blender), which works well in KiCad’s 3D viewer for mechanical clearance checking.
SparkFun KiCad Libraries
SparkFun maintains their own KiCad library that includes the popular SparkFun Pro Micro and other SparkFun-specific boards. If you’re using genuine SparkFun products, this library ensures accurate footprints.
The SparkFun library also includes production IDs and internal part numbers useful for manufacturing but can be ignored for hobby use.
Installing the Arduino KiCad Library via PCM
The easiest installation method uses KiCad’s built-in Plugin and Content Manager, available in KiCad 7 and later.
Step 1: Configure Library Prefix
Before installing, verify your library nickname prefix setting. Open KiCad and navigate to Preferences → Preferences. In the Plugin and Content Manager section, ensure “Library nickname prefix” is set to “PCM_”. This prefix ensures footprint references resolve correctly.
Step 2: Open Plugin and Content Manager
Click the Plugin and Content Manager button in KiCad’s main window.
Step 3: Find and Install the Library
Select “KiCad official repository” from the dropdown. Navigate to the Libraries tab and search for “Arduino.” Locate “KiCad Library for Arduino Modules” and click Install.
Step 4: Apply Changes
Click “Apply Changes” and wait for the download to complete. The library will appear in your Installed tab.
Step 5: Verify Installation
Open the schematic editor and press ‘A’ to add a symbol. Search for “Arduino” and you should see entries prefixed with “PCM_arduino-library.” The footprints automatically associate with the symbols when using this installation method.
Manual Arduino KiCad Library Installation
For KiCad 6 or when you need specific library versions, manual installation works reliably.
Open KiCad’s schematic editor and navigate to Preferences → Manage Symbol Libraries. Click the folder icon to add an existing library. Navigate to your extracted folder and select the .kicad_sym file. Set the nickname to “arduino-library” (without PCM_ prefix for manual installs).
Adding Footprint Library
Open the PCB editor and go to Preferences → Manage Footprint Libraries. Click the folder icon and select the .pretty folder from your extracted library. Use the same nickname as the symbol library for consistency.
Arduino Uno KiCad Footprint Details
The Arduino Uno KiCad footprint requires special attention due to its non-standard header spacing.
Arduino Uno R3 Shield Dimensions
Measurement
Value
Board width
68.6mm (2.7″)
Board length
53.3mm (2.1″)
Mounting holes
4x, 3.2mm diameter
Digital header (D0-D13)
18 pins
Analog header (A0-A5)
6 pins
Power header
8 pins
ICSP header
2×3 pins
The offset between the lower headers creates the 0.16″ (4.06mm) misalignment that makes Arduino shields incompatible with standard 0.1″ grid prototyping boards. The Alarm-Siren library handles this correctly, but always verify with a 1:1 printout before manufacturing.
Arduino Uno R4 Considerations
The newer Arduino Uno R4 (Minima and WiFi variants) maintains backward compatibility with R3 shields but adds additional pins. The library includes separate footprints for R4 boards to capture these extra connections.
Arduino Nano KiCad Footprint Guide
The Arduino Nano KiCad footprint is popular for compact projects. Its breadboard-friendly form factor uses standard 0.6″ (15.24mm) row spacing.
Arduino Nano Pin Configuration
Pin Row
Pins
Functions
Left side
D1/TX through D12
Digital I/O, Serial, PWM
Right side
VIN through A7
Power, Analog inputs
Bottom
ICSP
Programming header
The classic Arduino Nano V3 uses 30 pins total (15 per side). Newer variants like the Nano 33 BLE and Nano Every maintain the same footprint dimensions but may have different pin functions.
Socket vs Through-Hole Considerations
Most Arduino Nano KiCad footprints use through-hole pads sized for standard 0.1″ headers. If you plan to solder the Nano directly to your board (without headers), look for “Tile” variants with SMD pads that match the Nano’s castellated edges.
Arduino Mega KiCad Library Setup
The Arduino Mega 2560 KiCad footprint is the largest of the standard Arduino boards, with 86 total header pins plus ICSP.
Arduino Mega 2560 R3 Header Layout
Header Section
Pin Count
Purpose
Digital 22-53
32 pins
Extended digital I/O
Digital 0-21
22 pins
Standard digital + Serial
Analog 0-15
16 pins
Analog inputs
Power
8 pins
Power distribution
Communication
8 pins
I2C, Serial
ICSP
6 pins
Programming
The Mega’s header arrangement includes double-row headers on one side, making footprint orientation critical. Always mark pin 1 clearly on your silkscreen.
Clone Board Compatibility
Many Mega clones, particularly the “Mega 2560 Pro” compact variants, use different form factors. The Alarm-Siren library includes specific footprints for these clone boards since their dimensions don’t match the official Arduino Mega.
The Arduino Pro Micro KiCad footprint serves the mechanical keyboard community extensively. This compact ATmega32U4-based board fits in the same footprint as the Arduino Nano but includes native USB support.
Pro Micro Specifications
Specification
Value
Pins
24 (12 per side)
Row spacing
15.24mm (0.6″)
Pin pitch
2.54mm
USB
Micro-B (native)
Voltage
5V or 3.3V variants
Multiple Library Sources for Pro Micro
Several libraries provide Arduino Pro Micro KiCad footprints:
Library
Notes
Alarm-Siren
Included as part of main Arduino library
g200kg
Includes 3D model
Biacco42/ProMicroKiCad
Keyboard-focused with mounting variants
SparkFun KiCad Libraries
Official SparkFun footprint
The Biacco42 library deserves special mention for keyboard designers. It includes an “EnforcedTop” variant that covers one side’s pads with soldermask, preventing accidental reverse mounting, a common problem in keyboard builds.
Arduino Micro KiCad Symbol and Footprint
Don’t confuse the Arduino Micro with the Pro Micro. The Arduino Micro KiCad footprint is for the official Arduino board with 34 pins, while the Pro Micro has only 24 pins.
Arduino Micro vs Pro Micro Comparison
Feature
Arduino Micro
Pro Micro
Pins
34
24
MCU
ATmega32U4
ATmega32U4
USB
Micro-B
Micro-B
Manufacturer
Arduino
SparkFun/Clones
Price
Higher
Lower
If you’re working with genuine Arduino Micro boards, use the Arduino Micro footprint from the Alarm-Siren library. For SparkFun Pro Micro or clones, use the Pro Micro footprint.
Arduino Due KiCad Library Resources
The Arduino Due KiCad footprint follows the Mega form factor but uses 3.3V logic. The Due’s 32-bit ARM Cortex-M3 processor makes it popular for audio and signal processing projects.
The Alarm-Siren library includes Arduino Due Shield footprints. For carrier board designs, you may need to create a custom socket footprint or use one from SnapMagic (formerly SnapEDA).
Due-Specific Considerations
The Due runs at 3.3V and is not 5V tolerant on most pins. When designing shields, ensure your circuit doesn’t exceed 3.3V logic levels, even though the footprint physically fits both Uno and Due.
Verifying Footprints Before Manufacturing
Never trust any downloaded footprint without verification. This applies to all library sources, including well-maintained ones.
Verification Checklist
Check
Method
Pin spacing
Measure on printed 1:1 scale
Pin numbering
Compare to official Arduino pinout
Mounting holes
Verify diameter and position
Board outline
Check overall dimensions
Silkscreen
Confirm orientation markers
Print Test Method
Before ordering PCBs, print your board layout at exactly 1:1 scale. Place your actual Arduino board on the printout and verify all pins align with their pads. Check that mounting holes (if used) align properly. This simple step catches most footprint errors.
KiCad Arduino Library Resources and Downloads
Primary Library Downloads
Resource
URL
Contents
Alarm-Siren Arduino Library
github.com/Alarm-Siren/arduino-kicad-library
Most comprehensive, PCM available
g200kg Arduino Library
github.com/g200kg/kicad-lib-arduino
Nano, Micro, Pro Mini with 3D models
SparkFun KiCad Libraries
github.com/sparkfun/SparkFun-KiCad-Libraries
SparkFun products including Pro Micro
Biacco42 Pro Micro
github.com/Biacco42/ProMicroKiCad
Keyboard-focused Pro Micro variants
Freetronics Library
github.com/freetronics/freetronics_kicad_library
Arduino shields plus Raspberry Pi
Component Download Services
Service
Features
SnapMagic (SnapEDA)
Individual board downloads, multiple formats
Ultra Librarian
Manufacturer-verified footprints
Component Search Engine
Free symbol/footprint search
Official Arduino Resources
Resource
URL
Arduino Hardware Documentation
docs.arduino.cc/hardware
Arduino Store (board specs)
store.arduino.cc
Arduino GitHub
github.com/arduino
Frequently Asked Questions
Where can I find an Arduino Uno KiCad footprint for shield design?
Install the Alarm-Siren library via KiCad’s Plugin and Content Manager. Search for “KiCad Library for Arduino Modules” in the Libraries tab. After installation, you’ll find Arduino_Uno_R3_Shield (and other variants) in both the symbol and footprint browsers. This library correctly handles the non-standard 0.16″ header offset that makes Uno shields tricky to design.
How do I add Arduino Nano to my KiCad project?
The fastest method is installing via PCM (KiCad 7+): open Plugin and Content Manager, find “KiCad Library for Arduino Modules,” and install. For older KiCad versions, download the Alarm-Siren library from GitHub, then add the symbol library via Preferences → Manage Symbol Libraries and the footprint library via Preferences → Manage Footprint Libraries. The Arduino Nano Socket footprint works for most carrier board applications.
Is there a KiCad library for Arduino Pro Micro compatible with keyboard designs?
Yes, multiple options exist. The Biacco42/ProMicroKiCad library on GitHub specifically targets keyboard designers with variants including an “EnforcedTop” version that prevents reverse mounting. Alternatively, the g200kg and Alarm-Siren libraries include standard Pro Micro footprints. For genuine SparkFun boards, the SparkFun KiCad Libraries provide official footprints.
Why doesn’t Arduino provide official KiCad libraries?
Arduino historically used EAGLE for their PCB designs and provided EAGLE files for all their boards. As KiCad’s popularity grew, the community stepped in to create and maintain KiCad libraries. The Alarm-Siren library, while not officially affiliated with Arduino, has become the de facto standard and is now distributed through KiCad’s official Plugin and Content Manager.
Can I use the same KiCad footprint for Arduino Due and Mega?
The Arduino Due and Mega 2560 share the same physical header layout, so yes, the same shield footprint works for both. However, the Due operates at 3.3V while the Mega uses 5V logic. Your shield circuit must account for this voltage difference even though the footprint is mechanically compatible. The Alarm-Siren library includes separate symbols for Due and Mega to help track this distinction in your schematic.
Building Reliable Arduino-Based PCB Designs
With proper libraries installed and verified, designing Arduino-compatible PCBs becomes straightforward. Start with the Alarm-Siren library from KiCad’s PCM for the most comprehensive coverage. Supplement with SparkFun or specialized libraries when working with specific third-party boards.
Always verify footprints with physical boards before manufacturing, double-check pin numbering against official Arduino documentation, and consider voltage compatibility when designing for multiple Arduino variants. These practices prevent costly respins and ensure your custom shields and carrier boards work the first time.
The Arduino KiCad ecosystem has matured significantly from the early days of scattered, unreliable community footprints. Today’s libraries provide production-quality symbols and footprints that match or exceed what you’d expect from commercial EDA libraries. Take advantage of this excellent community resource and spend your time on circuit design rather than recreating basic footprints.
Inquire: Call 0086-755-23203480, or reach out via the form below/your sales contact to discuss our design, manufacturing, and assembly capabilities.
Quote: Email your PCB files to Sales@pcbsync.com (Preferred for large files) or submit online. We will contact you promptly. Please ensure your email is correct.
Notes: For PCB fabrication, we require PCB design file in Gerber RS-274X format (most preferred), *.PCB/DDB (Protel, inform your program version) format or *.BRD (Eagle) format. For PCB assembly, we require PCB design file in above mentioned format, drilling file and BOM. Click to download BOM template To avoid file missing, please include all files into one folder and compress it into .zip or .rar format.


