Inquire: Call 0086-755-23203480, or reach out via the form below/your sales contact to discuss our design, manufacturing, and assembly capabilities.
Quote: Email your PCB files to Sales@pcbsync.com (Preferred for large files) or submit online. We will contact you promptly. Please ensure your email is correct.
Notes: For PCB fabrication, we require PCB design file in Gerber RS-274X format (most preferred), *.PCB/DDB (Protel, inform your program version) format or *.BRD (Eagle) format. For PCB assembly, we require PCB design file in above mentioned format, drilling file and BOM. Click to download BOM template To avoid file missing, please include all files into one folder and compress it into .zip or .rar format.
IPC-9241 Explained: Complete Guide to PCB Microsection Preparation
There’s a moment every PCB quality engineer knows well: staring at an X-ray image of a via, knowing something looks off, but unable to confirm whether that shadow represents a real defect or just an imaging artifact. That’s when you reach for the diamond saw and prepare to sacrifice a coupon in the name of truth. Microsectioning reveals what no other inspection method can, but getting a clean, artifact-free cross-section takes skill, patience, and a solid understanding of the process variables involved.
IPC-9241 exists because microsection preparation isn’t just about grinding and polishing until things look shiny. It’s a systematic process where each step affects the next, where temperature control matters as much as grit selection, and where rushing the polish will cost you hours of rework. After years of preparing samples and reviewing countless cross-section images, I can tell you that the difference between a good microsection and a bad one often comes down to understanding the fundamentals that IPC-9241 documents.
IPC-9241, officially titled “Guidelines for Microsection Preparation,” is an industry standard published by IPC (Association Connecting Electronics Industries) that provides comprehensive guidance for preparing metallographic samples of printed circuit boards. Released in December 2016, this 44-page document represents the collective knowledge of the Microsection Subcommittee (7-12) of the IPC Testing Committee.
The standard addresses a fundamental challenge in PCB quality control: how do you prepare a cross-sectional sample that accurately represents the board’s true internal structure without introducing artifacts, damage, or distortion during the preparation process itself? This might sound straightforward, but anyone who has spent time in a metallography lab knows that poor sample preparation can make a perfectly good via look defective, or worse, hide actual defects behind preparation damage.
IPC-9241 covers the complete microsection preparation workflow from initial sample removal through final micro-etching, discussing the variables and common problems at each stage. Importantly, the standard doesn’t promote any single vendor’s equipment or consumables but instead focuses on the fundamental principles that apply regardless of the specific tools you’re using.
Why IPC-9241 Matters for PCB Quality
Microsectioning serves as the gold standard for PCB internal quality verification. While automated optical inspection (AOI) and X-ray systems provide valuable non-destructive screening, they cannot definitively confirm what’s happening inside plated through-holes, within laminate structures, or at the copper-to-dielectric interface. Only physical cross-sectioning exposes these features for direct measurement and evaluation.
The applications where microsectioning proves essential include qualification testing for new processes or materials, failure analysis investigations, process capability studies, customer acceptance verification, and compliance demonstration to standards like IPC-6012 and IPC-A-600. In aerospace, military, and medical device applications, microsection evidence often represents the final word in quality disputes.
IPC-9241 Scope and Key Topics
The IPC-9241 standard organizes microsection preparation as a process with multiple interdependent steps. Understanding what the standard covers helps you apply its guidance effectively.
Section Topic
What It Covers
Sample Removal
Techniques for extracting coupons without damaging target features
Mounting Methods
Encapsulation in epoxy or acrylic for handling and edge support
Grinding Procedures
Material removal using progressively finer abrasives
Polishing Techniques
Achieving scratch-free, mirror-finish surfaces
Micro-Etching
Chemical enhancement of grain structure and plating boundaries
Equipment Considerations
Variables affecting preparation quality
Common Problems
Troubleshooting artifacts and preparation defects
The standard acknowledges that microsection preparation is regarded by many as a highly developed skill. While IPC-9241 provides guidelines, successful execution still depends on the metallographer’s judgment in adapting techniques to specific board constructions and materials.
Relationship to Other IPC Standards
IPC-9241 doesn’t exist in isolation. It works alongside several related documents that reference or depend on proper microsection preparation.
Related Standard
Relationship to IPC-9241
IPC-TM-650 2.1.1
Test method procedure for microsectioning (more prescriptive than 9241)
IPC-A-600
Acceptability standard defining what to evaluate in microsections
Flexible circuit specification with microsection requirements
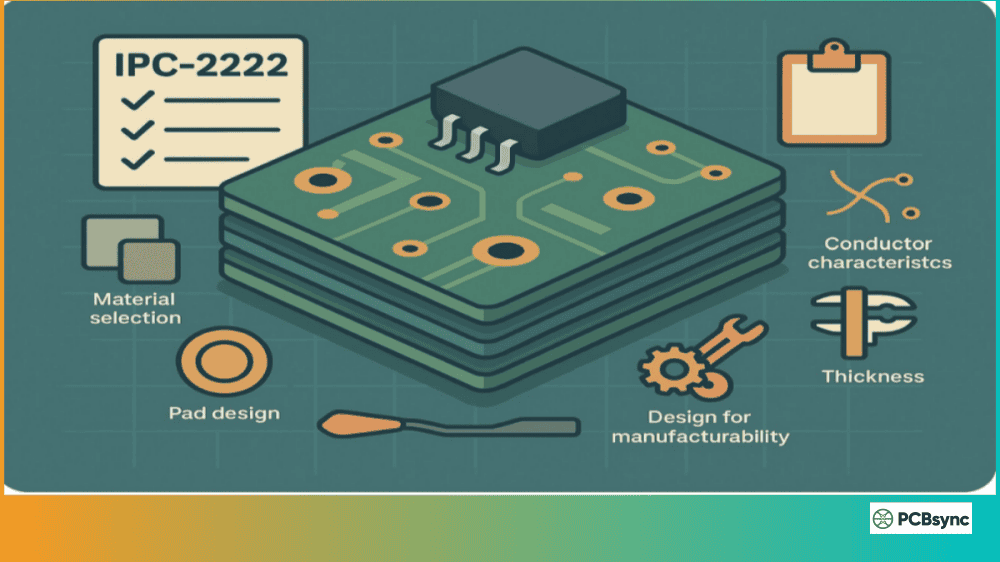
IPC-2221/2222/2223
Design standards referenced for coupon design
When customer specifications require microsection evaluation per IPC-A-600 or qualification per IPC-6012, IPC-9241 provides the preparation guidance needed to create samples suitable for those evaluations.
The PCB Microsection Preparation Process
Understanding the complete workflow helps you appreciate why each step matters and how errors at one stage propagate through subsequent operations.
Step 1: Sample Selection and Removal
Every microsection begins with identifying what you need to examine. For production monitoring, this typically means test coupons designed into the panel array. For failure analysis, you’ll need to locate the specific feature of interest and plan your sectioning approach.
Coupon designs following IPC-2221 guidelines include representative features like plated through-holes, blind and buried vias, and layer stackup structures. These coupons experience the same processing as production boards, making them valid proxies for board quality.
Sample removal requires a precision diamond saw with adequate coolant flow. The cutting operation must avoid mechanical stress or thermal damage that could affect the target area. Cut outside your region of interest, never through it, leaving sufficient material for mounting and grinding to the target plane.
Key considerations during sample removal include maintaining traceability by labeling samples with panel position and orientation, minimizing mechanical shock that could initiate delamination, and keeping samples clean to prevent contamination from affecting subsequent steps.
Step 2: Mounting the Sample
After cutting, the sample gets encapsulated in a mounting medium, typically epoxy or acrylic resin. This mounting serves multiple purposes: it provides a handling surface, supports the sample edges during grinding to prevent rounding, and fills voids and holes to prevent debris accumulation.
Epoxy mounting offers superior edge retention and penetration into small features but requires longer cure times (typically 8-12 hours at room temperature, or accelerated with heat). Epoxy works well when you need maximum infiltration into tight spaces like via barrels or under components.
Acrylic mounting cures much faster (10-15 minutes) and is adequate for routine production monitoring where edge retention requirements are less critical. The faster turnaround makes acrylic popular for high-volume testing operations.
Vacuum impregnation during mounting draws resin into all cavities, eliminating air pockets that would later trap grinding debris or polishing compound. Without vacuum assistance, you’ll often find voids in your mount that compromise the final preparation quality.
Step 3: Grinding to the Target Plane
Grinding removes material to expose the cross-sectional plane of interest. This is where understanding your target becomes critical. For plated through-hole evaluation, IPC-TM-650 allows a tolerance of 10% of the hole diameter for centerline accuracy. Missing the center means your plating thickness measurements won’t represent the minimum wall condition.
Grinding Stage
Typical Grit (SiC)
Purpose
Planar Grinding
120-240
Rapid material removal to approach target
Intermediate Grinding
320-400
Remove planar grinding damage
Fine Grinding
600-800
Prepare surface for polishing
Final Grinding
1000-1200
Minimize scratch depth before polish
The key principle is using the coarsest grit appropriate for the remaining material to remove, then progressing through finer grits to eliminate the damage from each previous step. Skipping grits or rushing through stages leaves subsurface damage that no amount of polishing will remove.
Automated grinding systems with programmable force, speed, and time settings produce more consistent results than manual grinding. They also free the operator to process multiple samples in parallel, improving laboratory throughput.
Step 4: Polishing to Mirror Finish
Polishing follows grinding and uses progressively finer abrasives, typically diamond suspensions, to achieve a scratch-free surface suitable for microscopic examination.
Polishing Stage
Abrasive Size
Typical Media
Coarse Polish
9 µm
Diamond suspension on hard cloth
Intermediate Polish
3 µm
Diamond suspension on medium cloth
Fine Polish
1 µm
Diamond suspension on soft cloth
Final Polish
0.3-0.05 µm
Alumina or colloidal silica
Diamond abrasives dominate PCB polishing because they cut efficiently through both copper and FR-4 materials without preferential removal that would create relief between different phases. The polycrystalline diamond form works particularly well, with multiple small cutting edges that produce shallow scratches relative to the particle size.
Between each polishing step, thorough cleaning removes all traces of the previous abrasive. Cross-contamination from coarser particles will create scratches that look like defects in your final image. Ultrasonic cleaning in appropriate solvents works well for this purpose.
The final polish should achieve a mirror finish with no visible scratches under bright-field illumination at 200x magnification. Any remaining scratches indicate incomplete preparation that will interfere with accurate evaluation.
Step 5: Micro-Etching for Structure Revelation
Micro-etching uses chemical solutions to selectively attack different materials, enhancing the contrast between copper layers, plating deposits, and grain boundaries. This step transforms a mirror-flat surface into one where the internal structure becomes visible.
Common etchants for PCB microsections include cupric chloride solutions for general copper structure, ammonium persulfate for revealing grain boundaries, and proprietary formulations optimized for specific plating types. The IPC-MS-810 document provides etchant formulations and application guidance.
Etching time varies with etchant concentration, temperature, and the specific features you’re trying to reveal. Over-etching obscures fine details, while under-etching leaves the structure indistinct. Experience with your specific materials and etchants is essential for consistent results.
Proper equipment selection significantly affects both preparation quality and laboratory efficiency. While manual preparation is possible, automated systems deliver more consistent results and higher throughput.
Essential Microsection Equipment
Equipment Category
Function
Key Specifications
Precision Saw
Sample removal
Diamond blade, coolant system, < 0.5 mm kerf
Mounting Press
Sample encapsulation
Vacuum capability, temperature control
Grinder/Polisher
Surface preparation
Variable speed (50-500 RPM), programmable force
Optical Microscope
Sample evaluation
50x-1000x magnification, digital imaging
Ultrasonic Cleaner
Inter-step cleaning
Appropriate solvents, adequate power
For laboratories processing significant volume, semi-automated grinder/polisher systems with specimen holders for multiple samples (typically 3-6) dramatically improve productivity. Central force holders, where pressure applies to the entire holder rather than individual specimens, produce the best edge retention and flatness.
Automated dispensing systems for diamond suspensions and lubricants ensure consistent abrasive delivery and reduce consumable waste. These systems can be programmed to deliver precise amounts at specified intervals throughout the polishing cycle.
Microscopy Requirements
After preparation, samples require microscopic examination for measurement and evaluation. The microscope system should provide multiple magnification options from 50x overview to 500x or higher for detailed examination, brightfield illumination for general evaluation, darkfield capability for detecting scratches and surface features, polarized light for revealing grain structure, and digital image capture for documentation and measurement.
Calibrated measurement capability is essential for dimensional evaluation of plating thickness, annular ring, and other critical features. Modern image analysis software can automate many measurements and generate standardized reports.
Common Microsection Defects and Artifacts
IPC-9241 addresses common problems that occur during microsection preparation. Recognizing these artifacts helps distinguish preparation damage from actual board defects.
Preparation Artifacts vs. Real Defects
Artifact Type
Appearance
Cause
Prevention
Scratches
Linear marks across surface
Contamination, insufficient polishing
Clean between steps, complete each stage
Smearing
Metal dragged across features
Excessive pressure, inadequate lubricant
Reduce force, ensure proper lubrication
Edge Rounding
Curved rather than sharp edges
Soft mounting media, excessive polish time
Use harder epoxy, limit final polish duration
Pull-outs
Voids where material was removed
Hard inclusions, inappropriate abrasive
Match abrasive to material hardness
Relief
Height differences between phases
Different removal rates
Use diamond abrasives for uniform cutting
Embedded Abrasive
Particles pressed into surface
Soft material, high pressure
Reduce force, use appropriate cloth
The critical skill is distinguishing these preparation artifacts from actual defects like barrel cracks, voiding, delamination, or plating inclusions. When in doubt, prepare a second sample and see if the feature reproduces. Preparation artifacts typically appear randomly, while real defects show consistent patterns.
Troubleshooting Poor Preparation
When microsection quality falls short of requirements, systematic troubleshooting identifies the root cause. Work backward through the process, examining samples at intermediate stages to isolate where problems originate.
If final polish shows scratches, check whether they’re circular (from current step) or linear (from previous step). Circular scratches indicate contaminated polishing media or worn cloth. Linear scratches mean insufficient time at the current step to remove prior damage.
Relief between copper and laminate suggests using diamond abrasives rather than silicon carbide, which removes FR-4 faster than copper. Edge rounding indicates either mounting media that’s too soft or excessive time on final polish with soft cloth.
IPC-9241 and Quality Standards Compliance
Microsection preparation per IPC-9241 supports compliance with multiple quality and acceptance standards used throughout the electronics industry.
Standards Requiring Microsection Evidence
For rigid PCB qualification per IPC-6012, manufacturers must demonstrate that their processes produce boards meeting the specification’s requirements for plating thickness, hole quality, and laminate integrity. Microsection evaluation provides the objective evidence needed for this demonstration.
IPC-A-600, the acceptability standard for printed boards, defines the target, acceptable, and defect conditions for features visible in cross-section. Inspectors evaluate prepared microsections against these criteria to determine board acceptability.
Military specifications like MIL-PRF-31032 and aerospace requirements per AS9100 often invoke IPC standards for PCB quality, making proper microsection preparation essential for defense and space industry suppliers.
Class-Dependent Requirements
IPC standards define three product classes with increasingly stringent requirements.
IPC Class
Application
Microsection Scrutiny
Class 1
General electronics
Basic evaluation
Class 2
Dedicated service
Standard acceptance criteria
Class 3
High reliability
Rigorous examination, tighter tolerances
Class 3 products (aerospace, military, medical implants) require microsection evaluation against the most stringent criteria. Sample preparation must be impeccable because marginal preparation quality could mask subtle defects that Class 3 standards intend to catch.
Best Practices for Consistent Microsection Results
Based on the principles in IPC-9241 and practical laboratory experience, these practices help achieve consistent, high-quality microsections.
Standardize your procedures. Document your grinding and polishing sequences, specifying abrasive types, times, pressures, and speeds. This enables consistent results regardless of which technician performs the work and provides a baseline for troubleshooting when problems occur.
Control your environment. Temperature affects epoxy cure rates, etchant activity, and even grinding wheel behavior. Humidity influences some polishing media. Maintain consistent laboratory conditions, ideally 20-25°C with moderate humidity.
Use quality consumables. Bargain grinding papers and polishing compounds often contain oversized particles or inconsistent particle distributions that introduce scratches. Premium consumables cost more per unit but reduce rework and improve consistency.
Clean obsessively between steps. Most preparation failures trace back to contamination, typically coarse particles carried into fine polishing steps. Ultrasonic cleaning between every abrasive change isn’t excessive for critical work.
Know your target depth. For plated through-hole centerlines, calculate where you need to stop based on hole diameter and current position. Diamond stops or other depth-control devices help achieve consistent targeting.
Practice on scrap first. When preparing samples from expensive or irreplaceable boards, practice your technique on similar scrap material to verify your process before touching the actual sample.
Useful Resources for PCB Microsectioning
For organizations implementing or improving microsection capabilities, these resources provide additional guidance and support.
IPC Standards (shop.ipc.org):
IPC-9241 Guidelines for Microsection Preparation – $183
IPC-TM-650 Test Methods Manual – Free download
IPC-A-600 Acceptability of Printed Boards – $235
IPC-6012 Qualification and Performance Specification – $235
Equipment Suppliers:
Buehler (buehler.com) – Comprehensive metallographic equipment and consumables
Struers (struers.com) – Sample preparation systems and technical support
Allied High Tech Products (alliedhightech.com) – Precision cutting and polishing equipment
Training Resources:
IPC certification programs through authorized training centers
Equipment vendor application laboratories offering hands-on training
ASTM E3 Standard Guide for Preparation of Metallographic Specimens
Technical References:
ASM Handbook Volume 9: Metallography and Microstructures
IPC-MS-810 Guidelines for Chemical Etchants
Frequently Asked Questions About IPC-9241
What is the difference between IPC-9241 and IPC-TM-650 2.1.1?
IPC-9241 provides guidelines discussing the variables and principles of microsection preparation without being highly prescriptive about specific procedures. IPC-TM-650 2.1.1 is a test method that specifies particular procedures and acceptance criteria for microsection preparation. Think of IPC-9241 as the educational background explaining why things work, while IPC-TM-650 2.1.1 tells you exactly what to do for compliant test specimens. Most laboratories use both documents together.
How accurate must the cross-section plane be for valid measurements?
For plated through-hole evaluation, IPC-TM-650 specifies that the cross-section should be within 10% of the hole diameter from the true center. For a 0.3 mm hole, this means hitting within 0.03 mm of center. Missing the center results in measuring thicker-than-minimum plating on the barrel wall, potentially passing boards that would fail at the true minimum. Tooling fixtures with diamond stops help achieve consistent targeting accuracy.
Can I use automatic grinder/polishers for IPC-9241 compliant preparation?
Yes, and automated equipment often produces more consistent results than manual preparation. The key is properly programming the equipment for your specific materials and validating that your automated procedure produces samples meeting the required quality level. Automated systems also offer better process documentation through stored programs and cycle logs, which supports quality system requirements.
How do I know if scratches in my microsection are preparation artifacts or real defects?
Preparation scratches typically appear as random linear marks across the entire surface, often crossing multiple features. They usually align with the grinding or polishing direction. Real defects like barrel cracks follow specific patterns, typically circumferential around plated holes or along layer interfaces. When uncertain, prepare a second sample from a different location. If the same feature appears in the same position relative to board structures, it’s likely real. Random appearance suggests preparation artifact.
What causes edge rounding in PCB microsections, and how do I prevent it?
Edge rounding occurs when the polishing process removes material faster from edges than from flat surfaces. Causes include mounting media that’s too soft (providing insufficient support), excessive time on final polishing steps with soft cloths, and inadequate sample cleaning allowing debris accumulation at edges. Prevention strategies include using harder epoxy mounting media, minimizing time on soft final polish cloths (just enough to remove prior scratches), ensuring vacuum impregnation fills all gaps with mounting media, and maintaining clean preparation conditions.
Achieving Excellence in PCB Microsection Preparation
IPC-9241 captures decades of metallographic knowledge applied specifically to PCB materials and structures. The standard recognizes that microsection preparation is both science and craft, requiring understanding of the underlying principles combined with hands-on skill developed through practice.
For quality laboratories, investing in proper equipment, training personnel on documented procedures, and maintaining consistent processes pays dividends in reliable, reproducible results. Poor microsections waste time in repeated preparation, create uncertainty in quality decisions, and can lead to incorrect conclusions about board acceptability.
Whether you’re establishing a new microsection capability or improving an existing operation, IPC-9241 provides the foundational guidance needed to achieve professional-quality results. Combined with the related IPC test methods and acceptance standards, it enables objective evaluation of PCB internal quality that no other inspection method can match.
The next time you face that ambiguous X-ray image, you’ll know exactly what to do: prepare a proper microsection per IPC-9241, examine the truth under the microscope, and make your quality decision based on evidence rather than guesswork. That’s the value of mastering this essential PCB quality technique.
Inquire: Call 0086-755-23203480, or reach out via the form below/your sales contact to discuss our design, manufacturing, and assembly capabilities.
Quote: Email your PCB files to Sales@pcbsync.com (Preferred for large files) or submit online. We will contact you promptly. Please ensure your email is correct.
Notes: For PCB fabrication, we require PCB design file in Gerber RS-274X format (most preferred), *.PCB/DDB (Protel, inform your program version) format or *.BRD (Eagle) format. For PCB assembly, we require PCB design file in above mentioned format, drilling file and BOM. Click to download BOM template To avoid file missing, please include all files into one folder and compress it into .zip or .rar format.


