Inquire: Call 0086-755-23203480, or reach out via the form below/your sales contact to discuss our design, manufacturing, and assembly capabilities.
Quote: Email your PCB files to Sales@pcbsync.com (Preferred for large files) or submit online. We will contact you promptly. Please ensure your email is correct.
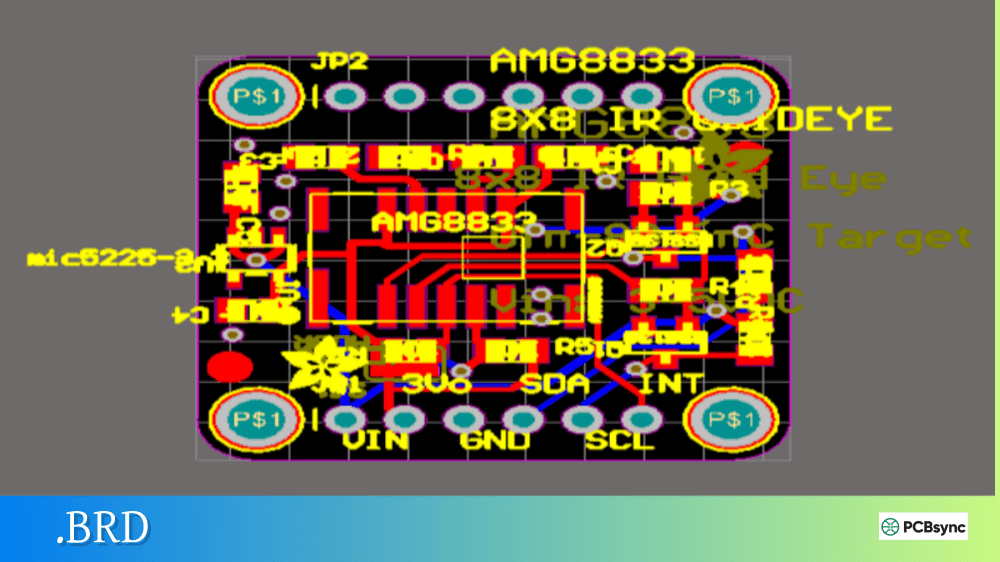
Notes: For PCB fabrication, we require PCB design file in Gerber RS-274X format (most preferred), *.PCB/DDB (Protel, inform your program version) format or *.BRD (Eagle) format. For PCB assembly, we require PCB design file in above mentioned format, drilling file and BOM. Click to download BOM template To avoid file missing, please include all files into one folder and compress it into .zip or .rar format.
What is a .DRC File? Design Rule Check Reports Explained
Before you generate Gerber files and send your PCB off for fabrication, there’s one critical step that separates professional designs from costly mistakes: the Design Rule Check. When you run a DRC in your PCB software, it generates a .DRC file—a report documenting every rule violation found in your design. Understanding this report can mean the difference between a board that works on the first spin and one that comes back with shorts, opens, or manufacturing defects.
This guide explains what .DRC files contain, how to interpret them, and how to use them effectively to catch problems before they reach production.
A .DRC file is a Design Rule Check report generated by PCB design software after analyzing your layout against predefined manufacturing and electrical constraints. The file documents every violation detected—clearance errors, trace width problems, unconnected pins, drill issues, and dozens of other potential problems that could cause your board to fail.
Think of the .DRC file as an automated quality inspection report. Your CAD software examines thousands of design elements, compares them against the rules you’ve defined, and produces a comprehensive list of anything that doesn’t comply. The report tells you exactly what’s wrong, where it’s located, and which rule was violated.
Most PCB design tools generate .DRC files in text, HTML, or XML format. Altium Designer uses the .drc extension for text reports, while other tools may use different naming conventions. Regardless of format, the purpose remains the same: documenting design violations so you can fix them before manufacturing.
Why DRC Reports Matter
Running a Design Rule Check and reviewing the .DRC file isn’t optional—it’s essential. Modern PCBs are far too complex for manual inspection. A typical design contains thousands of traces, vias, pads, and clearances that must all comply with manufacturing tolerances. Missing even one violation can result in:
Short circuits from insufficient clearances
Open circuits from broken traces or missing connections
Unmanufacturable boards that exceed fabricator capabilities
Signal integrity failures from incorrect impedance or routing
Assembly defects from improper pad sizes or spacing
The .DRC report catches these issues automatically, providing a systematic way to verify design integrity before committing to fabrication.
Types of Design Rule Checks
Design Rule Checks fall into several categories, each targeting different aspects of your PCB design. Understanding these categories helps you interpret .DRC file contents more effectively.
Electrical Rule Categories
Rule Type
What It Checks
Clearance
Minimum spacing between copper features
Short Circuit
Unintended connections between different nets
Un-Routed Net
Missing connections required by schematic
Net Antenna
Traces connected at only one end
Power/Ground
Proper connectivity of power planes
Physical Rule Categories
Rule Type
What It Checks
Trace Width
Minimum and maximum track widths
Via Size
Drill diameter and annular ring dimensions
Hole Size
Minimum drill sizes for manufacturability
Solder Mask
Clearances around pads and vias
Silkscreen
Text and graphics clearances
Board Edge
Minimum distance from copper to board outline
Manufacturing Rule Categories
Rule Type
What It Checks
Minimum Annular Ring
Copper ring around drilled holes
Acid Trap
Acute angles that trap etching chemicals
Solder Bridging
Pad spacing that could cause shorts
Copper Slivers
Thin copper features that may not etch properly
Drill-to-Copper
Spacing between holes and traces
Anatomy of a .DRC Report File
When you run a batch DRC and generate a report, the .DRC file contains structured information about your design’s compliance status. While exact formatting varies by CAD tool, most reports share common elements.
Typical DRC Report Sections
Section
Contents
Header
Project name, date, software version
Rule Summary
List of rules checked with pass/fail status
Violation List
Detailed entries for each error found
Statistics
Total violations by category and severity
Waived Violations
Intentionally ignored errors with justification
Sample DRC Violation Entry
A typical violation entry in a .DRC file includes:
Rule: Clearance Constraint (Gap=0.15mm, Actual=0.12mm)Violation: Clearance [0.12mm < 0.15mm]Between: Track (Net: VCC) on Top Layer at (25.4mm, 18.2mm) And: Track (Net: GND) on Top Layer at (25.52mm, 18.2mm)
This entry tells you exactly what rule was violated, the expected versus actual values, and the precise location of the problem. Most CAD tools let you click on these entries to jump directly to the violation in your layout.
How to Generate a .DRC File
Every major PCB design tool includes DRC functionality with report generation. The process varies slightly between applications, but follows the same general workflow.
DRC Generation by Software
Software
Menu Path
Report Format
Altium Designer
Tools → Design Rule Check
.drc (TXT), HTML, XML
KiCad
Inspect → Design Rules Checker
Plain text
OrCAD/Allegro
Tools → Design Rule Check
Text report
Eagle
Tools → DRC
Errors list
EasyEDA
Design → Check DRC
On-screen display
CircuitMaker
Home → Design Rules → Run DRC
HTML
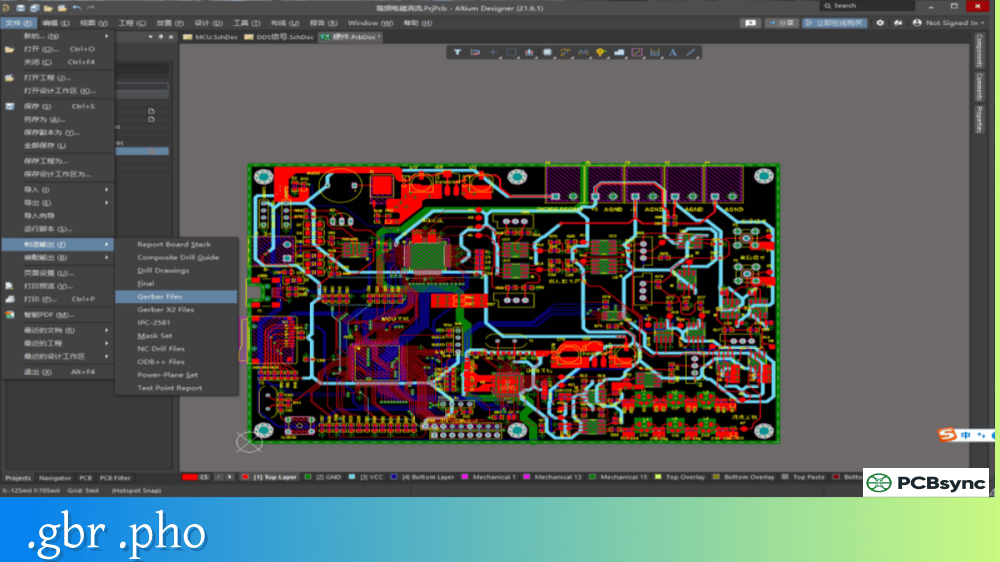
Running DRC in Altium Designer
Altium provides comprehensive DRC capabilities with flexible report options:
Open your PCB document
Navigate to Tools → Design Rule Check
Select which rule categories to check
Enable “Create Report File” under Report Options
Click “Run Design Rule Check”
The software generates a .DRC file in your project folder and optionally displays violations in the Messages panel. HTML reports include clickable links for cross-probing directly to violation locations.
Running DRC in KiCad
KiCad’s Design Rules Checker provides real-time and batch checking:
Open PCB Editor with your board
Select Inspect → Design Rules Checker
Configure options (refill zones, report all errors)
Click “Run DRC”
Use “Save” button to export report file
KiCad displays violations in the DRC window and marks them on the board canvas. The saved report provides a permanent record for documentation purposes.
Online vs Batch DRC Checking
PCB design software typically offers two DRC modes, each serving different purposes in the design workflow.
Online DRC (Real-Time)
Online DRC runs continuously in the background while you work, flagging violations the moment they occur. When you route a trace too close to another net, the software immediately highlights the error. This prevents violations from accumulating and makes problems easier to fix while you still remember what you were doing.
Benefits of Online DRC:
Immediate feedback during routing
Prevents rule violations before they happen
Reduces total violations in final check
Educates designers about constraint requirements
Batch DRC (Comprehensive)
Batch DRC performs a complete check of the entire design at once, generating a full .DRC report. This mode catches everything—including violations that may have been introduced before Online DRC was enabled or rules that only apply to batch checking.
When to run Batch DRC:
Before generating Gerber files
After major design changes
At project milestones
Before design reviews
As part of release validation
Best practice is to use both modes: Online DRC during active design, and Batch DRC at checkpoints and before final output.
Common DRC Violations and Solutions
Certain violations appear frequently in .DRC reports. Knowing how to address them speeds up the error resolution process.
Not every violation in a .DRC file necessarily requires action. Learning to interpret results correctly saves time and prevents unnecessary changes.
When to Fix Violations
Fix violations that:
Could cause electrical failure (shorts, opens)
Exceed manufacturer capabilities
Violate signal integrity requirements
Create assembly problems
When to Waive Violations
Consider waiving violations that:
Are intentional design decisions
Fall within acceptable tolerances
Result from known library issues with planned fixes
Apply to test points or non-critical features
Most CAD tools allow you to waive specific violations, marking them as reviewed and accepted. Waived violations still appear in the .DRC report but are flagged as intentionally ignored with documentation.
DRC Report Best Practices
Follow these guidelines for effective DRC management:
Configure rules before layout begins: Set up design rules that match your fabricator’s capabilities at project start. This prevents massive violation counts later.
Run DRC frequently: Check your design regularly rather than waiting until completion. Fixing ten violations is easier than fixing hundreds.
Document waived violations: When you intentionally waive a violation, record why. Future engineers (or future you) will need this context.
Keep reports with project files: Archive .DRC reports as part of your design documentation. They provide evidence of design verification.
Zero violations before release: Aim for a clean DRC report before generating manufacturing files. Unresolved violations should be rare exceptions with clear justification.
Useful Resources for DRC Files
Manufacturer DRC Rule Files
Source
Description
PCBWay
Custom DRC rules for KiCad, Altium, Eagle, Allegro
JLCPCB
Manufacturing capability guidelines
OSH Park
Design rules for their specific processes
Sierra Circuits
DRC setup guides and constraints
Software Documentation
Resource
URL
Altium DRC Guide
altium.com/documentation
KiCad DRC Documentation
docs.kicad.org
OrCAD DRC Tutorial
ema-eda.com
Eagle DRC Reference
autodesk.com/eagle
Online Tools
Tool
Purpose
PCB Checklist
Pre-fab verification checklist
Manufacturer DFM Check
Online design rule verification
Gerber Viewers
Visual inspection of output files
Frequently Asked Questions About .DRC Files
What file format is a .DRC file?
A .DRC file is typically a plain text or HTML document containing the Design Rule Check report from PCB software. Altium Designer generates .drc files as text reports, while other tools may use .txt, .html, or .xml extensions. The file is human-readable and can be opened in any text editor or web browser, depending on format. Some tools also support XML output for automated parsing and integration with other systems.
How do I fix DRC errors in my PCB design?
To fix DRC errors, first review the .DRC report to understand each violation’s location and cause. Use your CAD tool’s cross-probing feature to navigate directly to problem areas. For clearance violations, increase spacing between objects or reroute traces. For connectivity errors, complete missing connections or remove unintended ones. For manufacturing violations, adjust feature sizes to meet fabricator specifications. Re-run DRC after each fix to verify resolution.
Should I send my .DRC file to my PCB manufacturer?
Manufacturers don’t typically require .DRC files, but including them demonstrates design verification and can speed up their review process. More importantly, ensure your design passes DRC before generating Gerber files. Some manufacturers perform their own DFM (Design for Manufacturability) checks and will report issues they find. A clean .DRC report from your end reduces back-and-forth during their review.
What’s the difference between DRC and ERC?
DRC (Design Rule Check) verifies the PCB layout against physical and manufacturing constraints—clearances, trace widths, hole sizes, and similar parameters. ERC (Electrical Rule Check) verifies the schematic for electrical errors—floating pins, conflicting outputs, missing power connections, and similar issues. Both checks are essential: ERC validates your circuit design, while DRC validates your physical implementation. Run ERC before layout and DRC throughout the layout process.
Can I customize DRC rules for my specific manufacturer?
Yes, and you should. Most PCB design tools allow complete customization of design rules to match your fabricator’s capabilities. Many manufacturers provide downloadable rule files configured for their processes—PCBWay, JLCPCB, and others offer these for popular CAD tools. Import these rules at project start to ensure your design stays within manufacturable limits throughout development.
Conclusion
The .DRC file is your last line of defense against manufacturing problems and electrical failures. This automated report catches the violations that human review would miss—the clearance that’s 0.02mm too tight, the via drill that’s slightly undersized, the trace that never quite connected.
Make Design Rule Check reports a standard part of your workflow. Configure rules at project start, run DRC frequently during layout, and always generate a final report before releasing manufacturing files. When the .DRC report comes back clean, you can send your design to fabrication with confidence that it meets all specified constraints.
A few minutes reviewing your .DRC file now prevents weeks of debugging failed prototypes later.
Inquire: Call 0086-755-23203480, or reach out via the form below/your sales contact to discuss our design, manufacturing, and assembly capabilities.
Quote: Email your PCB files to Sales@pcbsync.com (Preferred for large files) or submit online. We will contact you promptly. Please ensure your email is correct.
Notes: For PCB fabrication, we require PCB design file in Gerber RS-274X format (most preferred), *.PCB/DDB (Protel, inform your program version) format or *.BRD (Eagle) format. For PCB assembly, we require PCB design file in above mentioned format, drilling file and BOM. Click to download BOM template To avoid file missing, please include all files into one folder and compress it into .zip or .rar format.


