Inquire: Call 0086-755-23203480, or reach out via the form below/your sales contact to discuss our design, manufacturing, and assembly capabilities.
Quote: Email your PCB files to Sales@pcbsync.com (Preferred for large files) or submit online. We will contact you promptly. Please ensure your email is correct.
Notes: For PCB fabrication, we require PCB design file in Gerber RS-274X format (most preferred), *.PCB/DDB (Protel, inform your program version) format or *.BRD (Eagle) format. For PCB assembly, we require PCB design file in above mentioned format, drilling file and BOM. Click to download BOM template To avoid file missing, please include all files into one folder and compress it into .zip or .rar format.
DIP (Dual In-Line Package): Classic IC Package Explained
If you’ve ever built a circuit on a breadboard or worked with vintage electronics, you’ve handled a DIP package. The dual in-line package has been the workhorse of electronics for over sixty years, and while surface-mount technology dominates modern production, DIPs remain essential for prototyping, education, and applications where easy handling matters.
This guide covers everything about DIP packages from a practical PCB engineering perspective: the fundamentals, package types, dimensions, pin configurations, soldering techniques, and where DIPs still make sense in today’s designs.
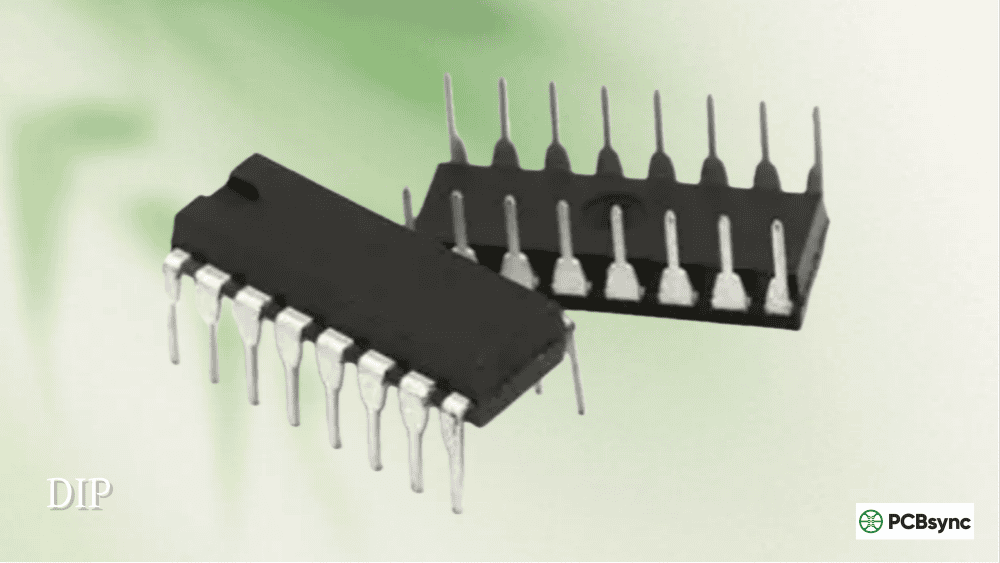
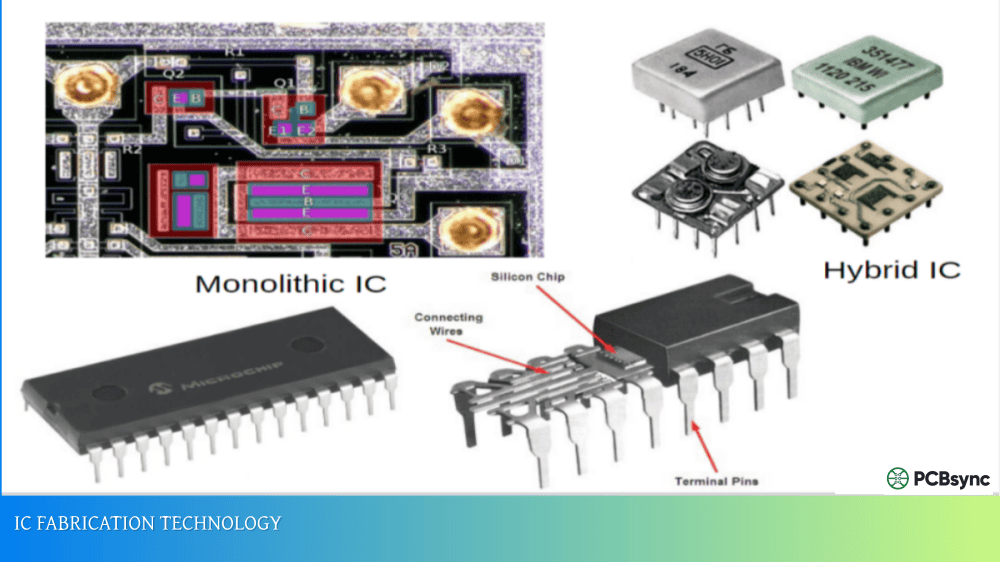
A DIP package (Dual In-Line Package, also called DIL) is an electronic component package featuring a rectangular housing with two parallel rows of metal pins extending downward from each side. These pins insert into holes drilled through a printed circuit board and are soldered on the opposite side—the classic through-hole mounting method.
The dual in-line package gets its name from its two (“dual”) rows of pins arranged in straight lines. Each pin connects internally to the integrated circuit die through fine bond wires, and the whole assembly is encased in plastic or ceramic for protection.
Bryant “Buck” Rogers, Don Forbes, and Rex Rice invented the DIP at Fairchild Semiconductor in 1964. Their first design had 14 pins and looked remarkably similar to DIPs manufactured today. The rectangular shape was a significant improvement over the circular TO-style packages used previously, allowing higher component density on circuit boards.
How DIP Packages Work
The internal structure of a DIP is straightforward. A lead frame made of copper alloy provides the mechanical foundation and electrical pathways. The semiconductor die (the actual IC chip) is mounted on a central pad of this lead frame using conductive epoxy or eutectic bonding.
Ultra-fine gold or aluminum bond wires connect pads on the die to the inner ends of each lead. These wires are incredibly thin—typically 25 to 50 micrometers in diameter—and loop upward slightly to accommodate thermal expansion without breaking.
The entire assembly is then encapsulated. For plastic DIPs (PDIP), epoxy molding compound is injected around the die and bond wires. Ceramic DIPs (CDIP) use a ceramic base and lid sealed together, providing better environmental protection and thermal performance.
When you insert a DIP into a PCB, each pin passes through a plated hole. Solder applied to the bottom side creates both the electrical connection and mechanical attachment. The through-hole design provides excellent mechanical strength—these joints can withstand significant vibration and mechanical stress.
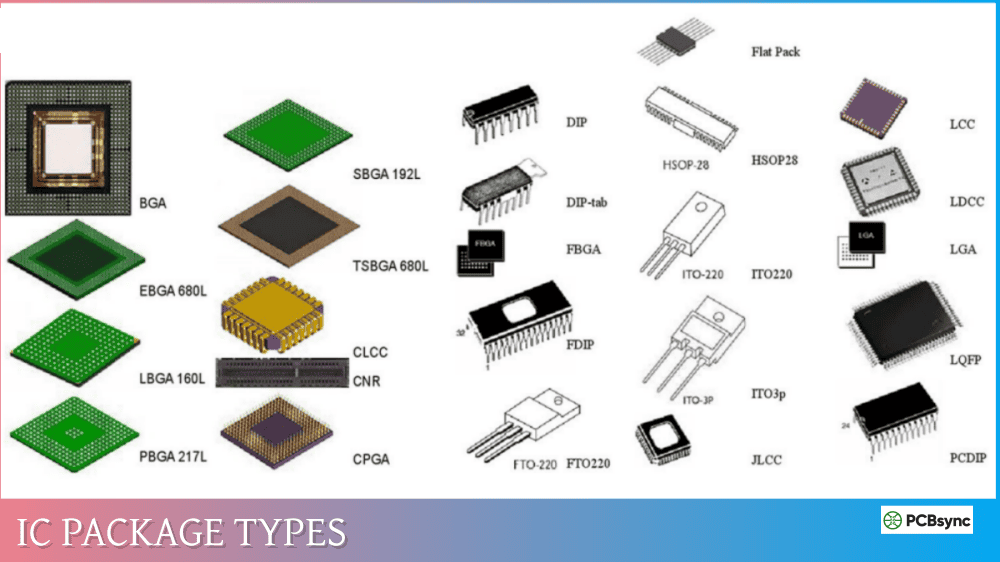
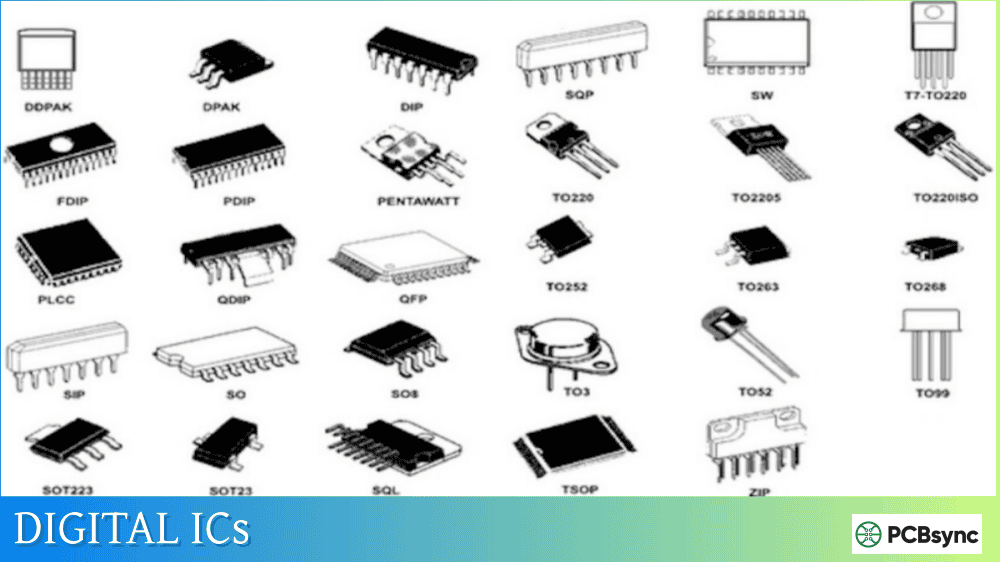
DIP Package Types and Variants
Several DIP variations exist, each optimized for specific requirements:
Plastic Dual In-Line Package (PDIP)
The most common and economical DIP type. PDIP uses molded epoxy plastic encapsulation with tin, silver, or gold-plated copper alloy leads. It’s adequate for most commercial and consumer applications operating within standard temperature ranges.
Best for: General-purpose applications, prototyping, hobby projects, education
Ceramic Dual In-Line Package (CDIP or CerDIP)
Uses a ceramic substrate and lid instead of plastic. Ceramic provides superior thermal conductivity, better hermeticity, and wider temperature range operation. CDIPs cost significantly more than plastic versions.
Best for: Military, aerospace, high-reliability applications, high-temperature environments
Shrink DIP (SPDIP)
A denser version of standard DIP with a reduced lead pitch of 1.778mm (0.07 inches) instead of the standard 2.54mm. This allows more pins in a smaller footprint while maintaining through-hole compatibility.
Best for: Higher pin-count applications where standard DIP would be too large
Skinny DIP (SDIP)
Refers to narrow-width DIP packages (7.62mm / 0.3 inch row spacing) regardless of pin count. The term distinguishes these from wider 15.24mm (0.6 inch) packages.
Best for: Space-constrained through-hole designs
Solder-Bump DIP
Features small solder bumps on the leads that create standoff height between the package and PCB. This gap allows solder to flow more easily underneath during assembly, improving joint quality.
Best for: Automated assembly processes
DIP Package Type Comparison
Package Type
Substrate Material
Lead Pitch
Temperature Range
Relative Cost
Typical Use
PDIP
Plastic/Epoxy
2.54mm
-40°C to +85°C
Low
Consumer, commercial
CDIP
Ceramic
2.54mm
-55°C to +125°C
High
Military, aerospace
SPDIP
Plastic
1.778mm
-40°C to +85°C
Medium
High pin-count
Skinny DIP
Plastic
2.54mm
-40°C to +85°C
Low
Space-constrained
Standard DIP Package Dimensions
DIP packages follow JEDEC standards for consistent dimensions across manufacturers:
Pin Count
Package Width
Length (approx)
Common Applications
DIP-8
7.62mm (0.3″)
9.5mm
Op-amps, timers, EEPROMs
DIP-14
7.62mm (0.3″)
19mm
Logic gates, comparators
DIP-16
7.62mm (0.3″)
19mm
Shift registers, drivers
DIP-18
7.62mm (0.3″)
22mm
Microcontrollers
DIP-20
7.62mm (0.3″)
25mm
Microcontrollers, ADCs
DIP-24
15.24mm (0.6″)
31mm
Memory, microcontrollers
DIP-28
15.24mm (0.6″)
37mm
Microcontrollers
DIP-40
15.24mm (0.6″)
52mm
Microprocessors, MCUs
DIP-64
22.86mm (0.9″)
56mm
Early CPUs, complex ICs
The standard lead pitch of 2.54mm (0.1 inch) matches breadboard hole spacing perfectly—not a coincidence, as breadboards were designed around DIP dimensions.
DIP Pin Numbering and Identification
Understanding pin numbering prevents costly mistakes during assembly:
Pin 1 Location: Look for a notch, dot, or both on one end of the package. With this indicator facing up and toward you, pin 1 is at the upper left corner.
Numbering Direction: Pins are numbered counterclockwise when viewed from above. Starting at pin 1 (upper left), count down the left side, then continue from the bottom right back up to the top right.
Example for DIP-14:
Left side (top to bottom): Pins 1-7
Right side (bottom to top): Pins 8-14
Always verify pin 1 orientation before soldering. Installing a DIP backward usually destroys the IC instantly when power is applied.
Advantages of DIP Packages
Despite being “old technology,” DIPs offer genuine benefits:
Easy Hand Soldering
Through-hole pins with 2.54mm spacing are simple to solder manually. A basic soldering iron and steady hand are sufficient—no specialized equipment needed. This makes DIPs ideal for repairs, prototyping, and low-volume production.
Breadboard Compatible
The 0.1-inch pin spacing fits directly into standard breadboards and protoboards. You can build and test circuits without any soldering, making DIPs perfect for education and experimentation.
Socket Mounting Option
DIP sockets allow easy IC replacement without desoldering. This is valuable for:
Development and testing where you might swap ICs
Field-replaceable components
Programming EPROMs and microcontrollers
Protecting expensive ICs from soldering heat
Mechanical Robustness
Through-hole solder joints are extremely strong. The pins penetrate the PCB and anchor on the opposite side, creating joints that resist vibration, shock, and mechanical stress far better than surface-mount connections.
Easy Inspection and Troubleshooting
All pins are visible and accessible. You can probe signals with an oscilloscope, check continuity, or rework individual pins without specialized equipment.
For various programmable logic devices including Altera FPGA development boards, DIP-packaged support components remain common due to their prototyping advantages.
Disadvantages of DIP Packages
DIPs have significant limitations that explain why surface-mount technology has largely replaced them:
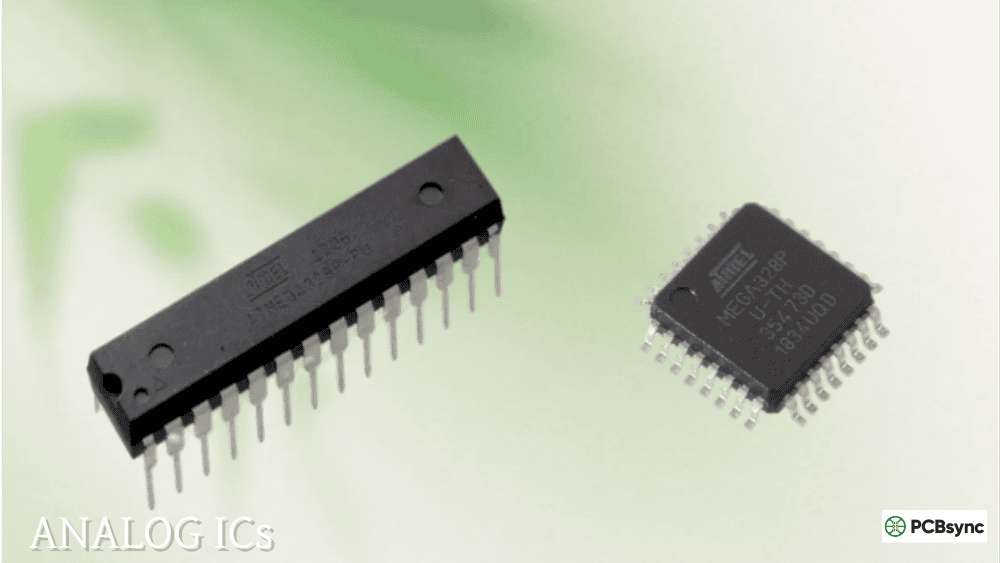
Large Physical Size
A DIP-40 package measures roughly 52mm × 15mm—enormous by modern standards. The same functionality in a QFP or BGA might occupy one-quarter the area or less.
Limited Pin Count
Practical DIP packages max out around 64 pins. Modern processors and FPGAs need hundreds or thousands of connections, impossible with through-hole technology.
Requires PCB Drilling
Every pin needs a drilled and plated hole in the PCB. This adds manufacturing cost and time compared to surface-mount assembly where holes are only needed for vias and mechanical mounting.
Slower Assembly
Through-hole insertion and wave soldering are slower processes than surface-mount pick-and-place and reflow. For high-volume production, this cost penalty is significant.
Poor High-Frequency Performance
Long leads act as inductors, causing signal integrity problems at high frequencies. DIPs are generally unsuitable for signals above a few hundred MHz.
Single-Sided Mounting Constraint
DIP pins protruding through the board prevent mounting components directly beneath them on the opposite side, reducing PCB real estate efficiency.
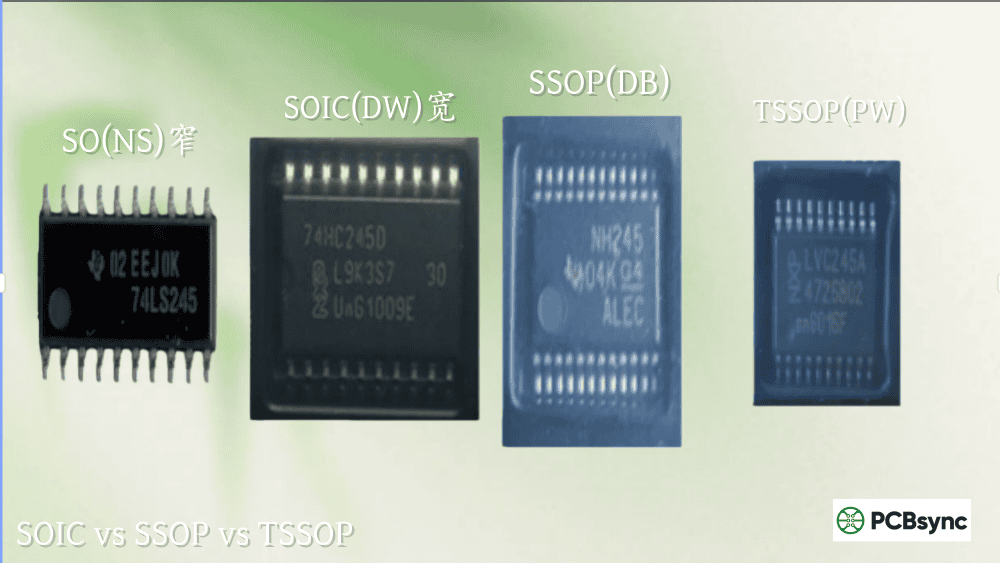
The SOIC (Small Outline Integrated Circuit) is essentially a surface-mount version of the DIP. Understanding when each makes sense helps with package selection:
Characteristic
DIP
SOIC
Mounting Type
Through-hole
Surface-mount
Lead Pitch
2.54mm
1.27mm
Package Height
3-5mm
1.5-2mm
Board Area
Larger
~50% smaller
Hand Soldering
Easy
Moderate
Breadboard Use
Yes
Requires adapter
Assembly Cost (volume)
Higher
Lower
Mechanical Strength
Excellent
Good
Frequency Performance
Limited
Better
Choose DIP when:
Prototyping on breadboards
Hand assembly or low volume
Field serviceability is required
Mechanical robustness is critical
Working with hobbyist/educational projects
Choose SOIC when:
Production volume justifies SMT setup
Board space is constrained
Better high-frequency performance needed
Lower assembly cost is priority
Common DIP Applications Today
While production electronics have moved to surface-mount, DIPs remain relevant in several areas:
Education and Learning
Electronics courses universally use DIPs because students can handle, insert, and solder them without specialized equipment. The visible pins help learners understand circuit connections.
Prototyping and Development
Engineers often prototype on breadboards using DIP-packaged components before transitioning to SMT for production. Many microcontroller development boards use DIP sockets for this reason.
Hobbyist Projects
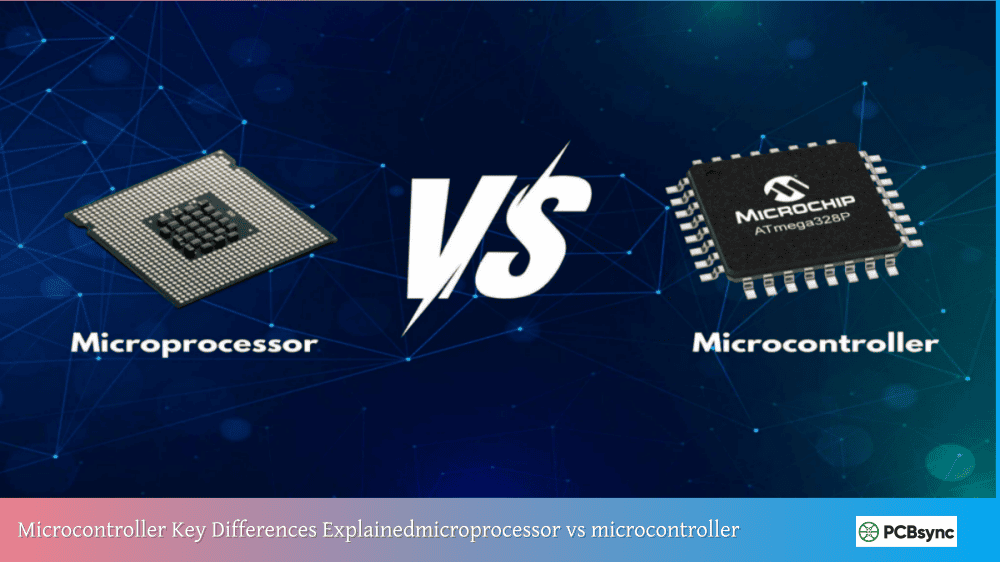
The maker community relies heavily on DIPs. Arduino-compatible ATmega328P microcontrollers, 555 timers, and classic logic ICs remain available in DIP packages specifically for hobbyist use.
Repair and Maintenance
Legacy equipment with DIP components can still be repaired because replacement parts remain available. Some industrial and military systems designed decades ago remain in service.
Industrial Controls
Certain industrial applications value the ruggedness and replaceability of socketed DIPs over surface-mount alternatives. PLCs and industrial controllers sometimes use DIP-packaged components for easy field replacement.
JEDEC Standards:jedec.org – Official package outline standards
Digi-Key/Mouser: Component distributors with detailed package specifications
Design Tools
KiCad: Free PCB design software with extensive DIP footprint libraries
Eagle: Popular PCB tool with comprehensive DIP support
SnapEDA: Free component footprints and symbols including DIPs
Learning Resources
Sparkfun Tutorials: Beginner-friendly guides on through-hole soldering
Adafruit Learning System: Excellent resources for working with DIP components
YouTube: Countless soldering tutorials for visual learners
Frequently Asked Questions
What does DIP stand for in electronics?
DIP stands for Dual In-Line Package. The “dual” refers to the two parallel rows of pins, and “in-line” describes how the pins align in straight rows along the package sides. It’s also sometimes called DIL (Dual In-Line). The package was invented in 1964 at Fairchild Semiconductor and became the dominant IC package for several decades.
How do I identify pin 1 on a DIP package?
Pin 1 is marked by a notch, dot, or both on one end of the package. With the notch or dot facing up and toward you, pin 1 is at the upper left corner. Pins then number counterclockwise: down the left side, then up the right side. Always verify orientation before powering a circuit—installing a DIP backward typically destroys the IC.
Can I use a DIP IC on a breadboard?
Yes, DIPs are specifically designed for breadboard compatibility. The standard 2.54mm (0.1 inch) pin pitch matches breadboard hole spacing exactly. Insert the DIP straddling the center channel of the breadboard so each row of pins goes into a different section. This gives you access to each pin through the connected rows.
Why are DIP packages still available if SMT is better?
DIPs serve purposes where surface-mount doesn’t excel: breadboard prototyping, hand soldering by hobbyists and students, field-replaceable components using sockets, and repair of legacy equipment. Major IC manufacturers continue producing popular parts in DIP packages because demand exists in education, hobby, and maintenance markets. The ease of handling and soldering DIPs makes them irreplaceable for certain applications.
What is the maximum pin count for DIP packages?
Standard DIP packages typically max out at 64 pins, though most common devices use 40 or fewer. The physical size becomes impractical beyond this—a DIP-64 is already quite large at roughly 56mm long and 23mm wide. For higher pin counts, designers switched to PGA (Pin Grid Array) for through-hole or QFP/BGA packages for surface-mount applications.
Conclusion
The DIP package represents a fundamental building block in electronics history. While the dual in-line package has been largely superseded by surface-mount technology in production electronics, it remains vital for prototyping, education, hobbyist projects, and legacy system maintenance.
Key points to remember about DIP packages:
Standard 2.54mm pin pitch provides breadboard compatibility
Pin 1 is marked by a notch or dot—always verify orientation
PDIP (plastic) is most common; CDIP (ceramic) handles extreme conditions
Easy hand soldering makes DIPs accessible to beginners
Size and pin count limitations restrict use in modern high-density designs
Whether you’re a student learning electronics fundamentals, a hobbyist building your next project, or an engineer prototyping a new design, understanding DIP packages provides essential foundation knowledge. The format may be decades old, but it continues earning its place in the electronics toolkit.
Inquire: Call 0086-755-23203480, or reach out via the form below/your sales contact to discuss our design, manufacturing, and assembly capabilities.
Quote: Email your PCB files to Sales@pcbsync.com (Preferred for large files) or submit online. We will contact you promptly. Please ensure your email is correct.
Notes: For PCB fabrication, we require PCB design file in Gerber RS-274X format (most preferred), *.PCB/DDB (Protel, inform your program version) format or *.BRD (Eagle) format. For PCB assembly, we require PCB design file in above mentioned format, drilling file and BOM. Click to download BOM template To avoid file missing, please include all files into one folder and compress it into .zip or .rar format.


