Inquire: Call 0086-755-23203480, or reach out via the form below/your sales contact to discuss our design, manufacturing, and assembly capabilities.
Quote: Email your PCB files to Sales@pcbsync.com (Preferred for large files) or submit online. We will contact you promptly. Please ensure your email is correct.
Notes: For PCB fabrication, we require PCB design file in Gerber RS-274X format (most preferred), *.PCB/DDB (Protel, inform your program version) format or *.BRD (Eagle) format. For PCB assembly, we require PCB design file in above mentioned format, drilling file and BOM. Click to download BOM template To avoid file missing, please include all files into one folder and compress it into .zip or .rar format.
If you’ve ever struggled to get consistent read range from your NFC design, or spent hours troubleshooting why your antenna works on the bench but fails in the enclosure, you’re not alone. I’ve been through dozens of NFC antenna PCB projects over the years, and the learning curve can be brutal without proper guidance.
This guide covers everything you need to know about designing, laying out, and tuning NFC antenna PCBs that actually work in real-world applications. No fluff—just practical knowledge from someone who’s made all the mistakes so you don’t have to.
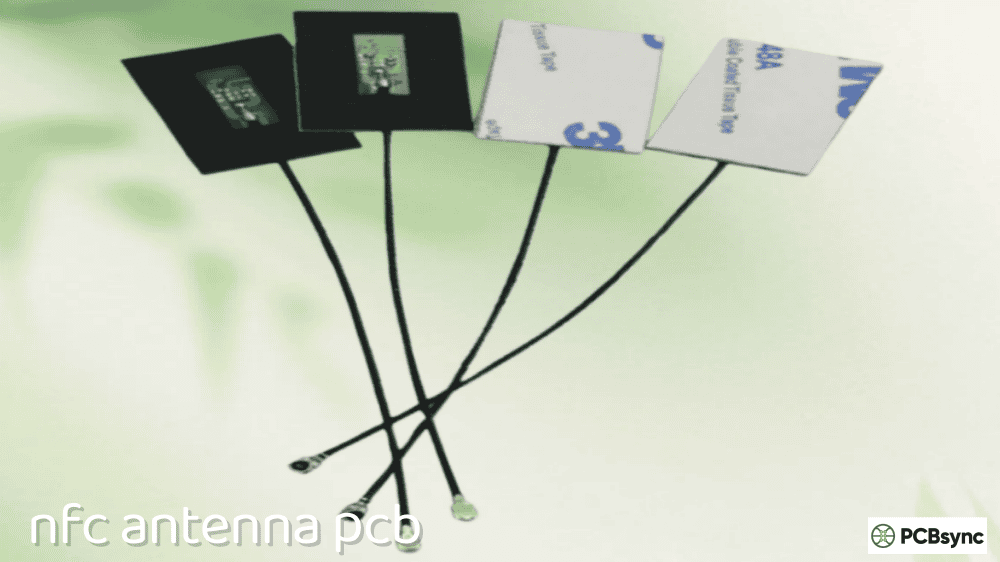
An NFC antenna PCB is a printed circuit board with an integrated loop coil antenna designed to operate at 13.56 MHz for near-field communication. Unlike traditional RF antennas that radiate electromagnetic waves into free space, NFC antennas work through magnetic induction in the near-field region, creating a coupling between the reader and tag.
The antenna is typically implemented as a planar spiral coil etched directly into the copper layer of the PCB. This coil forms an LC resonant circuit together with the NFC chip’s internal capacitance and any external tuning components. Getting this resonance right at 13.56 MHz is where most of the engineering effort goes.
Key Components of an NFC Antenna PCB
Every functional NFC antenna PCB consists of three essential elements working together. The coil antenna itself is the primary component, and its geometry directly determines the inductance, Q-factor, and coupling efficiency. Connected to the coil is the matching network, which typically consists of capacitors and sometimes resistors that tune the antenna to resonate at the correct frequency and match the impedance to the NFC IC. Finally, the NFC controller or tag IC handles all the communication protocols and provides the interface to your main system.
NFC Antenna PCB Design Fundamentals
Before diving into trace widths and turn counts, you need to understand what makes NFC antennas tick. This foundation will save you countless hours of trial and error.
Operating Principle at 13.56 MHz
NFC operates through inductive coupling at 13.56 MHz. The reader antenna generates an alternating magnetic field, and when a tag antenna enters this field, it picks up energy through mutual inductance. The tag then modulates this field to communicate back to the reader.
The resonant frequency of your antenna system is determined by the classic LC formula:
f = 1 / (2π√(LC))
For 13.56 MHz operation, you need to carefully match your antenna inductance with the total system capacitance. Most NFC ICs have internal tuning capacitance, so your job is to design an antenna with the right inductance value.
Target Inductance Values
Based on my experience and guidance from major IC manufacturers, here are the optimal inductance ranges:
Application Type
Target Inductance
Typical Turns
Notes
NFC Reader (50Ω match)
1.0 – 1.5 µH
2-4 turns
Texas Instruments, NXP readers
NFC Reader (direct drive)
0.3 – 3.0 µH
1-5 turns
Wide matching range available
NFC Tag (passive)
3.0 – 6.0 µH
5-10 turns
Higher inductance for better coupling
Smartphone-sized tag
2.0 – 4.0 µH
4-7 turns
Credit card form factor
The sweet spot for most reader designs is around 1 µH. This provides comfortable tuning range with standard capacitor values while maintaining a reasonable Q-factor.
Quality Factor (Q-Factor) Considerations
The Q-factor of your antenna determines both its efficiency and bandwidth. Here’s the trade-off you need to understand: a higher Q means better energy transfer but narrower bandwidth. For NFC applications, you want a Q-factor between 15 and 30 in the final matched system.
The antenna Q-factor before matching is typically higher (often 40-80 for a well-designed PCB coil), and you’ll reduce it during the matching process to achieve proper bandwidth for reliable data communication.
NFC Antenna PCB Dimensions and Sizing
Antenna size directly affects performance. Bigger isn’t always better, but there are clear relationships between dimensions and read range.
Common Antenna Dimensions
Application
Outer Dimensions
Optimal Turns
Typical Inductance
Wearables/IoT
15 × 10 mm
3-4 turns
0.8 – 1.5 µH
Smartphones
25 × 15 mm
4-5 turns
1.5 – 2.5 µH
Payment terminals
40 × 40 mm
3-4 turns
1.0 – 1.5 µH
Access control
50 × 50 mm
3-4 turns
1.2 – 1.8 µH
Credit card tags
50 × 80 mm (Class 1)
5-7 turns
3.0 – 5.0 µH
For tag antennas reading with smartphone readers, there’s no benefit going larger than credit card size (Class 1). Phone antennas are smaller than that, so you get diminishing returns beyond ~50×80 mm.
Trace Width and Spacing Guidelines
This is where many designers go wrong. The trace width and spacing directly impact both inductance and resistance.
Parameter
Recommended Range
Impact on Performance
Trace width
0.3 – 1.0 mm
Wider = lower resistance, lower inductance
Trace spacing
0.2 – 0.5 mm
Larger = lower parasitic capacitance
Copper thickness
1 oz (35 µm) or 2 oz (70 µm)
Thicker = lower resistance, better efficiency
Manufacturing tolerance
±0.05 mm (50 µm)
Critical for inductance accuracy
My go-to starting point for reader antennas is 0.5 mm trace width with 0.3 mm spacing on 2 oz copper. This gives a good balance between low resistance and manufacturable tolerances.
Inductance Calculation
For rectangular spiral antennas, the inductance can be approximated using this formula:
L = (µ₀ × N² × d_avg × c) / (1 + 2.47ρ)
Where:
N = number of turns
d_avg = average diameter
c = geometric constant (varies by shape)
ρ = fill ratio
Rather than calculating by hand, I recommend using online calculators or manufacturer tools:
Tool
Provider
Best For
NFC Antenna Design Hub
NXP
Reader antenna matching for NXP ICs
eDesign Suite NFC Inductance
STMicroelectronics
Tag and reader inductance calculation
Rectangular Antenna Calculator
RF Wireless World
Quick inductance estimates
Planar Coil Inductance Calculator
TranslatorsCafe
Multiple coil shapes
NFC Antenna PCB Layout Best Practices
Layout mistakes are the number one cause of NFC antenna problems I see in design reviews. Here’s how to avoid them.
Ground Plane Management
This is absolutely critical. Placing ground planes directly beneath your NFC antenna coil will kill your performance. The alternating magnetic field induces eddy currents in any nearby conductive plane, which weakens the field and detunes the antenna.
Required clearances:
Minimum clearance from coil to ground plane: 10 mm recommended
Absolute minimum (with performance penalty): 5 mm
For multi-layer boards: create a ground plane cutout under the antenna area
If you’re tight on space and can’t achieve 10 mm clearance, use a ferrite sheet between the antenna and ground plane. More on that later.
Trace Geometry Rules
Proper trace routing prevents inductance variations and signal integrity issues:
Corner treatment: Use 45° miters instead of 90° corners. Sharp corners create current crowding and impedance discontinuities. The inductance of a 90° corner is approximately 20% higher than a mitered corner.
Symmetry matters: Keep your spiral coil as symmetric as possible. Asymmetric designs create uneven current distribution and distort the magnetic field pattern.
Feed line routing: The traces connecting your coil to the matching network should be as short as possible and routed away from the coil to minimize coupling effects.
Multi-Layer Antenna Designs
When space is severely limited, you can stack coil turns across multiple layers. This doubles (or more) your inductance in the same footprint.
Two-layer approach:
Route clockwise spiral on top layer
Via to bottom layer
Continue spiral in same rotational direction
Connect turns in series for doubled inductance
Be careful with this approach. The inter-layer capacitance increases significantly, which can lower your self-resonant frequency. Keep the self-resonant frequency above 25 MHz to maintain comfortable tuning margin.
Component Placement
Your matching network components should be placed close to the antenna terminals, but not inside the coil area. A distance of 3-5 mm from the outermost turn is ideal.
For prototyping, include pads for an SMA or U.FL connector between the matching network and NFC IC. This allows you to connect a network analyzer for tuning without disturbing the rest of the circuit.
Impedance Matching and Tuning
Here’s where the real engineering happens. A perfectly designed antenna means nothing if it’s not properly matched to your NFC IC.
Understanding the Matching Network
Most NFC reader designs use a 3-element matching network (L-match or T-match configuration). This gives you flexibility to set both the impedance match and the system Q-factor.
Typical matching topology for NXP, ST, and TI readers:
Series capacitor (C1): Controls impedance magnitude
Shunt capacitor (C2): Controls imaginary part of impedance
If you have access to a Vector Network Analyzer (even an inexpensive NanoVNA works), here’s the tuning process I use:
Step 1: Measure the bare antenna
Disconnect antenna from matching network and NFC IC
Connect VNA directly to antenna terminals
Measure at 13.56 MHz and record L, R, C values from Smith chart
Step 2: Calculate initial matching values
Use manufacturer’s antenna design tool (NXP Antenna Design Hub or ST eDesign Suite)
Input measured antenna parameters
Get calculated component values for C1, C2, and any damping resistors
Step 3: Install and verify
Solder calculated components
Connect VNA between NFC IC and matching network (IC not powered!)
Target: impedance curve centered at 13.56 MHz with proper real component
Step 4: Fine-tune
Adjust C1 to change impedance magnitude
Adjust C2 to compensate imaginary part
Iterate until you hit target impedance
Tuning Without a VNA
Not everyone has a VNA on their bench. Here’s an alternative approach using an LCR meter:
Measure antenna inductance and resistance with LCR meter at 13.56 MHz
Calculate theoretical matching values using the formula in application notes
Use Smith chart software (free tools available) to simulate the match
Build and test—adjust by ±10-20% if read range is suboptimal
I’ve seen engineers get acceptable results this way, though a VNA gives much more confidence.
Metal Interference and Ferrite Shielding
This catches almost everyone the first time. Your antenna works perfectly on the bench, then completely fails when installed in the product enclosure.
How Metal Affects NFC Performance
When metal is placed near an NFC antenna, several bad things happen simultaneously:
Eddy current losses: The alternating magnetic field induces circulating currents in the metal, which dissipate energy as heat and reduce available field strength.
Inductance reduction: The eddy currents generate an opposing magnetic field, effectively reducing the antenna’s inductance and shifting its resonant frequency upward.
Q-factor degradation: Both effects combine to reduce the quality factor, broadening bandwidth but reducing efficiency.
Ferrite Shielding Solutions
Ferrite material placed between the antenna and metal surface redirects the magnetic field lines away from the metal. The ferrite acts as a magnetic “short circuit” that contains the field within the desired space.
Ferrite selection criteria:
High real permeability (µr’ > 100) at 13.56 MHz
Low imaginary permeability (µr” as low as possible for minimal losses)
Appropriate thickness (typically 0.3-1.0 mm)
Popular ferrite sheet materials include:
Laird Technologies Performance Materials
TDK FLEX-SUPPRESSOR
Murata NFM series
Important: Adding ferrite will change your antenna parameters. Expect inductance increase of 20-50% depending on ferrite properties. You’ll need to either redesign the antenna for lower inductance or adjust your matching network.
Compensation Strategies
Distance to Metal
Recommended Action
> 10 mm
No special measures needed
5-10 mm
Consider ferrite, retune antenna
2-5 mm
Ferrite required, significant retuning
< 2 mm
Ferrite required, antenna redesign likely
Always tune your antenna in its final environment. That means with the enclosure, battery, other PCBs—everything that will be present in the production unit.
Common NFC Antenna PCB Mistakes
After reviewing hundreds of NFC designs, these are the problems I see most often:
Mistake 1: Ground Plane Under Antenna
I mentioned this earlier, but it’s so common it deserves emphasis. The ground plane cutout should extend at least 10 mm beyond the outer edge of your coil. Use separate ground connections to tie the cutout area to the main ground if needed for EMC.
Mistake 2: Tuning in Free Space
Your antenna will behave differently once installed in the product housing. Always perform final tuning with the antenna in its actual operating environment. Plastic housings typically have minimal effect, but metal components anywhere within 10 mm will cause significant detuning.
Mistake 3: Ignoring Self-Resonant Frequency
Every spiral coil has inter-turn capacitance that creates a self-resonant frequency. If this frequency is too close to 13.56 MHz, matching becomes difficult or impossible. Target self-resonant frequency above 25 MHz—preferably above 40 MHz.
Mistake 4: Wrong Component Package Sizes
Use 0603 or larger components for your matching network, especially during prototyping. You’ll be swapping components frequently during tuning, and 0402 parts are a nightmare to hand-solder repeatedly. Also, smaller packages have worse tolerances at NFC frequencies.
Mistake 5: Insufficient Copper Thickness
Standard 1 oz copper (35 µm) works, but 2 oz copper (70 µm) significantly reduces resistive losses. The difference becomes more pronounced at smaller antenna sizes where trace resistance dominates.
Testing and Validation
Before signing off on any NFC antenna design, run through these validation checks:
Return Loss (S11) Measurement
Using a VNA, measure the return loss at 13.56 MHz. Target values:
Return loss < -10 dB: Acceptable
Return loss < -15 dB: Good
Return loss < -20 dB: Excellent
Read Range Testing
Test with multiple card/reader combinations:
ISO 14443 Type A and Type B cards
Different smartphone models (NFC antenna position varies)
Reference test cards (EMVCo or ISO reference PICs if available)
Environmental Testing
Verify performance across the operating temperature range. Ferrite permeability changes with temperature, and component values drift. Test at temperature extremes to catch issues before production.
Useful Resources and Tools
Here are the resources I keep bookmarked for NFC antenna design work:
Design Tools
Resource
URL
Description
NXP NFC Antenna Design Hub
nxp.com/nfc-antenna-design-hub
Complete tool for NXP reader ICs
ST eDesign Suite
eds.st.com
NFC inductance and tuning calculators
RF Wireless World Calculator
rfwireless-world.com/calculators
Quick inductance calculations
TranslatorsCafe Calculator
translatorscafe.com
Multi-shape planar coil calculator
Application Notes (Essential Reading)
Document
Manufacturer
Topic
AN13219
NXP
PN7160 antenna design and matching
AN12549
NXP
PN5190 antenna design
SLOA241
Texas Instruments
TRF79xxA antenna design
AN2972
STMicroelectronics
Dynamic NFC tag antenna design
AN5276
STMicroelectronics
ST25R3916 antenna design
AN11276
NXP
NTAG antenna design guide
Standards Reference
Standard
Description
ISO/IEC 14443
Proximity cards (Type A and B)
ISO/IEC 15693
Vicinity cards
NFC Forum specifications
NFC-A, NFC-B, NFC-F, NFC-V
FAQs
What is the ideal size for an NFC antenna PCB?
There’s no single ideal size—it depends on your application. For reader antennas in payment terminals, 40×40 mm is a common reference design that provides good read range with standard cards. For tag antennas that will be read by smartphones, anything from 25×15 mm to 50×80 mm works well. Going larger than credit card size offers no benefit when reading with phone-sized reader antennas.
How do I calculate the inductance of a rectangular NFC antenna?
Use the modified Wheeler formula or online calculators. Input your outer dimensions, trace width, trace spacing, and number of turns. NXP’s Antenna Design Hub and ST’s eDesign Suite both provide accurate inductance calculations. For prototyping, design multiple antenna variants with inductance values varying ±15% around your target, then measure and select the best performer.
Why does my NFC antenna work on the bench but fail in the enclosure?
This is almost always due to metal proximity effects. Nearby metal reduces antenna inductance and increases losses through eddy currents. The solution is either to increase spacing to metal (minimum 10 mm), add ferrite shielding between antenna and metal, or redesign the antenna with higher inductance to compensate for the reduction.
Can I use a 4-layer PCB for my NFC antenna?
Yes, but with careful attention to ground plane cutouts. Remove the inner ground and power planes from the area beneath your antenna coil. If inner planes must pass near the antenna, keep them at least 5 mm from the coil edge and use ferrite shielding. Some designers use the inner layers for the matching network while keeping the antenna on outer layers.
How do I tune an NFC antenna without expensive equipment?
Start by measuring your antenna inductance with an LCR meter at 13.56 MHz. Use manufacturer design tools to calculate initial matching component values. An inexpensive NanoVNA (under $50) provides surprisingly good results for NFC antenna tuning—it’s adequate for this frequency range. Some engineers successfully tune by iteratively adjusting component values and testing read range, though this takes longer than VNA-guided tuning.
Conclusion
Designing an effective NFC antenna PCB requires attention to inductance calculation, proper layout practices, and careful impedance matching. The key points to remember are: target 1-1.5 µH for reader antennas or 3-6 µH for tag antennas, maintain adequate clearance from ground planes and metal surfaces, use ferrite shielding when metal proximity is unavoidable, and always tune in the final operating environment.
The difference between an NFC design that barely works and one that performs reliably comes down to these details. Take the time to understand the fundamentals, use the manufacturer tools and application notes, and build in prototyping flexibility for tuning. Your production units will thank you with consistent, reliable NFC performance.
Inquire: Call 0086-755-23203480, or reach out via the form below/your sales contact to discuss our design, manufacturing, and assembly capabilities.
Quote: Email your PCB files to Sales@pcbsync.com (Preferred for large files) or submit online. We will contact you promptly. Please ensure your email is correct.
Notes: For PCB fabrication, we require PCB design file in Gerber RS-274X format (most preferred), *.PCB/DDB (Protel, inform your program version) format or *.BRD (Eagle) format. For PCB assembly, we require PCB design file in above mentioned format, drilling file and BOM. Click to download BOM template To avoid file missing, please include all files into one folder and compress it into .zip or .rar format.


