Inquire: Call 0086-755-23203480, or reach out via the form below/your sales contact to discuss our design, manufacturing, and assembly capabilities.
Quote: Email your PCB files to Sales@pcbsync.com (Preferred for large files) or submit online. We will contact you promptly. Please ensure your email is correct.
Notes: For PCB fabrication, we require PCB design file in Gerber RS-274X format (most preferred), *.PCB/DDB (Protel, inform your program version) format or *.BRD (Eagle) format. For PCB assembly, we require PCB design file in above mentioned format, drilling file and BOM. Click to download BOM template To avoid file missing, please include all files into one folder and compress it into .zip or .rar format.
How to Safely Discharge a Capacitor: Step-by-Step Guide
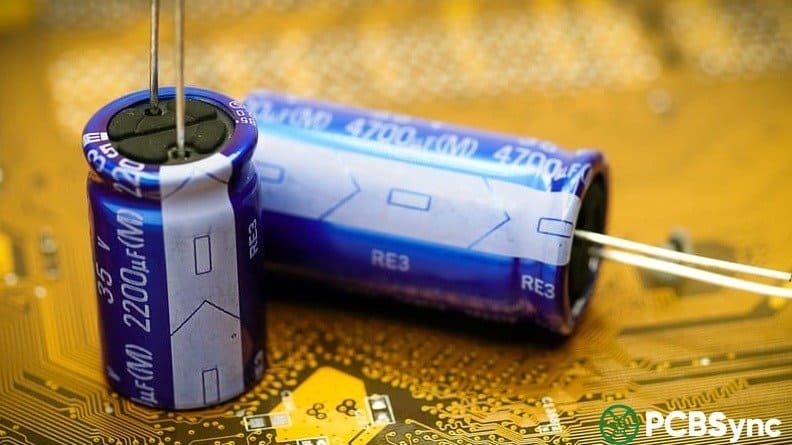
Knowing how to discharge a capacitor is one of the most fundamental safety skills in electronics work, and one that gets skipped far too often. A capacitor stores electrical energy between its plates and holds that charge even after the circuit has been switched off and the power supply disconnected. The voltage doesn’t drain away on its own in any useful timeframe — a bulk filter capacitor in a PC power supply can still hold over 300V thirty seconds after you unplug the machine. A camera flash capacitor can sit at 330V for days. A microwave oven high-voltage capacitor can hold lethal charge for hours.
This guide covers every practical method to safely discharge a capacitor: the physics behind why you need to do it, how to calculate the right discharge resistor, step-by-step procedures for different scenarios, and the situations where a simple resistor isn’t enough. Written from a working PCB and electronics repair perspective, with the emphasis on what actually protects you versus what looks like it should work but doesn’t.
Before getting into methods, it’s worth understanding why this matters at a physical level. A capacitor stores energy in an electric field between its plates. The stored energy is:
E = ½ × C × V²
Even at relatively modest voltages, a large electrolytic can store enough energy to cause serious harm. A 1,000µF capacitor charged to 400V stores 80 joules — more than enough to cause a fatal shock under the right conditions. A motor run capacitor in an HVAC unit (5µF at 440V) stores about 0.5 joules — lower energy, but still capable of delivering a painful and dangerous shock across your hands.
The trap is that turning off or unplugging a device cuts the charging current but gives the capacitor no path to discharge. Many power supplies do include bleeder resistors — high-value resistors permanently connected across the filter capacitors to drain them over time. But bleeder resistors can fail open, and many modern efficient designs omit them entirely to reduce standby power draw. Never assume a device has bled itself down just because it’s been off for a few minutes.
## Safety Gear and Workspace Setup Before You Begin
Getting the discharge environment right before you start matters. High-voltage work especially requires proper preparation.
Insulated rubber gloves rated for the voltage you’re working with. For low-voltage consumer electronics under 50V the risk is low, but for anything above 50V, gloves rated at 1,000V minimum are appropriate. For mains-connected equipment and HVAC systems, use gloves rated for the application.
Safety glasses or goggles. A capacitor discharged incorrectly — through a screwdriver short, for example — can cause a sharp spark or in extreme cases cause the capacitor to vent or rupture. Eye protection is non-negotiable.
One-hand rule. When probing or connecting to a potentially live circuit, keep one hand away from the equipment. If a shock occurs, it travels from one hand, through your arm, and can cross your chest to reach the other hand — passing through your heart. Keeping one hand in your pocket or behind your back eliminates that path.
Dry, non-conductive workspace. Work on a rubber mat or wooden bench. Avoid metal workbenches without an insulating layer. Never work near water.
## The RC Time Constant: How Long Does Discharge Actually Take?
The foundation of any planned discharge procedure is the RC time constant (τ = R × C), which describes how fast a capacitor voltage decays through a resistor:
V(t) = V₀ × e^(−t/RC)
Where V₀ is the initial voltage, R is the discharge resistance in ohms, C is the capacitance in farads, and t is time in seconds.
The key reference points every working engineer should know by heart:
After 1 time constant (τ = RC): voltage drops to 36.8% of initial value
After 2τ: drops to 13.5%
After 3τ: drops to 5%
After 5τ: drops to 0.7% — effectively discharged for most practical purposes
For safe handling, the goal is to get below a safe threshold — generally accepted as below 50V for mains-derived circuits, or below 1V for sensitive component handling. The time required to reach a target voltage from an initial voltage is:
t = RC × ln(V₀ / V_target)
RC Time Constant Discharge Reference:
Time Elapsed
Voltage Remaining (% of initial)
Practical Status
1τ (= 1 × R × C)
36.8%
Still significant — keep discharging
2τ
13.5%
Still potentially dangerous above 50V initial
3τ
5.0%
Approaching safe for medium-voltage circuits
5τ
0.7%
Considered fully discharged for most purposes
7τ
0.09%
Essentially zero — safe for any circuit
Practical example: A 1,000µF capacitor charged to 350V, discharged through a 10kΩ resistor:
τ = R × C = 10,000 × 0.001 = 10 seconds
Time to reach 1V = RC × ln(350/1) = 10 × 5.86 = 58.6 seconds
This is why you should always wait significantly longer than you think you need to, and always verify with a meter afterward.
## Method 1: Resistor Discharge — The Safe Standard Procedure
The resistor method is the correct, safe approach for virtually all electronics work. It controls the discharge current, prevents damage to the capacitor, and eliminates dangerous sparks. The resistor converts the capacitor’s stored energy into heat at a rate governed by the resistance value.
### Choosing the Right Discharge Resistor
Two parameters matter: resistance value and power rating.
Resistance value determines both discharge speed and peak current. A lower resistance discharges faster but draws higher initial current and generates more peak heat in the resistor. A higher resistance is slower but gentler and safer. For most electronics work, 1kΩ to 100kΩ covers the range from fast-but-safe to slow-but-very-safe.
Power rating determines whether the resistor can handle the energy without overheating or burning out. The peak power dissipated at the moment of connection is P = V² / R. For a 350V capacitor connected to a 10kΩ resistor: P = 350² / 10,000 = 12.25W at the first instant. The resistor doesn’t sustain that peak for long, but you still need a part rated above it. A 5W resistor would immediately overheat. A 20W or 25W wirewound resistor handles it safely.
Always choose a resistor with at least 2× the calculated peak power rating as a safety margin. Ceramic or wirewound resistors are preferred for this application — carbon film resistors can fail under high-energy transients.
Discharge Resistor Selection by Application:
Application / Voltage Range
Typical Capacitance
Recommended Resistor
Minimum Power Rating
Wait Time
Low-voltage PCB, under 50V
Any
1kΩ–10kΩ
1W
5–15 seconds
PC desktop power supply, 300–420V
100µF–1,000µF
10kΩ–20kΩ
10–25W
60–120 seconds
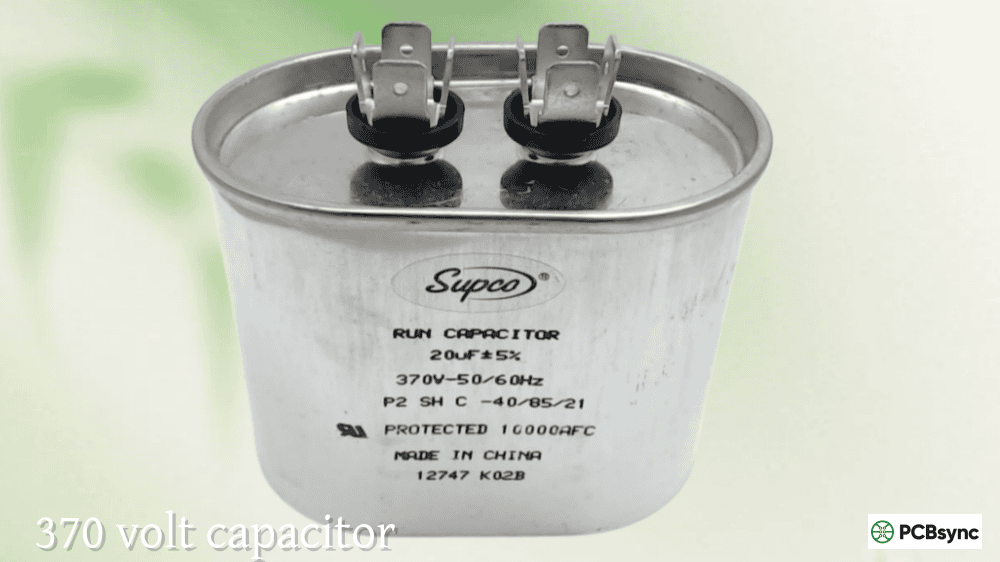
HVAC motor run capacitor, 370–440V
1µF–100µF
10kΩ–50kΩ
5–10W
30–60 seconds
Camera flash capacitor, 300–350V
100µF–1,000µF
10kΩ–20kΩ
10–25W
60–90 seconds
Microwave HV capacitor, 800–2,100V
0.9µF–1.2µF
50kΩ–100kΩ
10–20W
60–120 seconds
Audio amplifier power supply, 50–100V
1,000µF–10,000µF
10kΩ
5W
60–120 seconds
Industrial motor drive, 600–1,200V
Varies
Manufacturer spec / specialist tool
Per energy stored
Per manufacturer
### Step-by-Step: Resistor Discharge Procedure
Step 1 — Disconnect all power sources. Unplug from mains, disconnect DC supply leads, and remove any backup batteries. Do not rely on a front-panel switch alone — switches on the input side disconnect the charging path but leave the capacitor fully charged with no discharge route.
Step 2 — Wait 30–60 seconds. Some circuits include built-in bleeder resistors that begin draining the capacitor immediately. Give them time to work. Do not treat this as a substitute for verification — bleeder resistors age and fail.
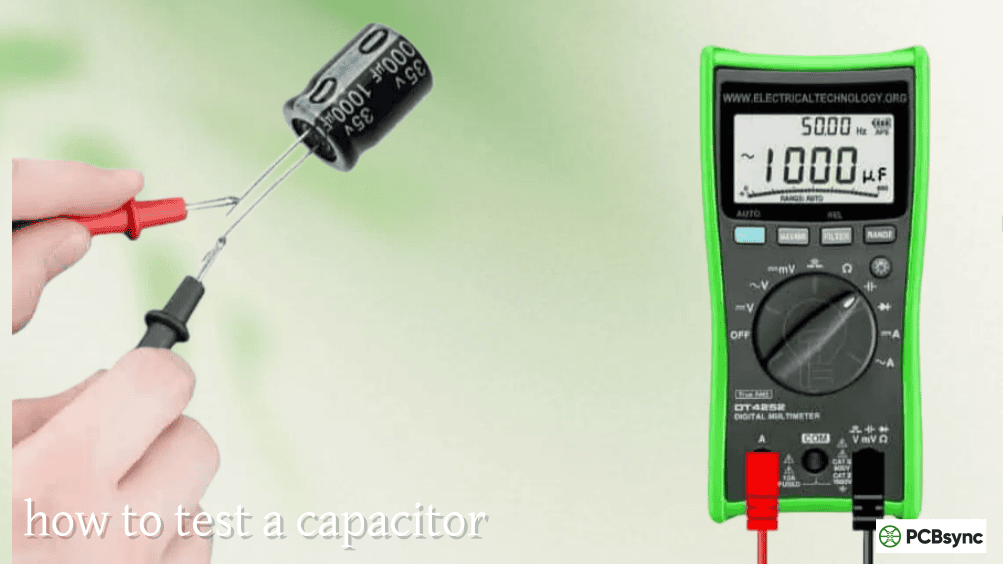
Step 3 — Measure initial voltage. Set your multimeter to DC volts at a range above the expected voltage. If you don’t know the voltage, start at the highest range available. Touch the red probe to the positive terminal of the capacitor and the black probe to the negative. Note the reading. This establishes what you’re working with.
Step 4 — Select and prepare the discharge resistor. Based on the table above, choose an appropriate resistance and power rating. Attach alligator clip leads to both ends of the resistor. Do not plan to hold the resistor in your fingers — it can reach 80–100°C at the peak of discharge.
Step 5 — Connect the resistor across the terminals. Clip one lead to the positive terminal and the other to the negative. Keep your hands away from both the resistor body and the capacitor terminals once connected.
Step 6 — Wait the full discharge time. Use the 5τ rule: wait for five times the RC time constant calculated for your resistor and capacitor values. Add margin — waiting 7τ costs nothing and eliminates residual charge concerns.
Step 7 — Remove the resistor and verify with the multimeter. Disconnect the clip leads and remeasure voltage across the capacitor terminals. The reading should be below 1V for safe component-level work, or below 10V for general servicing. If significant voltage remains, reconnect the resistor and wait longer.
Step 8 — Brief terminal short for critical work. For work on sensitive components or precision circuits, after meter verification, briefly touch an insulated wire between both terminals. No spark and no meter reading confirms full discharge.
For capacitors in the 50–400V range, a tungsten incandescent light bulb rated above the capacitor voltage can be used as a discharge load in place of a resistor. The bulb provides immediate visual feedback: it glows brightly at initial connection and dims progressively to dark as the capacitor discharges.
Connect the bulb across the capacitor terminals using insulated leads. Once the bulb is completely dark, wait an additional 30 seconds, then verify with a multimeter. The visual indication is useful for large capacitors where the discharge process takes a minute or more — you can watch the progress without repeatedly probing the circuit.
One limitation: a tungsten bulb’s resistance is non-linear. It starts cold (low resistance, high current) and rises as the filament heats up, which means the discharge curve is steeper at first and slower later than a fixed resistor. For controlled, predictable discharge, the fixed resistor method is more reliable. For a field situation where you have a lamp but not a specific resistor, the bulb method is entirely workable — just verify afterward.
## Method 3: Dedicated Discharge Tool
If you regularly service equipment with hazardous capacitors, a purpose-built discharge tool is the professional approach. The basic design is simple: two insulated probe leads, a current-limiting resistor sized for the voltage class you work with, and optionally an LED indicator that extinguishes when the terminal voltage drops below the LED forward voltage.
The iFixit guide to constructing a discharge tool (linked in resources) covers the build with appropriate wire gauge and resistor ratings for power supply, motor start, and camera flash capacitors. Commercial discharge tools are also available and typically include rated probes, indicating LEDs, and sometimes audible confirmation.
A dedicated tool eliminates the improvisation from each job — you pick it up, clip on, wait for the LED to go out, verify with the meter, proceed. It’s faster and more reliable than assembling a discharge setup from loose components each time.
The screwdriver short is the method most commonly described in casual online advice and the one that should never be used on any capacitor above trivial voltages.
Shorting a capacitor directly through a screwdriver collapses the voltage to near-zero in microseconds. For a large capacitor, all stored energy releases as a single high-current arc. The peak current is limited only by the capacitor’s own internal resistance, which can be well under 0.5Ω for large electrolytics. For a 350V, 1,000µF capacitor, the peak short-circuit current can reach hundreds of amperes for the first fraction of a millisecond.
That arc can damage the screwdriver tip, weld it to the terminal, cause the capacitor to vent or rupture explosively, deposit vaporised metal as conductive contamination across the PCB, and startle you enough to drop tools into the live circuit. It also creates a shock pulse through the discharge path. Beyond the immediate hazard, it stresses the capacitor dielectric and shortens the component’s life.
The only situation where a brief screwdriver short is broadly accepted is for very small signal capacitors — a few µF or less at voltages under 5V — where the stored energy is so small that no arc, no damage, and no shock is possible. Anything involving mains-voltage or motor circuits: use the resistor method, every time.
## Special Case: Microwave Oven High-Voltage Capacitors
Microwave ovens deserve their own section because they contain the most dangerous capacitors found in consumer products. The magnetron power supply uses a voltage-doubler circuit that charges a high-voltage capacitor to 2,000–2,100V DC from a standard mains supply. The capacitor is typically rated at 0.9µF to 1.2µF at 2,100V.
The stored energy at 2,100V in a 1µF capacitor: E = ½ × C × V² = ½ × 0.000001 × 2,100² = 2.2 joules
That number looks modest compared to a PC power supply bulk cap, but at 2,100V the delivered current creates severe risk of cardiac arrest. Many microwave circuits include a bleeder resistor across the HV capacitor, but these frequently fail over time. The capacitor can retain lethal charge for many hours after the unit is unplugged.
The correct procedure requires a dedicated HV discharge tool with a 50kΩ–100kΩ resistor rated at 10–20W, connected on insulated leads at least 1 metre long. Connect one lead at a time, keeping your body well away from both terminals. Wear HV-rated insulating gloves. Verify with a high-voltage rated multimeter — a standard DMM with a 600V rating is not appropriate here. If you do not have HV-rated test equipment and insulating gloves, do not open a microwave oven.
Discharge Requirements by Device Type:
Device Type
Voltage
Key Risk
Required Discharge Method
PC / server power supply
300–420V DC
Held after shutdown; bleeder often absent
10kΩ–20kΩ, 10–25W resistor; verify under 1V
Laptop power brick output
12–20V DC
Low risk in normal use
1kΩ, 1W resistor sufficient
Camera flash
300–350V DC
Battery charges cap even when off
10kΩ–20kΩ, 10–25W; disconnect battery first
HVAC motor run cap
370–440V AC-rated
Service call hazard; always treat as live
10kΩ–50kΩ, 5–10W; do not trust internal bleeder
Microwave oven HV supply
1,800–2,100V DC
Lethal; retained for hours
50kΩ–100kΩ, 10–20W; HV gloves; HV-rated meter
Audio amplifier power rail
50–120V DC
Often overlooked in repair work
10kΩ, 5W resistor; wait 60+ seconds
CRT television / monitor
25–35kV (anode)
Extremely dangerous; charge on glass
Specialist HV probe only; not DIY
Industrial motor drive
600–1,200V DC
High stored energy; lockout required
Manufacturer procedure + lockout/tagout
## Verifying Complete Discharge
After every discharge procedure, measure with your multimeter before touching anything. Set to DC voltage, range above the initial measured value, probes across the capacitor terminals. For general servicing work, below 10V is a reasonable safe threshold. For component-level repair where you’ll be handling the PCB directly, target below 1V. For precision work or sensitive components, discharge to near zero and wait 5 additional minutes before proceeding to allow dielectric absorption residuals to decay.
If the voltage does not drop as expected during discharge, check that all power sources are genuinely disconnected. A circuit that continues charging a capacitor while you’re trying to discharge it is an indication that a supply is still connected somewhere — track it down before proceeding.
Q1: How do I calculate what resistor I need to discharge a capacitor?
Calculate the peak power first: P_peak = V² / R, where V is the initial capacitor voltage and R is your chosen resistance. Your resistor must be rated above this peak. For a 400V capacitor and 10kΩ resistor, P_peak = 400² / 10,000 = 16W — use a 25W wirewound resistor at minimum. Then calculate your 5τ wait time: τ = R × C in seconds (with R in ohms and C in farads), then wait 5τ. For a 1,000µF cap and 10kΩ resistor, τ = 10 seconds, so wait 50 seconds minimum. As a practical shortcut for any mains-voltage capacitor up to 1,000µF: a 10kΩ, 25W resistor with a 60-second wait is a conservative, safe default. The DigiKey RC time constant calculator in the resources section does all the maths if you input your actual values.
Q2: Does unplugging a device discharge its capacitors?
No. Unplugging removes the charging source but gives the capacitor no discharge path. The charge stays on the plates indefinitely in an ideal capacitor, and for hours or days in a real one. Some devices include bleeder resistors specifically to drain the capacitors after power-off — a good design practice — but these resistors can fail open, and many modern designs omit them to reduce standby power. The only way to know whether capacitors are discharged is to measure with a multimeter. Assume they are still charged until your meter says otherwise.
Q3: How long should I wait before touching a capacitor after disconnecting power?
There’s no fixed time that applies universally. The correct answer is: wait until you’ve measured under 1V with a multimeter. The wait time with a discharge resistor connected depends on the RC time constant — 5τ gives you to 0.7% of initial voltage, 7τ to under 0.1%. Without a discharge resistor, the discharge time depends entirely on the circuit’s internal bleeder resistors (if any), leakage paths, and the capacitor’s own self-discharge characteristics. Large, high-quality electrolytics in a well-designed circuit can retain charge for 30 minutes or longer after shutdown with no bleeder. In practice, for any mains-connected equipment, connect a discharge resistor, wait 5τ, and verify with a meter — don’t rely on elapsed time alone.
Q4: Can a discharged capacitor become dangerous again if I leave it sitting?
Yes, in two scenarios. The first is dielectric absorption: after discharge, a small amount of charge trapped in the dielectric material slowly migrates back to the plates, producing a low residual voltage — typically a few volts to tens of volts in a large electrolytic. This is normally too small to be a shock hazard but can cause unexpected behaviour in sensitive circuits. The second, more serious scenario: if the capacitor is still connected to a circuit where any charging source remains active (a battery, a second supply rail, a transformer still energised via another path), the capacitor will recharge through that path. This is why disconnecting all power sources — not just the main one — before discharge work is essential. Always reverify with a meter immediately before any contact with the circuit.
Q5: Is there any difference between discharging an AC-rated capacitor and a DC-rated one?
The discharge procedure is the same regardless of AC or DC voltage rating — connect a resistor across the terminals and wait for the voltage to drop to safe levels, then verify with a meter. The AC voltage rating on a motor run capacitor refers to the maximum AC voltage the capacitor is designed to withstand in operation, not that it operates differently in a discharge context. When a motor run capacitor is disconnected from a running motor circuit, it holds a DC charge at whatever voltage was across it at the moment of disconnection — it discharges the same way as any other capacitor through a resistor load. The main practical difference with AC-rated capacitors used in motor applications is that they can hold charge in non-obvious ways: a motor circuit can charge the capacitor through back-EMF from the motor coils even after the supply is switched off. Always wait 30–60 seconds after disconnecting a motor circuit before touching any capacitors, and then verify with a meter.
## Making Safe Discharge a Reflex
The engineers who work safely around capacitors for decades are the ones who made this procedure automatic before they ever encountered a close call. The sequence never varies: power off — wait — measure — discharge — verify — proceed.
The resistor and alligator clip leads for discharge take up almost no space in a tool bag. Keep them there, labelled, so reaching for them is as automatic as reaching for your meter. The sixty seconds a controlled discharge takes is not a slowdown in your workflow — it’s the standard procedure that makes every other step safe to do at all.
Inquire: Call 0086-755-23203480, or reach out via the form below/your sales contact to discuss our design, manufacturing, and assembly capabilities.
Quote: Email your PCB files to Sales@pcbsync.com (Preferred for large files) or submit online. We will contact you promptly. Please ensure your email is correct.
Notes: For PCB fabrication, we require PCB design file in Gerber RS-274X format (most preferred), *.PCB/DDB (Protel, inform your program version) format or *.BRD (Eagle) format. For PCB assembly, we require PCB design file in above mentioned format, drilling file and BOM. Click to download BOM template To avoid file missing, please include all files into one folder and compress it into .zip or .rar format.


