Inquire: Call 0086-755-23203480, or reach out via the form below/your sales contact to discuss our design, manufacturing, and assembly capabilities.
Quote: Email your PCB files to Sales@pcbsync.com (Preferred for large files) or submit online. We will contact you promptly. Please ensure your email is correct.
Notes: For PCB fabrication, we require PCB design file in Gerber RS-274X format (most preferred), *.PCB/DDB (Protel, inform your program version) format or *.BRD (Eagle) format. For PCB assembly, we require PCB design file in above mentioned format, drilling file and BOM. Click to download BOM template To avoid file missing, please include all files into one folder and compress it into .zip or .rar format.
Ceiling Fan Capacitors: Troubleshooting & Replacement Guide
After spending years diagnosing motor control circuits and helping countless homeowners understand why their fans stopped working, I can tell you that the ceiling fan capacitor is responsible for more service calls than any other component. That small black box tucked inside your fan’s switch housing does critical work, and when it fails, the symptoms can range from annoying to completely disabling your fan.
This guide covers everything you need to know about ceiling fan capacitors, from understanding how they work to diagnosing problems, selecting the right replacement, and completing the swap yourself. Whether your fan won’t start, runs painfully slow, or only works on one speed, there’s a good chance you’ll find your answer here.
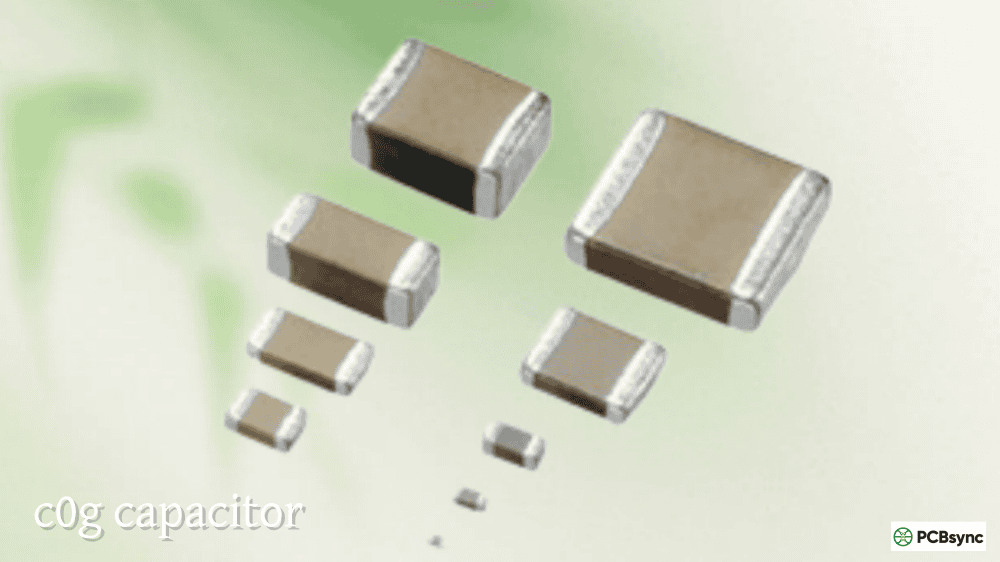
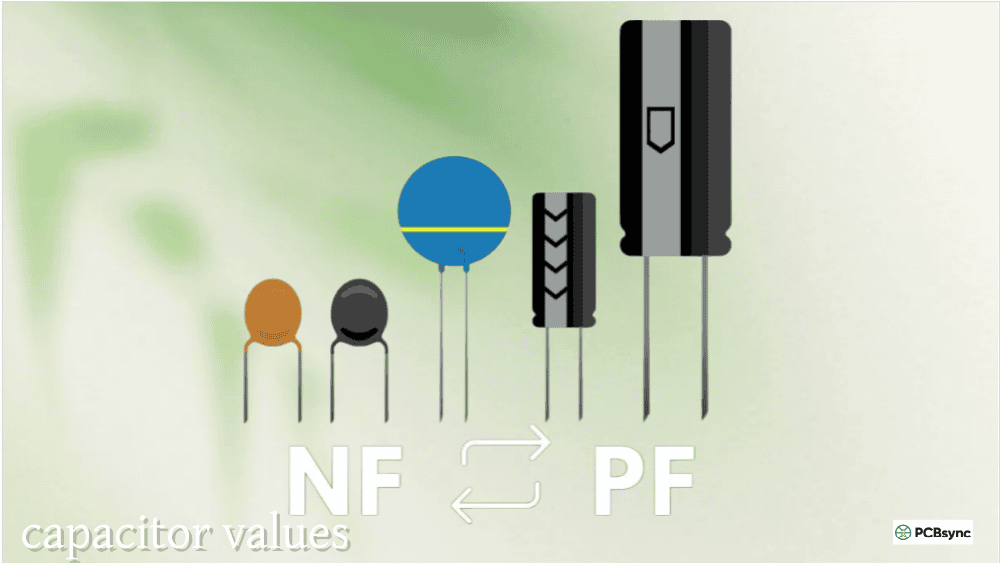
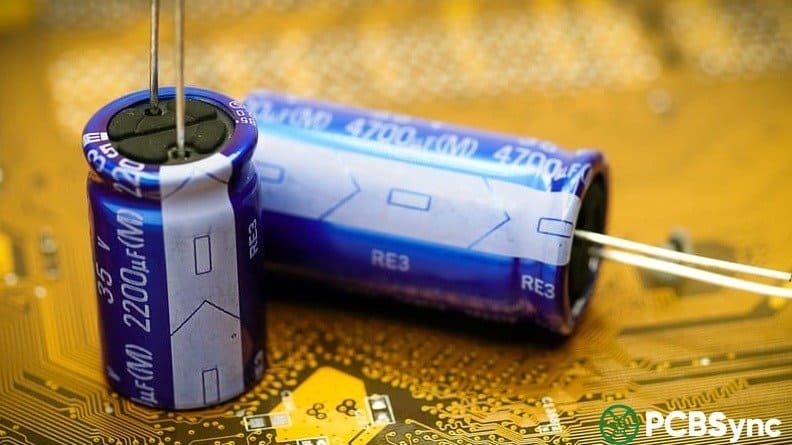
A ceiling fan capacitor is a non-polarized AC Capacitor that enables your fan’s motor to start and run at different speeds. It’s typically a small rectangular or cylindrical component housed in black plastic, located inside the fan’s switch housing or canopy.
The capacitor performs two essential functions in your ceiling fan. First, it creates the phase shift necessary to start the motor. Single-phase AC power doesn’t naturally create a rotating magnetic field, so the capacitor shifts the timing of current in one motor winding relative to the other. This phase difference generates the rotating magnetic field that gets your fan blades spinning. Second, the capacitor controls fan speed. Multi-speed ceiling fans use capacitors with different values for each speed setting. When you pull the chain or press the remote to change speeds, the fan’s switch selects different capacitor sections, changing the phase relationship and resulting motor speed.
Without a functioning capacitor, your ceiling fan motor would simply hum without spinning, or if given a manual push, might rotate weakly and inconsistently.
How Ceiling Fan Capacitors Control Speed
Understanding how capacitors control fan speed helps explain why certain failure symptoms point directly to capacitor problems.
The Phase Shift Principle
Ceiling fans use permanent split capacitor (PSC) motors, which have two sets of windings positioned 90 degrees apart around the stator. The main winding connects directly to the power supply, while the auxiliary winding connects through the capacitor.
The capacitor causes current in the auxiliary winding to lead the current in the main winding by approximately 90 degrees. This timing difference creates two magnetic fields that peak at different moments, producing a rotating magnetic field that drags the rotor around.
Speed Control Through Capacitance
Changing the capacitor value changes the phase relationship between windings, which affects motor torque and speed. Higher capacitance values generally produce higher speeds, while lower values produce lower speeds. This is why multi-speed fans use capacitors with multiple sections, each providing a different capacitance value for low, medium, and high speed settings.
A typical 3-speed fan might use capacitor values like 1.5 µF for low speed, 2.5 µF for medium speed, and 4 µF for high speed. The fan’s speed switch selects which capacitor section connects to the circuit.
Types of Ceiling Fan Capacitors
Ceiling fan capacitors come in several configurations based on the number of wires and capacitance values they contain.
2-Wire Capacitors
The simplest configuration has two wires and a single capacitance value. These are found in basic single-speed fans or as individual capacitors in fans that use multiple separate capacitors for speed control.
3-Wire Capacitors
Three-wire capacitors contain two capacitor sections sharing a common wire. They typically have one common wire (often gray) and two value-specific wires (different colors for each capacitance). These are commonly found in 2-speed fans.
4-Wire and 5-Wire Capacitors
Multi-wire capacitors (4-wire, 5-wire, or more) contain multiple capacitor sections for fans with three or more speed settings. Each wire connects to a different capacitance value, with one or two common wires shared between sections.
For example, a 5-wire capacitor might have two gray common wires and three colored wires for 4.5 µF, 5 µF, and 6 µF values respectively. The speed switch selects different combinations to achieve various speeds.
CBB61 Capacitors
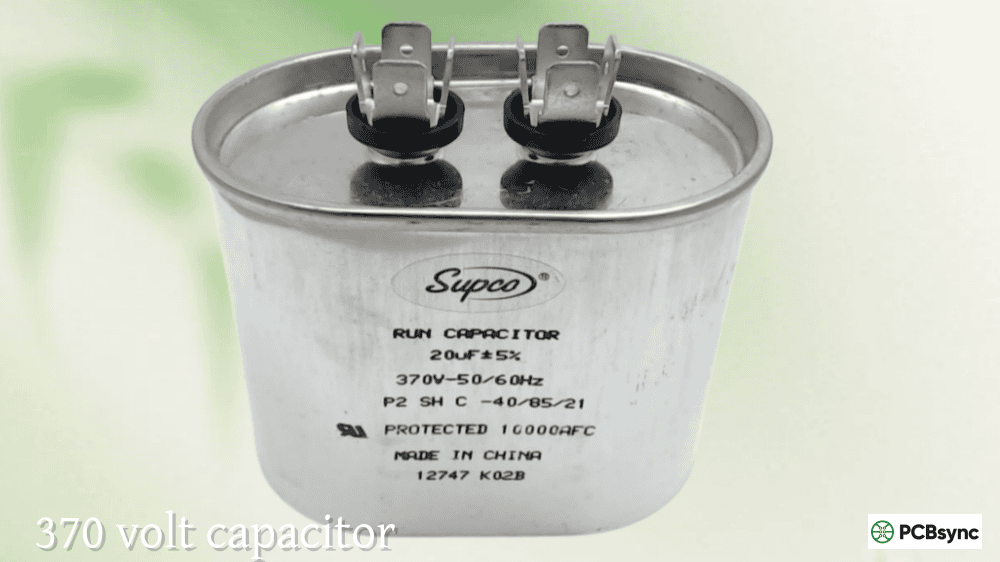
CBB61 is the industry designation for metallized polypropylene film capacitors commonly used in ceiling fans. These capacitors are designed specifically for AC motor applications, featuring self-healing construction that can recover from minor dielectric breakdowns, low loss characteristics for cool operation, high humidity resistance, and voltage ratings typically between 250V and 450V AC.
When shopping for replacement capacitors, you’ll frequently encounter the CBB61 designation regardless of wire count.
The following table summarizes common ceiling fan capacitor configurations:
Wire Count
Capacitor Sections
Typical Application
Example Values
2-wire
Single
Single-speed fans, individual replacement
2 µF, 3 µF, 4 µF
3-wire
Dual (shared common)
2-speed fans
1.5 µF + 2.5 µF
4-wire
Triple or dual
3-speed fans
3 µF + 4 µF + 5 µF
5-wire
Triple (dual common)
3-speed fans
4.5 µF + 5 µF + 6 µF
Ceiling Fan Capacitor Specifications
Selecting the correct replacement capacitor requires matching several key specifications.
Capacitance Value (Microfarads)
The microfarad (µF) rating must match the original capacitor exactly. Using incorrect capacitance values causes speed problems at best and motor damage at worst. For multi-wire capacitors, all values must match.
If you can’t find an exact match, staying within ±5% of the original value is generally acceptable. A ±1 µF difference on a 5 µF rating might affect speed slightly but usually won’t cause damage. However, larger deviations can cause the motor to overheat or perform poorly.
Voltage Rating
The voltage rating must equal or exceed the original capacitor’s rating. Ceiling fan capacitors are typically rated at 250V AC or 450V AC.
Using a higher voltage capacitor (like 450V instead of 250V) is perfectly acceptable and may actually extend capacitor life. Never use a lower voltage rating than the original, as this leads to premature failure and potential hazards.
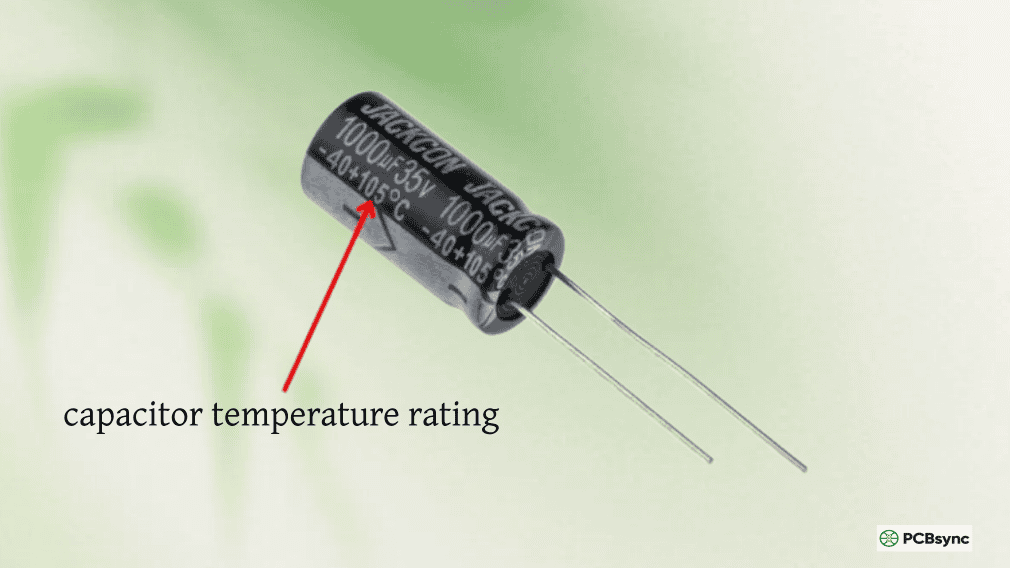
Temperature Rating
Capacitors should be rated for the operating environment. Standard ceiling fan capacitors typically operate between -25°C and +70°C or +85°C. Fans in hot attics, outdoor locations, or tropical climates benefit from capacitors with higher temperature ratings.
Wire Configuration
The replacement capacitor must have the same number of wires as the original. While you can technically substitute multiple 2-wire capacitors for a single multi-wire unit, this complicates wiring and mounting. Matching the wire count ensures straightforward installation.
Symptoms of a Bad Ceiling Fan Capacitor
Recognizing the signs of capacitor failure helps you diagnose problems quickly and avoid unnecessary troubleshooting.
Fan Won’t Start
The most obvious symptom is a fan that doesn’t start when you flip the switch. You’ll typically hear a humming sound from the motor, but the blades won’t move. This indicates the capacitor can’t provide the phase shift needed to create starting torque.
If you push the blades by hand while the fan is switched on, a fan with a failed start capacitor section might continue spinning (slowly and weakly), confirming the capacitor is the problem.
Slow Fan Speed on All Settings
When your fan runs noticeably slower than it used to, even on the highest setting, the capacitor has likely lost capacitance. Capacitors degrade over time, and as their capacitance drops, motor performance suffers.
A fan that once provided strong airflow but now barely moves air, even though the blades spin, points to a weak capacitor that needs replacement.
Some Speeds Don’t Work
Multi-speed fans with capacitor problems often have selective failures. You might find that low speed works but medium doesn’t, or high speed runs fine while low crawls along. This happens when individual sections within a multi-wire capacitor fail while others remain functional.
If only certain speeds are affected, the capacitor is almost certainly the cause.
Fan Hums But Won’t Spin
A humming motor that won’t rotate indicates the motor is receiving power but can’t generate the rotating magnetic field needed to start. While this can indicate other problems (like seized bearings), the capacitor is the most common cause.
Try spinning the blades gently by hand with the fan switched on. If they continue rotating (even slowly), the capacitor is failing to provide starting torque.
Motor Overheating
A failing capacitor forces the motor to work harder, often causing excessive heat. If your fan’s motor housing feels unusually hot after running, the capacitor may be degraded and creating inefficient operating conditions.
Continued operation with a bad capacitor can damage motor windings, so address overheating promptly.
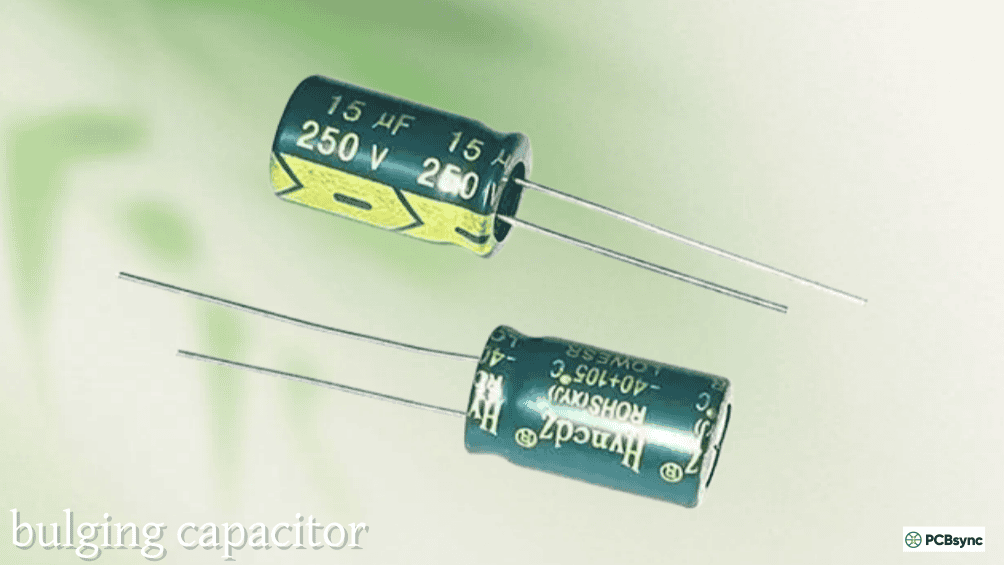
Physical Damage
Visual inspection often reveals failed capacitors. Look for a bulging or swollen case, cracks in the plastic housing, burn marks or discoloration, melted plastic, and oil leakage (in older oil-filled types).
Any visible damage means immediate replacement is needed.
The following table summarizes common symptoms and their likely causes:
Symptom
Probable Cause
Capacitor Section Affected
Fan won’t start, hums
Failed start function
All sections or primary
Slow on all speeds
Degraded capacitance
All sections
Low speed doesn’t work
Failed low-speed section
Low µF value section
Medium speed doesn’t work
Failed medium section
Medium µF value section
High speed doesn’t work
Failed high-speed section
High µF value section
Motor overheats
Degraded capacitance
Any or all sections
Burning smell
Severe failure
Physical damage present
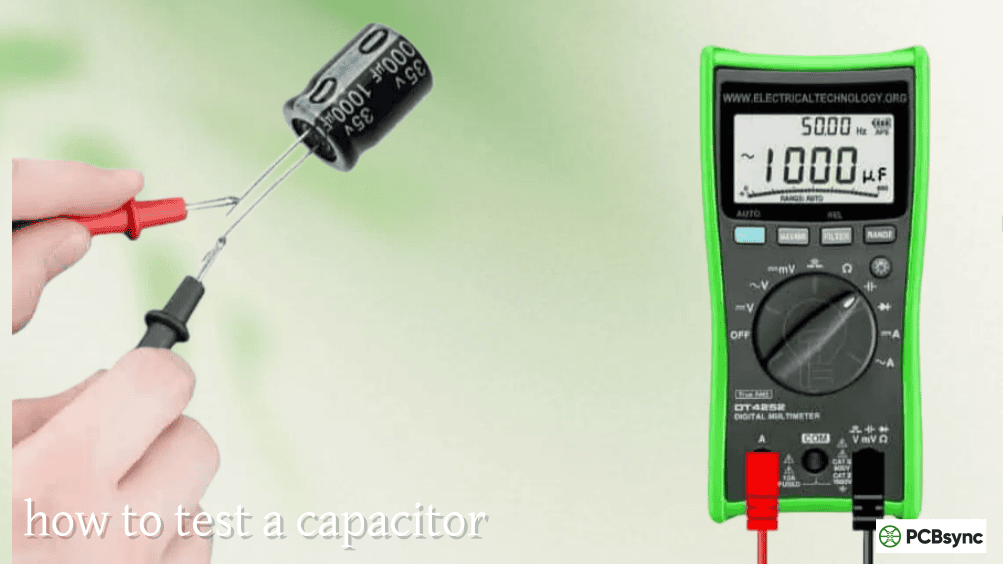
How to Test a Ceiling Fan Capacitor
Before replacing a capacitor, testing confirms whether it’s actually the problem. You’ll need a multimeter with capacitance measurement capability.
Safety First
Always disconnect power at the circuit breaker before testing. Then discharge the capacitor by carefully shorting across its terminals with an insulated screwdriver. Some capacitors have internal bleed resistors, but don’t rely on them.
Visual Inspection
Start with a visual check. Remove the fan’s canopy or switch housing to access the capacitor. Look for any physical signs of damage: bulging, cracks, burn marks, or melted plastic. If you see damage, skip testing and proceed to replacement.
Capacitance Test
Set your multimeter to capacitance mode (µF). For a 2-wire capacitor, place one probe on each terminal and read the value displayed. Compare the reading to the rated value printed on the capacitor.
For multi-wire capacitors, test each section separately. Place one probe on the common wire (often gray) and the other on each colored wire in turn. Record each reading and compare to the labeled values.
A healthy capacitor should read within ±5% to ±10% of its rated value. Readings significantly lower than rated indicate a failed capacitor.
Resistance Test
If you don’t have a capacitance meter, a resistance test can identify shorted or open capacitors (though not degraded ones).
Set your multimeter to the highest ohms range. Touch the probes to the capacitor terminals. A good capacitor shows the resistance rising gradually from low to very high (or OL/infinity) as it charges. A shorted capacitor shows very low resistance that doesn’t rise. An open capacitor shows infinite resistance (OL) immediately.
This test indicates obvious failures but won’t detect capacitors that have simply lost capacitance.
Test Result
Diagnosis
Reading within ±10% of rated value
Capacitor is good
Reading 10-25% below rated value
Capacitor is marginal, replace soon
Reading more than 25% below rated
Capacitor has failed, replace immediately
Zero or very low reading
Capacitor is shorted, replace immediately
OL (infinite) reading
Capacitor is open, replace immediately
Finding the Right Replacement Ceiling Fan Capacitor
Sourcing the correct replacement capacitor requires matching specifications from your original unit.
Document Original Specifications
Before removing the old capacitor, record all information printed on its case. Note the capacitance values (all of them for multi-wire types), voltage rating, number of wires and their colors, physical dimensions, and manufacturer part number (if visible).
Take clear photos of the capacitor and all wire connections before disconnecting anything. This documentation proves invaluable during replacement.
Where to Find Replacement Capacitors
Ceiling fan capacitors are available from multiple sources. The manufacturer’s replacement parts department offers exact match parts for your specific fan model. Online retailers like Amazon carry a wide selection of generic CBB61 capacitors in various configurations. Home improvement stores stock common capacitor values. Electrical supply houses provide professional-grade components. Ceiling fan specialty retailers offer brand-compatible replacements.
Generic CBB61 capacitors work fine as long as specifications match. Brand-name replacements from your fan manufacturer ensure compatibility but typically cost more.
Matching Multi-Wire Capacitors
Finding exact matches for unusual multi-wire capacitors can be challenging. If you can’t find an exact match, you have options. You can use multiple 2-wire capacitors wired to provide the same total configuration. You can select a capacitor with the same total values but different wire colors (just match functions, not colors). You can contact the fan manufacturer for genuine replacement parts.
Never substitute different capacitance values hoping they’ll work. The motor is designed for specific values, and substitutions cause performance problems or damage.
Replacing a ceiling fan capacitor is manageable for anyone comfortable with basic electrical work.
Tools and Materials Needed
Gather these items before starting: replacement capacitor with matching specifications, screwdrivers (Phillips and flathead), needle-nose pliers, wire nuts or push-in connectors, electrical tape, non-contact voltage tester, smartphone or camera for photos, and a ladder or step stool.
Replacement Procedure
Step 1: Disconnect Power
Turn off power at the circuit breaker, not just the wall switch. Verify power is off using a non-contact voltage tester at the fan.
Step 2: Access the Capacitor
Remove the fan’s canopy (the decorative cover at the ceiling) or switch housing (below the motor) depending on your fan’s design. The capacitor is typically a black rectangular box with multiple colored wires.
Step 3: Document Connections
Before touching any wires, take clear photos showing which wire connects to which capacitor terminal. Note wire colors and their positions. This step prevents wiring errors during reassembly.
Step 4: Discharge the Old Capacitor
Even with power off, capacitors can retain charge. Carefully short across the terminals using an insulated screwdriver. For multi-wire capacitors, short each terminal to the common wire.
Step 5: Disconnect and Remove
Disconnect the wires from the old capacitor using pliers. Note that wires may be connected via push-on terminals, wire nuts, or direct soldering. Remove any mounting bracket or tape securing the capacitor.
Step 6: Install the New Capacitor
Connect the wires to the new capacitor terminals matching your documented connections. Ensure connections are secure using appropriate connectors. Position the capacitor to fit within the housing without pinching wires.
Step 7: Reassemble and Test
Carefully tuck wires back into the housing. Reassemble the canopy or switch housing. Restore power at the breaker and test all fan speeds. Verify the fan starts promptly and runs smoothly at each setting.
Troubleshooting After Replacement
If problems persist after capacitor replacement, check that all wire connections are secure, verify you installed the correct capacitance values, ensure no wires are pinched or damaged, and test the speed switch for proper operation.
If the fan still doesn’t work correctly, the problem may be in the motor windings or speed switch rather than the capacitor.
Capacitors degrade over time as their dielectric material deteriorates. Even quality capacitors eventually lose capacitance through normal aging. Typical ceiling fan capacitors last 8-15 years under normal conditions.
Heat Exposure
Heat accelerates capacitor degradation. Fans in hot attics, near skylights, or in poorly ventilated spaces experience premature capacitor failure. Motors that run hot due to other issues also stress their capacitors.
Voltage Spikes
Power surges from lightning strikes or grid fluctuations can damage capacitors instantly or weaken them for later failure. Surge protection helps prevent this damage.
Manufacturing Defects
Low-quality capacitors may use inferior dielectric materials or poor construction, leading to early failure. Buying from reputable suppliers reduces this risk.
Overloading
Running a fan continuously at high speed in extreme heat stresses capacitors more than occasional use at lower speeds. While fans are designed for continuous operation, extreme conditions accelerate wear.
Ceiling Fan Capacitor Maintenance Tips
While capacitors don’t require regular maintenance, some practices extend their life.
Keep the Fan Clean
Dust buildup on motor housings restricts airflow and increases operating temperature. Clean your fan regularly to prevent heat-related capacitor stress.
Use Surge Protection
A whole-house surge protector or surge-protected outlet helps prevent voltage spike damage to capacitors and other fan electronics.
Don’t Ignore Early Symptoms
Address speed irregularities or starting difficulties promptly. Running a fan with a failing capacitor stresses the motor and may cause additional damage.
Consider Preventive Replacement
If your fan is 10+ years old and showing any symptoms, proactive capacitor replacement is inexpensive insurance against complete failure during peak cooling season.
Frequently Asked Questions About Ceiling Fan Capacitors
Can I use a capacitor with higher microfarad values than original?
No, you should match the original capacitance values as closely as possible. Higher capacitance increases current in the auxiliary winding, potentially causing overheating and motor damage. The motor manufacturer specifies capacitance values for proper operation. Using significantly different values affects speed, efficiency, and motor longevity.
Is it safe to use a higher voltage rated capacitor?
Yes, using a capacitor with a higher voltage rating than the original is perfectly safe. A 450V capacitor works fine in place of a 250V unit. The higher voltage rating simply means the capacitor can withstand more voltage stress, potentially extending its lifespan. Never use a lower voltage rating than specified, as this causes premature failure.
Why does my ceiling fan work on high speed but not low?
This symptom indicates the low-speed capacitor section has failed while the high-speed section still functions. Multi-wire capacitors contain separate sections for each speed, and these sections can fail independently. Replacing the entire capacitor restores all speed settings.
Can I replace a multi-wire capacitor with multiple single capacitors?
Yes, you can substitute multiple 2-wire capacitors for a single multi-wire unit if they provide the same capacitance values. Connect the common terminals together and wire each value-specific terminal to its corresponding speed wire. This works electrically but complicates mounting within the limited housing space.
How long do ceiling fan capacitors typically last?
Quality ceiling fan capacitors typically last 8-15 years under normal operating conditions. Factors that shorten lifespan include heat exposure, voltage spikes, continuous high-speed operation, and manufacturing quality. Fans in hot environments or those experiencing electrical disturbances may need replacement sooner.
Useful Resources for Ceiling Fan Capacitor Replacement
Parts and Suppliers:
Hunter Fan (hunterfan.com) — Official replacement parts for Hunter fans
Hampton Bay/Home Depot (homedepot.com) — Common capacitor replacements
Amazon — Wide selection of generic CBB61 capacitors
Switch Prince (switchprince.com) — Ceiling fan capacitor specialists
While capacitor replacement is DIY-friendly, certain situations warrant professional help.
Complex Wiring Issues
If your fan’s wiring doesn’t match standard configurations, or if previous repairs created a confusing tangle, an electrician can sort things out safely.
Motor Problems
If capacitor replacement doesn’t solve the problem, the motor itself may have failed windings or other issues requiring professional diagnosis.
Ceiling Height Concerns
Fans mounted on very high ceilings or in difficult-to-access locations may require professional service for safe access.
Warranty Considerations
DIY repairs may void warranties on newer fans. Check your warranty terms before proceeding with self-repair.
Final Thoughts on Ceiling Fan Capacitor Repair
The ceiling fan capacitor is a small component with a big job. When it fails, your fan becomes useless during the hottest days of summer. Fortunately, capacitor replacement ranks among the simplest and most cost-effective ceiling fan repairs.
By understanding how capacitors work, recognizing failure symptoms, and following proper replacement procedures, you can restore your fan to full operation in under an hour. The key points to remember include matching all capacitance values exactly, using equal or higher voltage ratings, documenting wire connections before disconnection, and always disconnecting power at the breaker before working.
A $10-15 capacitor and thirty minutes of work often saves a $150+ service call or the cost of a new fan. More importantly, understanding your ceiling fan’s capacitor helps you make informed decisions about repairs versus replacement when problems arise.
Keep this guide handy for the next time your ceiling fan starts acting up. Chances are, that little black box holds the answer.
Inquire: Call 0086-755-23203480, or reach out via the form below/your sales contact to discuss our design, manufacturing, and assembly capabilities.
Quote: Email your PCB files to Sales@pcbsync.com (Preferred for large files) or submit online. We will contact you promptly. Please ensure your email is correct.
Notes: For PCB fabrication, we require PCB design file in Gerber RS-274X format (most preferred), *.PCB/DDB (Protel, inform your program version) format or *.BRD (Eagle) format. For PCB assembly, we require PCB design file in above mentioned format, drilling file and BOM. Click to download BOM template To avoid file missing, please include all files into one folder and compress it into .zip or .rar format.


