Inquire: Call 0086-755-23203480, or reach out via the form below/your sales contact to discuss our design, manufacturing, and assembly capabilities.
Quote: Email your PCB files to Sales@pcbsync.com (Preferred for large files) or submit online. We will contact you promptly. Please ensure your email is correct.
Notes: For PCB fabrication, we require PCB design file in Gerber RS-274X format (most preferred), *.PCB/DDB (Protel, inform your program version) format or *.BRD (Eagle) format. For PCB assembly, we require PCB design file in above mentioned format, drilling file and BOM. Click to download BOM template To avoid file missing, please include all files into one folder and compress it into .zip or .rar format.
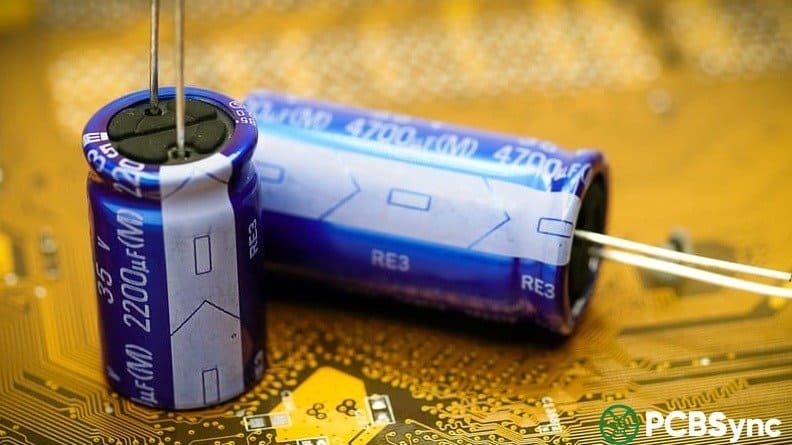
Capacitance Meters: Measurement Tools & Techniques Every Engineer Should Know
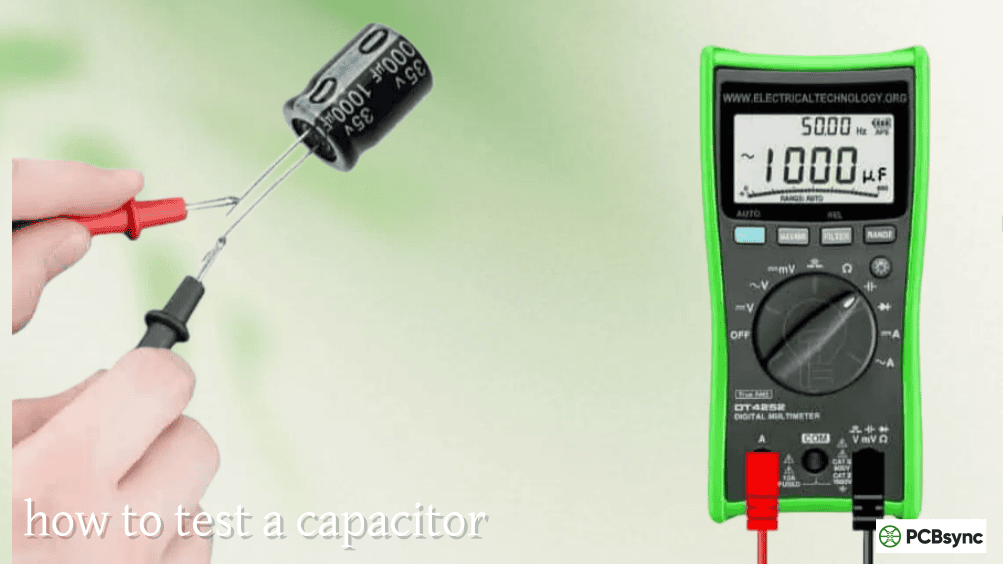
The number on a capacitance meter display looks authoritative. Three or four significant digits, a unit suffix, a stable reading — it projects precision. What it doesn’t reveal is whether the measurement was taken at the right test frequency for the component type, whether the test fixture’s parasitic impedance was properly nulled, whether DC bias derating is shifting the effective value 40% below nominal, or whether the component under test is a healthy 100nF film cap or a degraded electrolytic that happens to still read close to nominal while its ESR has climbed tenfold.
Capacitance measurement is deceptively simple to do badly and requires deliberate technique to do well. Engineers who understand what their capacitance meter is actually measuring — and more importantly, what it is not measuring — make better component selection decisions, catch more failures during incoming inspection, and spend significantly less time chasing ghosts in circuit debugging. Those who treat the reading as ground truth without understanding the measurement conditions behind it end up with designs that don’t behave as simulated and boards that fail in ways that seem inexplicable until the measurement methodology is questioned.
This guide covers every practical aspect of capacitance measurement: instrument types, measurement principles, test frequency selection, fixture compensation, DC bias effects, in-circuit versus out-of-circuit technique, and the specific scenarios where each approach excels or misleads — written from the perspective of an engineer who has been burned by bad capacitance data and learned from it.
How a Capacitance Meter Works: The Measurement Principle
AC Bridge and Vector Impedance Measurement
Modern capacitance meters — whether standalone instruments, the capacitance function of a digital multimeter, or a full benchtop LCR meter — fundamentally measure impedance. They apply a known AC voltage at a defined test frequency and measure the resulting current magnitude and phase angle. From the ratio of voltage to current and the phase relationship, the instrument calculates the complex impedance of the component, then extracts the capacitance value from the reactive (imaginary) component.
The two dominant measurement architectures are:
Auto-balancing bridge: The most accurate approach, used in benchtop LCR meters. A feedback amplifier maintains a virtual ground at the low terminal while measuring current. This four-terminal architecture eliminates lead impedance errors and delivers the highest accuracy, typically ±0.05% to ±0.5% depending on instrument grade.
Vector voltmeter / ratio method: Used in many handheld instruments and DMM capacitance functions. A reference resistor in series with the unknown component is used to calculate impedance from voltage ratios. Simpler and lower cost, but more susceptible to lead resistance and stray capacitance errors. Typical accuracy ±1% to ±5%.
Understanding which architecture your instrument uses directly informs how much to trust the displayed reading and what precautions are necessary for accurate measurement.
What the Capacitance Meter Calculates From Impedance
When you set a capacitance meter to measure capacitance, it applies an AC signal at the selected test frequency, measures the complex impedance Z = R + jX, and calculates the capacitance from the reactive component:
C = –1 / (2π × f × X)
where X is the imaginary part of the impedance (negative for a capacitor, which has capacitive reactance). The displayed capacitance is always calculated at the specific test frequency used — change the frequency, and the displayed value changes, even for the same component. This frequency dependence is not an instrument error; it reflects real physical behavior. A component that measures 100nF at 1kHz may legitimately measure 95nF at 10kHz and 85nF at 100kHz due to dielectric relaxation and parasitic inductance effects.
Types of Capacitance Meters and Their Practical Applications
Digital Multimeters with Capacitance Function
The capacitance function built into most modern digital multimeters is the most widely owned capacitance measurement capability in electronics. It measures capacitance at a single internal test frequency — typically 1kHz for most value ranges, sometimes lower for large electrolytic values — with accuracy specifications usually in the range of ±1.9% to ±5% of reading plus a fixed offset.
For the PCB engineer, the DMM capacitance function is genuinely useful for:
Quick verification that a component is approximately the marked value
Sorting unknown capacitors from a parts bin where markings have worn off
Identifying completely open or dead capacitors that read near zero
Rough range-checking that a design’s installed capacitance matches the BOM
What the DMM capacitance function cannot reliably do:
Measure values below about 1nF accurately (stray capacitance of the test leads is typically 0.5–1.5nF and swamps small measurements)
Measure at multiple frequencies to characterize frequency dependence
Apply DC bias to measure effective capacitance under operating voltage
Measure ESR or dissipation factor (the parameters that actually reveal component health)
Achieve the ±1% or better accuracy needed for filter or timing circuit component verification
DMM Model
Capacitance Range
Accuracy
Test Frequency
Min Measurable
Fluke 87V
1nF – 9999µF
±1.9% + 2pF
~1 kHz
~5nF reliably
Keysight U1241C
1nF – 10mF
±1.5% + 3 counts
1 kHz
~5nF reliably
Klein Tools MM600
1nF – 100µF
±3% + 10pF
1 kHz
~15nF reliably
UNI-T UT61E
1nF – 100µF
±3% + 5pF
~1 kHz
~10nF reliably
Brymen BM869S
1nF – 9999µF
±2% + 5pF
1 kHz
~5nF reliably
The fixed offset error (expressed as ±X pF or ±Y counts) is the parameter that limits small-capacitance accuracy. On a 1nF measurement, a ±5pF offset represents ±0.5% — acceptable. On a 10pF measurement, it represents ±50% — useless. Always use open-circuit zeroing (short the test leads together to read the lead capacitance, then null it) before measuring small values.
Handheld Dedicated LCR Meters: The Best-Value Engineering Tool
The dedicated handheld LCR meter occupies the most useful position on the price-performance curve for most engineering applications. Unlike a DMM that measures capacitance at a single fixed frequency, a handheld LCR meter allows test frequency selection — typically offering 100Hz, 120Hz, 1kHz, 10kHz, and 100kHz — and measures capacitance alongside ESR (or equivalent series resistance, displayed as Rs) and dissipation factor (D or tan δ) simultaneously.
The DE-5000 handheld LCR meter has earned a strong reputation among engineers for delivering genuine multi-frequency LCR measurement capability at an accessible price point. Its combination of accuracy (±0.5% basic capacitance accuracy at 1kHz), multi-frequency operation, and open/short compensation makes it a credible engineering tool rather than a consumer accessory.
Handheld LCR Meter
Frequency Range
Basic C Accuracy
DC Bias
ESR/D Measurement
Price Range
DE-5000
100Hz – 100kHz
±0.5%
No
Yes
$60–$100
BSIDE LCR Meter
100Hz – 100kHz
±1%
No
Yes
$40–$70
Smart Tweezers ST5S
100Hz – 100kHz
±1%
No
Yes
$120–$180
Extech LCR200
100Hz – 100kHz
±0.5%
No
Yes
$150–$200
Peak Atlas LCR45
1kHz fixed
±1%
No
Yes
$100–$150
Smart Tweezers deserve specific mention for SMD component work. The integrated tweezer probe design allows direct contact with 0402 and smaller SMD components on reels or boards without needing clip adapters. For production floor incoming inspection of SMD capacitors, they significantly speed up the measurement workflow.
When capacitance measurement accuracy genuinely matters — incoming inspection against tight tolerances, precision filter component verification, characterization of capacitor voltage coefficient, or failure analysis — a benchtop LCR meter is the appropriate capacitance meter. These instruments deliver basic accuracy from ±0.05% to ±0.1%, variable test frequency from 20Hz to 2MHz (or higher), programmable DC bias up to 40V or more, four-terminal Kelvin measurement connections, and open/short/load compensation routines that null fixture parasitics with high precision.
The DC bias capability deserves emphasis. It is the single most important differentiator between a benchtop LCR meter and everything below it in the hierarchy for characterizing ceramic capacitors in real applications. Without DC bias, you cannot measure the actual capacitance of an X7R or X5R MLCC at its operating voltage — and that measurement is the one that actually determines whether your filter or bypass network performs as designed.
Benchtop LCR Meter
Frequency Range
Basic Accuracy
DC Bias
Price Range
Key Strength
Keysight E4980AL
20Hz – 1MHz
±0.05%
Up to 40V DC
$2,000–$3,500
Industry reference standard
Hioki IM3523
40Hz – 200kHz
±0.08%
Up to 5V DC
$1,500–$2,500
Excellent value, fast measurement
Hioki IM3536
4Hz – 8MHz
±0.05%
Up to 40V DC
$3,500–$5,000
Wide frequency, high accuracy
GW Instek LCR-6002
10Hz – 200kHz
±0.1%
Optional
$600–$1,000
Budget benchtop entry point
Tonghui TH2816B
20Hz – 200kHz
±0.1%
Optional
$500–$900
Cost-effective lab instrument
Keysight E4990A
20Hz – 120MHz
±0.08%
Up to 40V DC
$15,000–$25,000
Impedance analyzer / RF characterization
Critical Measurement Techniques for Accurate Capacitance Readings
Open and Short Compensation: Non-Negotiable for Accuracy
Every benchtop LCR meter and most quality handheld instruments offer open-circuit compensation (OPEN) and short-circuit compensation (SHORT) routines. These are not optional calibration niceties — they are mandatory for accurate low-value and high-value capacitance measurements respectively.
Open compensation measures the stray admittance (primarily stray capacitance) of the test fixture with nothing connected, then subtracts it from subsequent measurements. Stray capacitance in typical SMD test clips is 0.5–3pF. On a 10pF measurement, 2pF of uncompensated stray capacitance is a 20% error.
Short compensation measures the residual impedance (primarily series resistance and inductance) of the test fixture with the terminals shorted together, then subtracts it. For measuring low-ESR capacitors or large electrolytic values where lead resistance contributes meaningfully, short compensation reduces systematic measurement error.
The practical workflow every time you change test fixtures, test cables, or move to a different component size adapter:
Install the fixture with nothing connected → run OPEN compensation
Short the fixture terminals together → run SHORT compensation
Begin measurements
Skipping this step when switching between a 0402 SMD tweezer fixture and a through-hole lead fixture guarantees systematic errors that will look like component-to-component variation but are actually fixture parasitic differences.
Test Frequency Selection for Different Capacitor Types
This is where many engineers make consistent systematic errors. Setting the capacitance meter to 1kHz for everything is convenient but wrong for a significant proportion of real measurement tasks.
Capacitor Type
Recommended Test Frequency
Reason
Large electrolytic (≥100µF)
100Hz or 120Hz
Capacitance is higher at low frequency; matches datasheet spec point
Standard electrolytic (1–100µF)
1kHz
Industry standard spec frequency for this range
Film capacitors (all values)
1kHz
Standard spec frequency; stable over frequency range
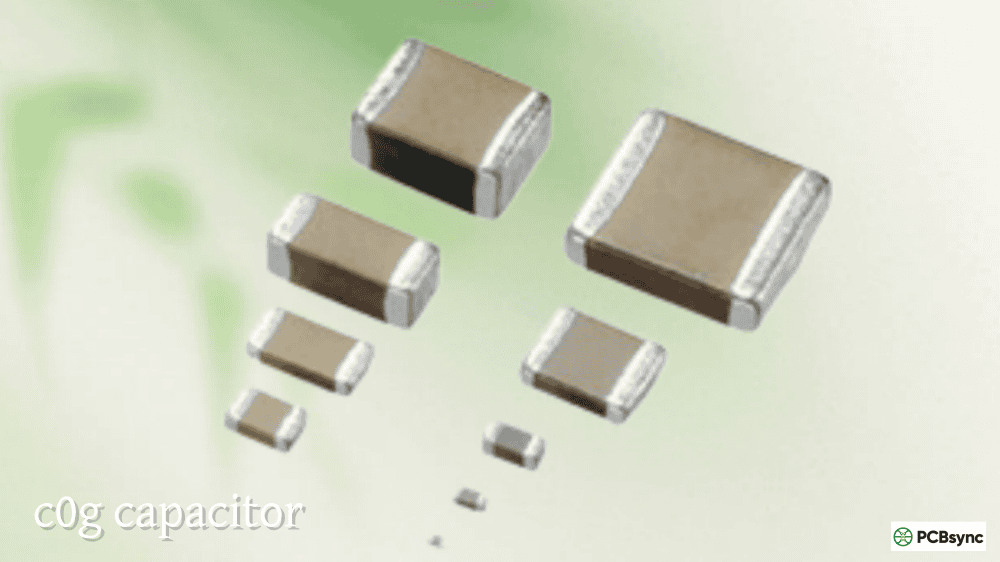
COG/NP0 ceramic
1kHz or 1MHz for small values
Stable; 1MHz better for values below 1nF
X7R/X5R ceramic (bias check)
1kHz with DC bias applied
Reveals actual capacitance at operating voltage
RF capacitors
1MHz – 10MHz
Characterizes behavior near operating frequency
Timing capacitors
1kHz
Matches application operating frequency range
Electrolytic ESR (switching PSU)
100kHz
Matches switching PSU operating frequency
Measuring MLCC Capacitors Under DC Bias
This is the measurement technique that most engineers skip and most designs would benefit from. The voltage coefficient of Class II ceramics (X7R, X5R) is significant — capacitance can drop 30–70% at rated operating voltage. A filter capacitor that reads correctly on the bench at 0V bias may be delivering less than half its nominal value in circuit.
The measurement procedure with a bias-capable LCR meter:
Run OPEN and SHORT compensation with bias enabled but at 0V
Set DC bias to the operating voltage of the circuit (e.g., 3.3V, 5V, 12V)
Wait 5–10 seconds for the capacitor to polarize fully
Record capacitance — this is the effective value in your circuit
Compare this value against your design requirement. If it falls short, select a capacitor with a higher voltage rating (so the operating point represents a smaller fraction of the rated voltage) or specify a larger nominal value to compensate for the derating.
Four-Terminal Kelvin Measurement for Low-ESR Components
Standard two-terminal measurement mixes the voltage measurement with the current-carrying path, so lead resistance appears as part of the measured impedance. For capacitors with ESR in the milliohm range — polymer electrolytics, high-quality film types, large MLCC arrays — two-terminal measurement produces meaningless ESR data because 10–50mΩ of contact resistance dominates the reading.
Four-terminal Kelvin measurement uses separate current-injection and voltage-sensing terminals at each end of the component, physically separating the measurement of voltage from the path carrying test current. Contact resistance in the current terminals does not affect the voltage measurement. For any ESR measurement below approximately 100mΩ, four-terminal connection is mandatory for accuracy.
Most benchtop LCR meters have four-terminal Kelvin test fixtures available as accessories. The Hioki and Keysight SMD test fixtures for surface-mount components are designed specifically for this measurement configuration.
Common Capacitance Measurement Errors and How to Avoid Them
Residual Charge in the Capacitor Under Test
Measuring a capacitor that retains residual charge from previous circuit operation or handling introduces a DC offset into the AC test circuit, distorting the measurement. Always discharge capacitors before measurement — particularly electrolytics, which can hold charge for minutes to hours after circuit power-down. A 10kΩ resistor briefly connected across the terminals is sufficient for most capacitors; high-voltage types need longer discharge times and potentially higher-value discharge resistors.
Temperature Effects on Measurement
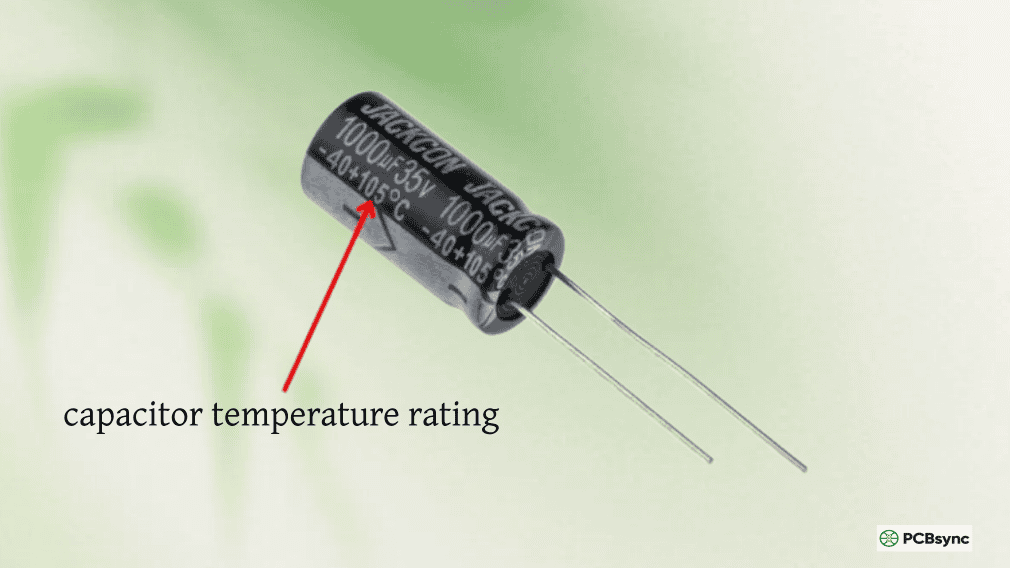
Capacitor parameters are temperature-dependent. X7R capacitors drift ±15% over –55°C to +125°C; polypropylene drifts approximately –200ppm/°C. Measurements taken immediately after soldering, when components are elevated to 40–60°C from reflow heat, will differ from room-temperature measurements. Allow components to return to room temperature before performing acceptance measurements.
Stray Capacitance From Hand Proximity
At measurement frequencies above 10kHz and for capacitance values below 100pF, the capacitance between your hands, body, and the test fixture can contribute several picofarads of stray capacitance that shifts readings unpredictably. Use the instrument’s guard terminal to shield sensitive measurement circuits, handle test fixtures only at designated grip points, and where possible use a grounded shielded test fixture for measurements below 10pF.
Parallel Resonance in Large Inductors
When measuring capacitors that are still installed adjacent to inductors on a PCB, the LC combination can resonate at certain test frequencies, producing wildly inaccurate capacitance readings. If in-circuit capacitance readings seem unreasonably high or low, suspect a parallel resonance with a nearby inductor and either desolder the capacitor or measure at a different test frequency away from the resonance.
Choosing the Right Capacitance Meter for Your Application
Application
Minimum Required Instrument
Ideal Instrument
Basic component sorting
DMM with capacitance function
Handheld LCR meter
Power supply repair
Handheld ESR + capacitance meter
Handheld LCR (multi-frequency)
PCB component verification
Handheld LCR meter
Benchtop LCR meter
MLCC DC bias characterization
Benchtop LCR with DC bias
Keysight E4980A / Hioki IM3536
Precision filter design
Benchtop LCR ±0.1% or better
Benchtop LCR with SMD fixture
RF component characterization
High-frequency LCR meter
Impedance analyzer (E4990A class)
Production incoming inspection
Benchtop LCR with handler interface
ATE-integrated LCR with sorting
SMD reel verification
Smart Tweezers or handheld LCR
Smart Tweezers ST5S
For understanding the nominal specifications and tolerance grades you’re measuring against, the Capacitor reference at PCBSync provides a comprehensive breakdown of rated parameters, standard tolerance grades, and characteristic specifications across all major capacitor families — useful context when deciding whether a measured value represents a pass or a genuine out-of-tolerance result.
Useful Resources for Capacitance Measurement
Resource
Description
Link
Keysight E4980A Product Page
Industry-reference benchtop LCR meter specs and accessories
Frequently Asked Questions About Capacitance Meters
Q1: What is the most accurate way to measure a small capacitor value below 10pF?
Measuring below 10pF reliably requires a benchtop LCR meter with four-terminal Kelvin connections, a shielded SMD test fixture with guard terminal, proper OPEN compensation to null fixture stray capacitance, and measurements taken with hands away from the fixture. The combined stray capacitance of typical DMM test leads (0.5–2pF) and body capacitance coupling (1–3pF variable) make DMM capacitance functions unreliable below approximately 50–100pF. For values below 1pF, a vector network analyzer (VNA) measuring S-parameters and converting to capacitance provides the best accuracy and is standard practice in RF component characterization.
Q2: Why does my capacitance meter read different values at different test frequencies?
This is correct physical behavior, not instrument error. Capacitor parameters are frequency-dependent for real physical reasons: dielectric relaxation (the polarization mechanism in the dielectric takes time to respond, so at higher frequencies the contribution from slower polarization mechanisms decreases), dielectric losses (which increase at certain frequencies), and the growing influence of ESL at higher frequencies. For Class II ceramics (X7R), the difference between 100Hz and 100kHz readings can be several percent. For electrolytics, the 100Hz reading is higher than the 1kHz reading by 5–20% in aged units. Always specify and record the test frequency alongside any capacitance measurement that will be used as a reference value.
Q3: Can I measure capacitance in-circuit without desoldering the component?
In-circuit capacitance measurement is generally unreliable for accurate values because parallel components — resistors, other capacitors, semiconductor junctions — all contribute to the measured impedance. At the typical 1kHz test frequency, a 10kΩ resistor in parallel with a 100nF capacitor contributes negligible parallel resistance error. But a 100Ω resistor in parallel completely dominates the measurement. In-circuit ESR measurement is more robust at 100kHz (because parallel resistors are relatively high impedance compared to the capacitor at that frequency), which is why dedicated in-circuit ESR meters use 100kHz rather than 1kHz. For accurate capacitance values, desolder and measure out of circuit.
Q4: How do I measure the capacitance of a large electrolytic capacitor accurately?
Large electrolytic capacitors (above a few hundred microfarads) measure most accurately at 100Hz or 120Hz — the frequencies closest to their typical mains ripple application environment and the frequencies at which their datasheet capacitance is typically specified. At 1kHz, large electrolytics often read 10–20% lower than their nominal value because the capacitance contribution from slower polarization mechanisms hasn’t fully responded. Always discharge the capacitor completely before measurement (leave discharged for 1–2 minutes after shorting for large values), connect with correct polarity if using a DC bias-capable instrument, and use the 100Hz test frequency for values above 100µF. Record ESR at 100kHz simultaneously to assess component health beyond just capacitance.
Q5: What accuracy do I need in a capacitance meter for PCB design work?
For general component verification — confirming that installed parts match the BOM within their specified tolerance — the ±0.5% to ±1% accuracy of a quality handheld LCR meter is sufficient for components with ±5% or ±10% tolerance grades. For precision filter, timing, or oscillator components specified at ±1% or ±2% tolerance, you need a benchtop LCR meter with ±0.1% or better basic accuracy, otherwise the measurement uncertainty is a significant fraction of the component tolerance you’re trying to verify. For MLCC characterization under DC bias — the measurement that actually reflects in-circuit behavior — a benchtop LCR meter with DC bias capability is not optional; it’s the only instrument that provides the relevant data.
Measuring Capacitance Well Is a Skill, Not Just a Meter Setting
The capacitance meter is only as useful as the measurement technique applied to it. A $15,000 impedance analyzer operated without OPEN compensation on a noisy bench with residual charge in the component under test will produce worse data than a $90 handheld LCR meter used correctly with proper fixture compensation, correct test frequency selection, and appropriate discharge procedures.
Understanding that capacitance is frequency-dependent and changes with DC bias, that ESR is often more diagnostic than capacitance for electrolytic health assessment, that stray fixture impedances must be compensated before meaningful small-value measurements are possible, and that four-terminal Kelvin connections are mandatory for milliohm-range ESR accuracy — these principles determine whether capacitance data drives good engineering decisions or creates false confidence in numbers that don’t reflect component behavior in circuit.
Inquire: Call 0086-755-23203480, or reach out via the form below/your sales contact to discuss our design, manufacturing, and assembly capabilities.
Quote: Email your PCB files to Sales@pcbsync.com (Preferred for large files) or submit online. We will contact you promptly. Please ensure your email is correct.
Notes: For PCB fabrication, we require PCB design file in Gerber RS-274X format (most preferred), *.PCB/DDB (Protel, inform your program version) format or *.BRD (Eagle) format. For PCB assembly, we require PCB design file in above mentioned format, drilling file and BOM. Click to download BOM template To avoid file missing, please include all files into one folder and compress it into .zip or .rar format.


