Inquire: Call 0086-755-23203480, or reach out via the form below/your sales contact to discuss our design, manufacturing, and assembly capabilities.
Quote: Email your PCB files to Sales@pcbsync.com (Preferred for large files) or submit online. We will contact you promptly. Please ensure your email is correct.
Notes: For PCB fabrication, we require PCB design file in Gerber RS-274X format (most preferred), *.PCB/DDB (Protel, inform your program version) format or *.BRD (Eagle) format. For PCB assembly, we require PCB design file in above mentioned format, drilling file and BOM. Click to download BOM template To avoid file missing, please include all files into one folder and compress it into .zip or .rar format.
Bulging Capacitors: Identification & Replacement Guide for Engineers and Technicians
A bulging capacitor on a PCB is not a cosmetic problem. It is a physical failure indicator that something went wrong in the design, the environment, or the component itself — and the circuit attached to that board has likely been operating in degraded or unreliable condition for some time before the visible swelling appeared. By the time an aluminum electrolytic capacitor bulges visibly, its internal condition has typically been deteriorating for months or years. The swelling is the end stage of a process, not the beginning.
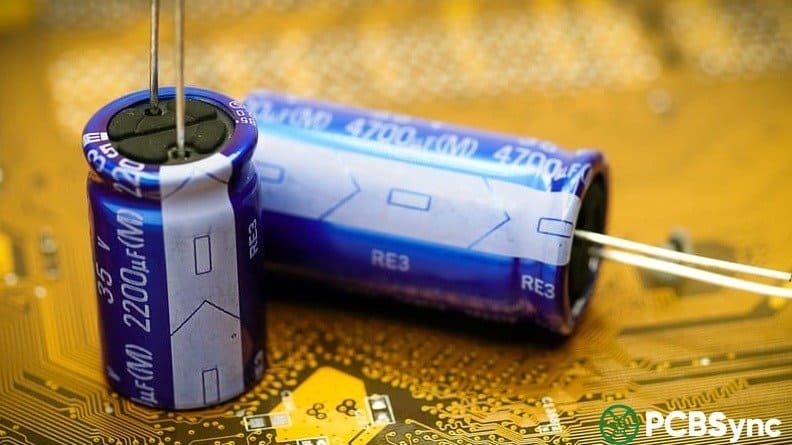
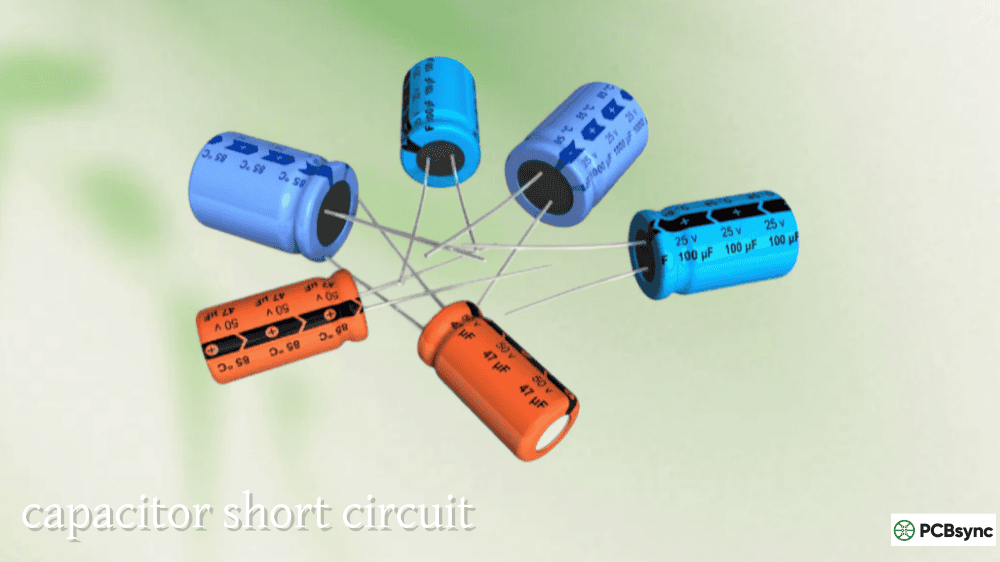
The bulging capacitor phenomenon is almost exclusively associated with aluminum electrolytic capacitors. Their construction — aluminum foil electrodes separated by paper soaked in liquid electrolyte, sealed at the base with a rubber bung — makes them uniquely susceptible to internal pressure buildup when the electrolyte electrolyzes, decomposes, or boils. Virtually all cylindrical aluminum electrolytic capacitors have a pressure relief vent scored into the top of the aluminum can specifically to handle this scenario: a controlled vent is far safer than an uncontrolled rupture.
Understanding what causes a capacitor to bulge, how to safely identify and confirm the failure, how to choose the correct replacement, and how to prevent recurrence is practical knowledge every engineer and experienced technician needs in their diagnostic toolkit.
Why Aluminum Electrolytic Capacitors Bulge: The Physical Mechanisms
Electrolyte Decomposition From Thermal Overstress
The most common cause of a bulging capacitor in power supply and consumer electronics equipment is prolonged thermal overstress. When an electrolytic capacitor operates at a temperature above its rated maximum — whether from excessive ambient temperature, insufficient ventilation, thermal proximity to hot components, or excessive ripple current causing internal self-heating — the liquid electrolyte gradually decomposes and releases hydrogen gas as a byproduct of electrolytic reactions.
Hydrogen gas accumulates inside the sealed capacitor can. As pressure builds, the aluminum casing distorts. The characteristic dome shape develops on the top of the capacitor — the pressure relief vent area — as the can expands upward against the internal pressure. In early-stage bulging, the deformation is subtle and requires close inspection to confirm. In advanced cases, the vent has partially or fully opened and electrolyte residue may be visible on the capacitor body or the PCB surface beneath it.
The thermal overstress mechanism is insidious because the conditions that cause it frequently exist from the day the product was manufactured. A capacitor positioned 5mm from a transformer operating at 80°C in a sealed enclosure with no active cooling was destined to bulge — the timeline was just a matter of how many operating hours elapsed before the gas accumulation became visible.
Ripple Current Overstress
Excessive ripple current is the electrical equivalent of thermal overstress in terms of its effect on electrolyte. When ripple current exceeds the capacitor’s rated value, internal power dissipation (P = I² × ESR) elevates the core temperature above rated conditions. The resulting electrolyte heating and electrochemical stress produces the same gas generation and pressure buildup that ambient thermal overstress causes — sometimes faster, because core temperature from ripple current self-heating can exceed rated maximum even when the external ambient temperature appears acceptable.
This failure cause is particularly relevant in switching power supply output filters where the switching-frequency ripple current is frequently underestimated or calculated without the manufacturer’s frequency correction factors applied. A capacitor with a 100kHz ripple current rating of 1.2A, used in a circuit that actually delivers 1.5A of combined low-frequency and switching-frequency ripple, is running at 125% of its rated ripple current from day one.
Reverse Voltage Installation Error
A third cause of bulging — and one that produces dramatically faster failure than thermal mechanisms — is reverse voltage across a polarized electrolytic capacitor. When an electrolytic is installed with reversed polarity, the oxide dielectric on the anode foil is subjected to reverse electric field, causing it to break down. This creates rapid electrolytic current flow, intense local heating, and violent gas generation. A reversed electrolytic in a powered circuit can bulge, vent, and rupture within seconds to minutes of power-on.
Reverse voltage installation errors most commonly occur during hand assembly, prototype rework, or replacement by non-technical users. Preventing them requires clear polarity markings on both the PCB silkscreen and the component itself, and ideally, PCB footprint design that makes incorrect installation physically difficult or impossible through asymmetric pad sizing or polarization keying.
The Capacitor Plague: Defective Electrolyte Formulations
Engineers old enough to have worked through the 2002–2007 period will recognize the term “capacitor plague” — a widespread industry problem caused by a specific group of Taiwanese capacitor manufacturers using an incorrectly formulated electrolyte that had been reverse-engineered incompletely from a Japanese competitor. The defective electrolyte produced hydrogen gas at dramatically accelerated rates under normal operating conditions, causing massive premature bulging and failure in millions of motherboards, monitors, and other consumer electronics.
The capacitor plague is largely historical — the affected manufacturers either corrected their processes or exited the market — but it illustrates a broader point: counterfeit and substandard capacitors from non-franchise distribution continue to enter the supply chain, and they can exhibit similar premature failure characteristics. Any bulging capacitor failure in equipment that is less than five years old from initial manufacture warrants investigation into component sourcing and authenticity.
How to Identify a Bulging Capacitor: Visual Inspection Guide
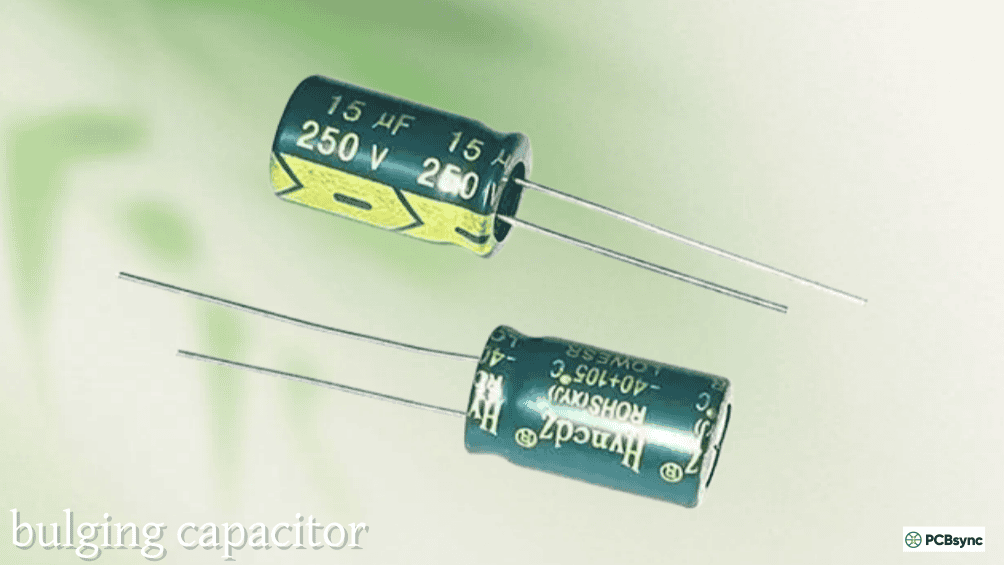
What Normal and Abnormal Look Like
A healthy aluminum electrolytic capacitor has a flat top with a visible score pattern (the pressure relief vent) and vertical sides. The score pattern may be a K-shape, X-shape, or circular groove depending on the manufacturer — this is normal and does not indicate damage. The top surface should be completely flat, not domed or elevated above the rim of the can.
A bulging capacitor presents visible deformation of the can:
Severity Level
Visual Appearance
Action Required
Early / Subtle
Top slightly convex; not flat
Replace promptly — failure is progressing
Moderate
Clear dome on top; sides may show slight bowing
Replace immediately — near failure
Advanced
Vent partially open; electrolyte residue on top
Replace immediately; inspect board for corrosion
Severe / Vented
Vent fully opened; electrolyte on PCB and nearby components
Replace; clean board; inspect for corrosion damage
Ruptured
Can deformed; material expelled; brown residue widespread
Full board inspection; check nearby components for damage
Electrolyte residue — a brown, sticky substance that appears around the base or vent of a failed cap — is highly corrosive and will attack PCB traces, solder joints, and component leads over time. A board with an advanced or vented bulging capacitor requires not just component replacement but thorough cleaning of the affected area with isopropyl alcohol and careful inspection of any traces, vias, or components within 10–15mm of the failed cap.
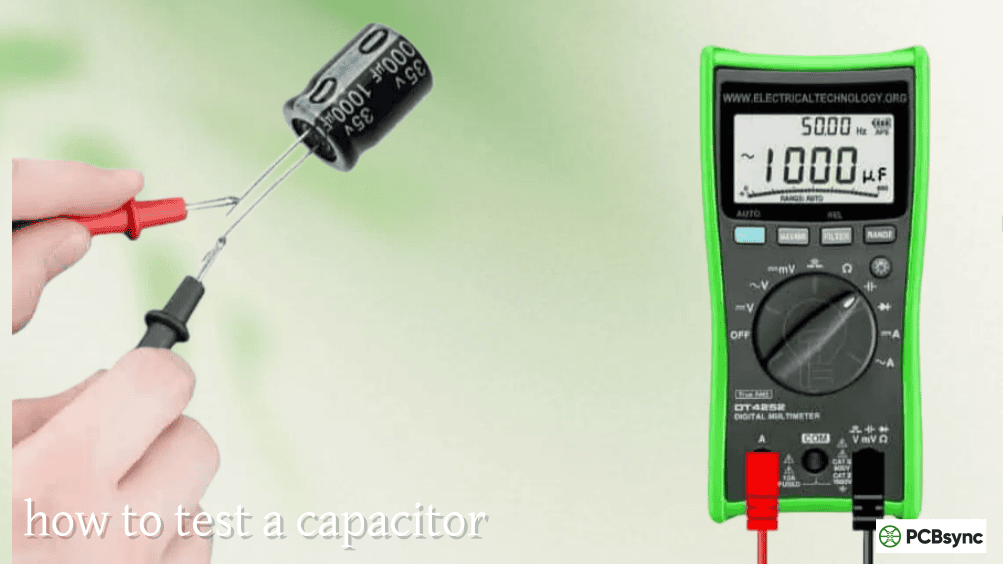
Using ESR Measurement to Confirm Failure
Visual inspection confirms physical damage but doesn’t quantify electrical degradation. A capacitor can have significantly elevated ESR — indicating advanced internal deterioration — without visible external swelling. Before replacing visually identified bulging capacitors, check nearby electrolytics on the same board for ESR elevation even if they show no visible swelling. A board that has been in service long enough to produce a visually obvious bulging capacitor has almost certainly been operating at conditions that stressed all its electrolytic capacitors, not just the one that failed visibly first.
Use an ESR meter to screen all electrolytic capacitors on the affected board. Any reading more than 3–5× the expected new-condition ESR value for that capacitor size and voltage rating should be flagged for replacement even if it looks physically intact. Replacing only the visually obvious bulging capacitor while leaving others with elevated ESR is a partial repair that will result in another failure in short order.
Safe Handling and Removal of Bulging Capacitors
Safety Precautions Before Handling
A bulging capacitor may still retain charge, particularly in a power supply or equipment that was recently powered. The energy stored in a large electrolytic can be significant and potentially hazardous. Before handling a bulging capacitor:
Disconnect power and discharge the capacitor. Power off the equipment completely and unplug from mains. For power supply boards, use a discharge resistor (10kΩ, 2W) or a dedicated discharge tool to safely discharge any large bulk capacitors. Allow at least 2–3 minutes for smaller capacitors to self-discharge through circuit resistances.
Avoid pressure on the bulged can. A capacitor that has already built up internal pressure may vent or rupture if compressed or punctured. Handle boards with bulging capacitors carefully — do not flex the board in ways that might apply load to the swollen can.
Protect eyes and skin. If there is any evidence of electrolyte venting (brown residue, unusual odor), wear safety glasses and gloves during handling. Electrolyte solution is mildly corrosive and should be kept away from eyes and skin.
Desoldering and Removal Technique
For through-hole electrolytic capacitors — the type most commonly associated with visible bulging — removal requires desoldering both leads from the bottom of the PCB:
For manual desoldering: Use a temperature-controlled soldering iron set to 340–360°C. Apply fresh solder to the joint before attempting removal (fresh solder melts more cleanly than aged oxidized solder). Use a desoldering pump or braid to remove solder from the through-holes, then gently rock the capacitor to free it from the board. Do not apply excessive force — if the leads are not fully freed, applying force risks lifting PCB pads.
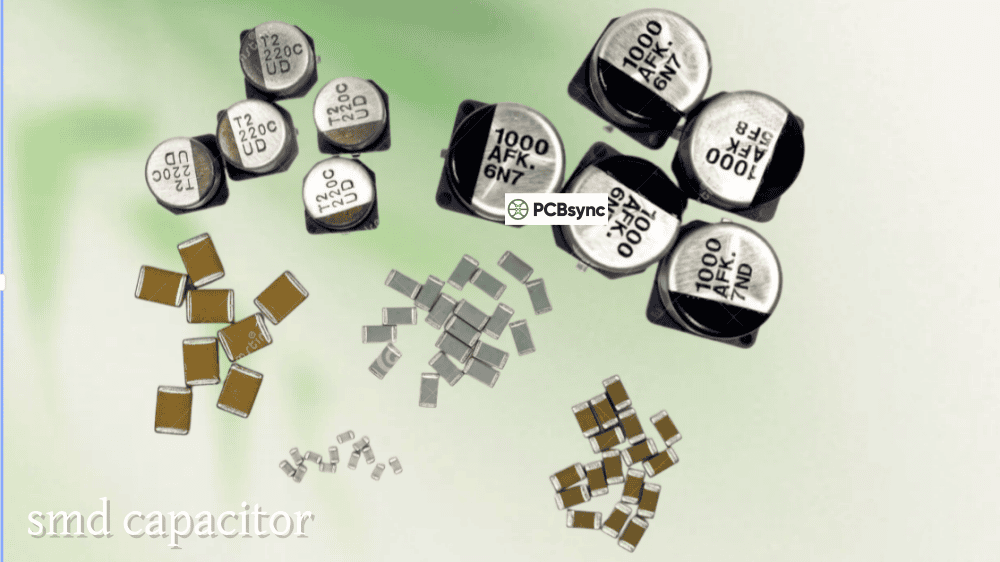
For SMD electrolytic capacitors (less common but present in some consumer electronics): Apply heat to both pads simultaneously with hot air or a heated tweezer tool, and lift vertically once the solder on both pads has fully reflowed. Avoid dragging the component horizontally across the board surface, which risks solder bridging.
Clean the through-holes or pads thoroughly after removal. Inspect the pad area for corrosion, trace damage, or electrolyte contamination requiring cleaning before installing the replacement.
Matching Specifications for Safe and Reliable Replacement
The replacement capacitor must match or exceed the original specification in every relevant parameter. Using the wrong replacement is a common cause of early re-failure:
Parameter
Match Requirement
Notes
Capacitance
Equal to original
±20% acceptable in most applications
Voltage rating
Equal or higher
Never reduce voltage rating
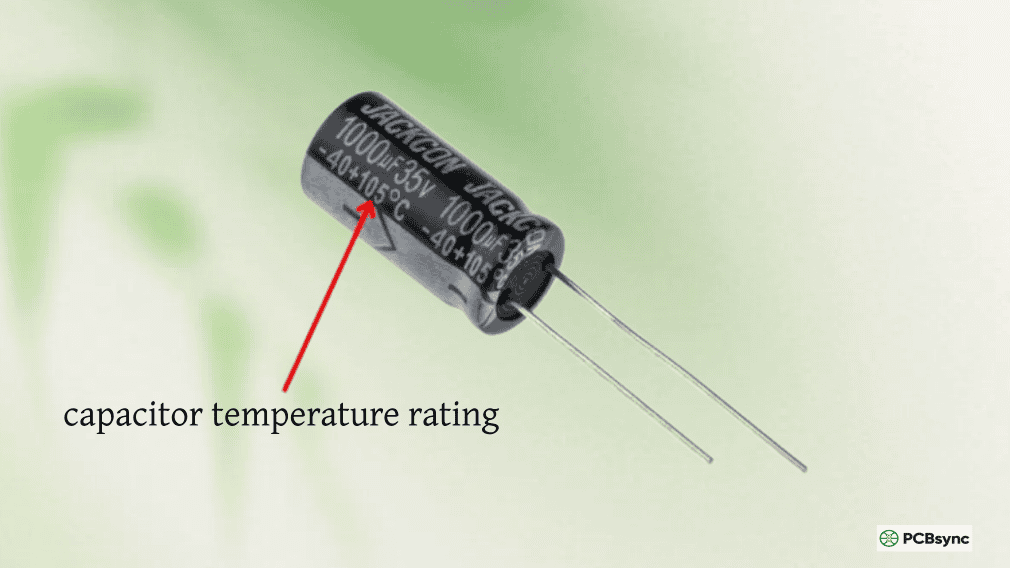
Temperature rating
Equal or higher
Always use 105°C grade for switching PSUs
Physical dimensions
Match diameter and height
Height especially critical in enclosed equipment
Lead pitch / diameter
Match exactly
Different pitches won’t fit the footprint
ESR / Series
Low-impedance preferred
Upgrade to low-Z series improves reliability
Polarity
Must match
Double-check before installation
The temperature rating requirement deserves emphasis: if the original capacitor was an 85°C-rated standard-grade type and it bulged from thermal overstress, replacing it with another 85°C standard-grade type will reproduce the failure in a similar timeframe. Always upgrade to a 105°C low-impedance series — Nichicon HE, Rubycon ZLH, Panasonic FR — for any switching power supply replacement. The cost difference is minimal; the reliability improvement is substantial.
Reputable Replacement Capacitor Sources
Counterfeit electrolytic capacitors are a documented reality in the market, particularly for popular sizes and voltage ratings. Purchasing replacement capacitors from franchise distributors or directly from manufacturer authorized channels is essential for confirming component authenticity:
Supplier
Description
Link
Digi-Key
Franchise distributor; full range of Nichicon, Panasonic, Rubycon
For comprehensive reference on capacitor types, specifications, and replacement selection parameters across all major capacitor families, the Capacitor guide at PCBSync covers the full technology landscape with practical selection guidance.
Preventing Bulging Capacitor Recurrence
Replacing a bulging capacitor without addressing the root cause that caused it to fail is treating the symptom rather than the disease. The failure will recur — typically faster in the replacement component because the thermal environment hasn’t changed.
Investigate and address the thermal cause. Measure or estimate the operating temperature around the failed capacitor. If it exceeds 60°C, the thermal design needs improvement — better ventilation, physical separation from heat sources, reduced ambient temperature, or a lower-ESR replacement that generates less self-heating.
Verify ripple current is within specification. Measure the RMS ripple current through the replacement capacitor with a current probe and oscilloscope. Compare against the manufacturer’s rated ripple current at the actual operating temperature with frequency correction factors applied. If it exceeds 80% of the rated value, the capacitor is undersized for ripple current in this application.
Check supply voltage stability. Confirm the voltage across the capacitor does not exceed its rated working voltage with appropriate derating margin. Transient overvoltage from inductive loads or poor supply regulation accelerates capacitor degradation.
Consider a preventive replacement program. In equipment with a defined service life — industrial controls, medical devices, professional audio equipment — scheduling preventive electrolytic capacitor replacement at 7–10 year intervals (based on operating conditions) eliminates the failure mode entirely rather than waiting for it to present.
Frequently Asked Questions About Bulging Capacitors
Q1: Is it safe to use equipment with a bulging capacitor?
No — equipment with a confirmed bulging capacitor should be powered off and not used until the component is replaced. A bulging capacitor has already reached a state of internal deterioration that is progressing toward complete failure. Continued operation risks sudden failure of the capacitor, which can cause the power supply to stop functioning, damage downstream components from uncontrolled power rail behavior, or in extreme cases — particularly in high-voltage mains-connected equipment — create a safety hazard from electrical arcing or electrolyte venting near live conductors. The equipment should be considered non-operational until repair is complete.
Q2: Can a bulging capacitor cause other component damage on the board?
Yes, in several ways. A failing electrolytic with elevated ESR causes increased power supply ripple that can damage or stress microprocessors, memory, and sensitive analog components through supply rail noise. Electrolyte venting releases corrosive fluid that attacks PCB traces, solder joints, and adjacent component leads — causing corrosion-based failures in components that were physically undamaged by the original capacitor failure. In worst-case scenarios where a capacitor ruptures under power, the energy release can physically damage nearby components through heat and mechanical force. Any board with an advanced or vented bulging capacitor requires a thorough inspection beyond simply replacing the obvious failed component.
Q3: How do I tell the difference between a bulging capacitor and one that just has a scored vent pattern?
All aluminum electrolytic capacitors have a pressure relief vent scored into the top of the can — this is a normal manufacturing feature and not a failure indicator. A healthy capacitor has a completely flat top surface; the score lines are shallow grooves in an otherwise flat aluminum surface. A bulging capacitor has a convex or domed top surface that is visibly elevated above the rim of the can — the metal has deformed outward from internal pressure. In subtle early-stage bulging, the distinction requires viewing the capacitor from the side at eye level to detect the slight convexity. A straightedge placed across the top of the can will rock on a bulged cap and lie flat on a healthy one.
Q4: Can I replace a single bulging capacitor or should I replace all of them?
In a switching power supply or any power electronics application where all the electrolytic capacitors have been operating at the same temperature and ripple current stress, replacing only the one that has visibly failed while leaving others in place is a temporary fix at best. The other capacitors have accumulated similar stress hours and their ESR is likely elevated even if they haven’t yet visibly swollen. Measure the ESR of all electrolytic capacitors on the board. Any reading more than 3× the expected new-condition value warrants replacement. In consumer electronics repair, experienced technicians typically replace all electrolytic capacitors in a power supply section as a preventive measure when one has failed visibly — the component cost is small compared to the labor of a second repair visit.
Q5: What is the best replacement for a bulging capacitor in a computer power supply or motherboard?
For computer power supplies and motherboards — the most common context for bulging capacitor failures — the correct replacement is a 105°C-rated low-impedance (low-ESR) electrolytic capacitor with the same or higher voltage rating and same capacitance. For motherboard capacitors, Nichicon HE or HZ series, Rubycon ZLH or ZLJ, and Panasonic FR are widely regarded as premium replacement choices that offer better reliability than the original components in many affected boards. Match the physical dimensions (diameter and height), lead pitch, and polarity orientation exactly. Source from franchise distributors rather than generic marketplaces to ensure component authenticity. A quality 105°C low-impedance replacement in a properly maintained thermal environment will outlast the equipment it’s installed in.
A Bulging Capacitor Is the Last Warning Before Something Goes Wrong
The bulging capacitor is a self-reporting failure mode — the component is physically announcing its own end-of-life state in a way that is visible without any test equipment. That visibility is valuable: it gives the engineer or technician the opportunity to make a controlled repair before the failure mode progresses to board damage, equipment downtime, or safety hazard.
Taking that opportunity seriously means more than replacing the swollen component and returning the equipment to service. It means investigating the thermal and electrical conditions that caused the failure, replacing all electrolytic capacitors on the affected board that show elevated ESR, upgrading to 105°C low-impedance types as the replacement standard, and verifying that the root cause thermal or ripple current overstress condition has been addressed. Done correctly, a bulging capacitor repair produces hardware that is more reliable than it was when it left the factory.
Inquire: Call 0086-755-23203480, or reach out via the form below/your sales contact to discuss our design, manufacturing, and assembly capabilities.
Quote: Email your PCB files to Sales@pcbsync.com (Preferred for large files) or submit online. We will contact you promptly. Please ensure your email is correct.
Notes: For PCB fabrication, we require PCB design file in Gerber RS-274X format (most preferred), *.PCB/DDB (Protel, inform your program version) format or *.BRD (Eagle) format. For PCB assembly, we require PCB design file in above mentioned format, drilling file and BOM. Click to download BOM template To avoid file missing, please include all files into one folder and compress it into .zip or .rar format.


