Inquire: Call 0086-755-23203480, or reach out via the form below/your sales contact to discuss our design, manufacturing, and assembly capabilities.
Quote: Email your PCB files to Sales@pcbsync.com (Preferred for large files) or submit online. We will contact you promptly. Please ensure your email is correct.
Notes: For PCB fabrication, we require PCB design file in Gerber RS-274X format (most preferred), *.PCB/DDB (Protel, inform your program version) format or *.BRD (Eagle) format. For PCB assembly, we require PCB design file in above mentioned format, drilling file and BOM. Click to download BOM template To avoid file missing, please include all files into one folder and compress it into .zip or .rar format.
Bad Capacitor Symptoms: Troubleshooting & Diagnosis
A capacitor fails and the clues it leaves behind range from brutally obvious — a bloated aluminium can with crust around the base — to completely invisible until you measure it with an ESR meter. That gap between visual failure and electrical failure is exactly what makes capacitor diagnosis simultaneously simple and deceptive. The obvious cases catch themselves. The dangerous ones look fine until the circuit stops working, and even then, a capacitance check often passes while ESR has tripled.
Bad capacitor symptoms appear across every category of electronics: switching power supplies, computer motherboards, HVAC systems, motor drives, audio amplifiers, and automotive electronics. The specific symptoms vary by context, but the underlying failure mechanisms — electrolyte loss, oxide dielectric degradation, elevated ESR, and reduced capacitance — are universal. This guide covers the full diagnostic picture: visual symptoms, circuit-level behavioural symptoms across different applications, measurement methods, and the key mistakes that lead to missed diagnoses.
## Why Capacitors Fail: The Root Causes Behind Bad Capacitor Symptoms
Before cataloguing symptoms, it helps to understand what is actually happening inside a failing capacitor. Most bad capacitor symptoms trace back to a small number of physical failure mechanisms.
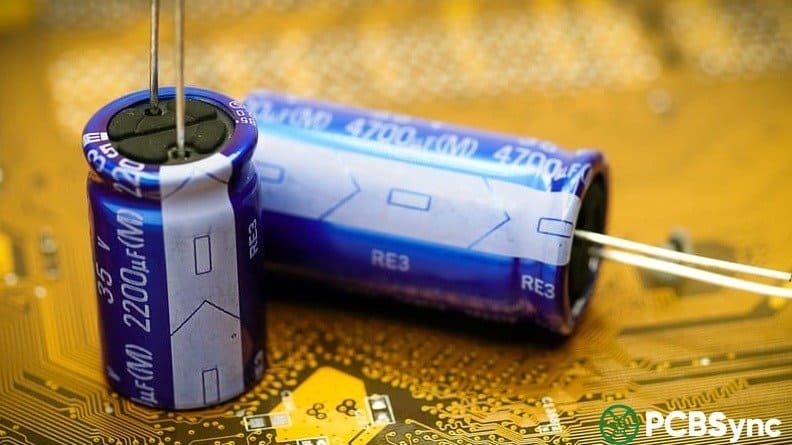
Electrolyte evaporation is the primary aging mechanism in wet aluminium electrolytic capacitors. The liquid electrolyte that forms the effective cathode slowly vaporises through the capacitor’s seal, driven by heat and time. As electrolyte volume decreases, the ionic resistance rises — ESR climbs. As the plates partially dry out, effective capacitance falls. This happens gradually over years, and the capacitor may look perfectly normal throughout the process.
ESR rise driving thermal runaway is the second stage. As ESR increases, the ripple current flowing through the capacitor generates more I²R heat (P = I²ESR). That heat accelerates evaporation, which raises ESR further, which generates more heat. This self-reinforcing process eventually causes the electrolyte to boil, gas pressure builds inside the can, and the safety vent ruptures.
Oxide dielectric breakdown occurs when a polarised capacitor is subjected to overvoltage, reverse voltage, or simply very long service life. The aluminium oxide or tantalum pentoxide dielectric layer thins or develops defects, leakage current rises sharply, and the capacitor transitions from high impedance to near-short-circuit.
Mechanical damage and contamination from physical stress, PCB vibration, solder heat, or external corrosive environments can damage the seal, introduce moisture, or crack the dielectric in ceramic and film types.
Understanding these mechanisms clarifies something critical: the visual symptoms of a bad capacitor appear at the end of the failure process, not the beginning. By the time you can see the problem, the circuit has likely been suffering degraded performance for months.
## Visual Symptoms of a Bad Capacitor: What to Look For
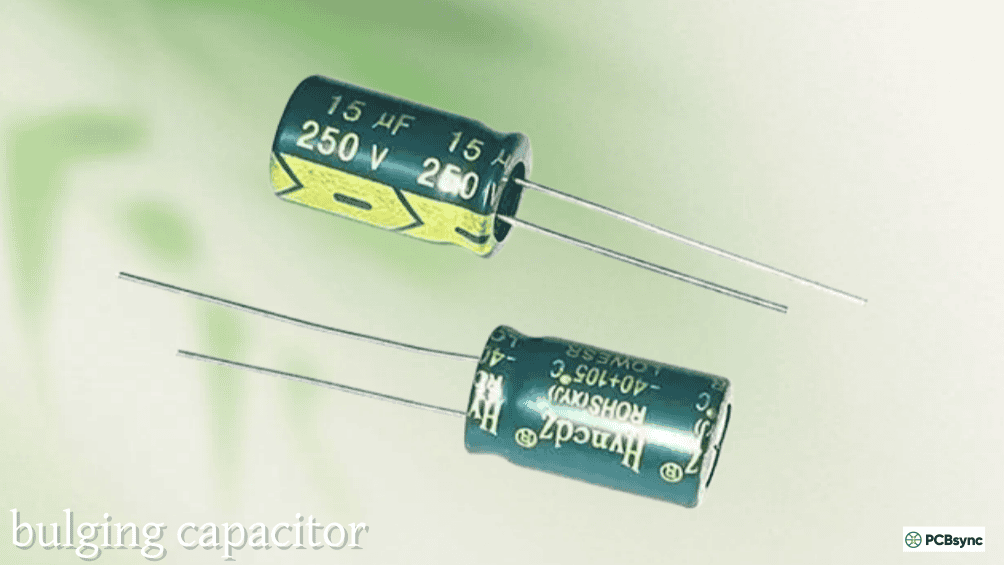
### Bulging or Swollen Top (Aluminium Electrolytic)
The most recognisable bad capacitor symptom is a domed or swollen top on an aluminium electrolytic can. The top of a healthy capacitor is flat; a failing one develops upward pressure as the internal electrolyte generates gas during degradation. The safety vent scoring on the top (typically a cross or K pattern) is designed to deform and open before the can ruptures outright. A bulging top means gas has already built up significantly — the capacitor is failed and must be replaced.
### Open or Cracked Safety Vent
If you can see the scored safety vent on the top of the can has actually cracked open and is no longer flat, the capacitor has fully vented. The electrolyte has expelled, the component is beyond serviceable, and you will usually find electrolyte residue around it.
### Electrolyte Leakage and Residue
Leaked electrolyte appears as a dark brown, reddish-brown, or black crust or residue at the base of the capacitor where it meets the PCB, or tracking up the side of the can. On older boards the electrolyte may dry to a dark, slightly shiny crust. On newer failures it can appear as a visible liquid or gelatinous deposit. Use a flashlight at an oblique angle to the PCB surface — electrolyte residue has a characteristic sheen that is easy to miss under normal lighting.
One important warning: dark brown or black material directly under an aluminium electrolytic is sometimes adhesive glue used to mechanically secure the component against vibration during assembly. The glue itself is harmless. Electrolyte residue is more irregular and often extends further across the PCB surface; glue typically forms a neat ring. If in doubt, smell it — electrolyte has a distinctive acrid chemical odour; glue does not.
### Capacitor Sitting Crooked on the PCB
If the rubber or plastic base seal has been pushed out by internal pressure, the capacitor body may sit visibly tilted or raised off the PCB surface rather than flush. This indicates the internal pressure has been high enough to displace the base — a certain sign of failure.
### Corrosion and Discolouration Around the Leads
On through-hole capacitors where electrolyte has wicked down the leads, you may find green or white corrosion on the copper pads or nearby PCB traces. This matters beyond just the capacitor itself — leaked electrolyte is mildly corrosive and can attack PCB copper over time, creating trace damage or lifted pads that require repair even after the capacitor is replaced.
### Burn Marks or Scorch Marks
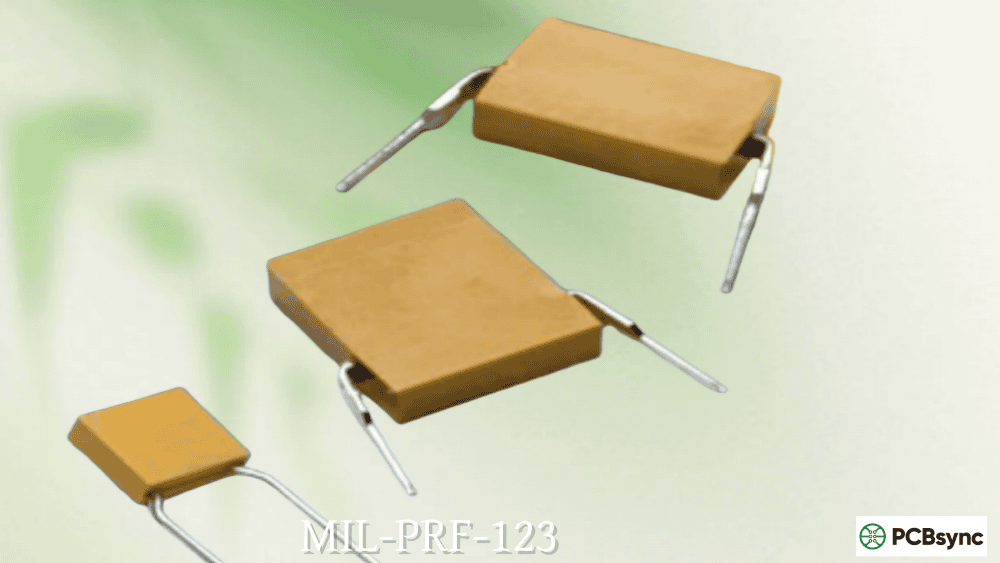
Black or brown scorch marks on the capacitor body, its leads, or the PCB directly underneath it indicate the capacitor experienced significant heat — either from internal failure (I²ESR heating), external heat from a nearby component, or in severe cases, ignition. Scorch marks anywhere near a tantalum capacitor should be treated seriously — tantalum failure is more violent than aluminium electrolytic failure and can ignite adjacent materials.
### SMD Capacitor Leakage
Surface-mount electrolytic capacitors leak downward into the PCB rather than pooling visibly at the base. Because they sit flush to the board, significant electrolyte must accumulate before it becomes visible at the edges of the component. Often the first visual sign is discolouration or corrosion on the solder joints or the PCB surface immediately around the pads. Check with a flashlight at a low angle, and inspect the underside of the PCB if accessible.
Visual Symptom Quick Reference:
Visual Symptom
Component Type
What It Means
Action
Domed/bulging top
Al. electrolytic
Gas pressure buildup — partially vented
Replace immediately
Open safety vent
Al. electrolytic
Fully vented — electrolyte expelled
Replace immediately
Brown/dark crust at base
Al. electrolytic
Leaked electrolyte
Replace; check for PCB trace damage
Capacitor sitting crooked/tilted
Al. electrolytic
Base seal pushed out by pressure
Replace immediately
Corrosion on leads/pads
Al. electrolytic
Electrolyte-induced corrosion
Replace cap; clean and inspect PCB traces
Black scorch marks on body
Tantalum, Al. electrolytic
Thermal event — fire risk if tantalum
Replace; inspect nearby components
Discolouration around SMD pads
SMD electrolytic
Electrolyte leakage
Replace; check pads and traces
Orange flash residue
Tantalum MnO₂
Ignition event — catastrophic failure
Replace cap + inspect board for damage
## Circuit-Level Bad Capacitor Symptoms: Electronics and PCB Applications
The most important bad capacitor symptoms are often the invisible ones — the circuit behaviours that change as capacitor performance degrades, long before any visual sign appears.
### Excessive Ripple Voltage on Power Rails
In a power supply or DC rail, filter capacitors reduce the AC ripple component of the rectified output to a clean DC voltage. As ESR rises in a filter capacitor, the ripple voltage on the output increases — the formula is V_ripple ≈ I_ripple × ESR at switching frequencies. A 10mΩ capacitor might produce 10mV of ESR-related ripple; the same capacitor aged to 1Ω produces 1V of ripple on the same rail. Symptoms at the system level include unstable operation under load, logic errors in digital circuits powered from the affected rail, audio hum or noise in analogue circuits, and sensitive ICs producing errors or crashing.
### System Instability, Random Crashes, and Freezes
Computer systems, embedded controllers, and other digital circuits fed from capacitor-filtered power rails show characteristic instability when those capacitors are failing. The system may work fine when cold (the capacitor’s ESR is higher at low temperature, but the ripple may still be acceptable) and begin crashing after 15–30 minutes of operation as the capacitor warms up and the power supply rail becomes noisier. Alternatively it may work perfectly most of the time and show errors only under computational load, when current draw increases ripple. Random crashes, POST failures, and refusal to boot at all are all documented consequences of bad motherboard capacitors — this was the defining failure mode of the “capacitor plague” that affected millions of computer motherboards between 1999 and 2007.
### Slow or Failed Motor Start (HVAC and Motor Applications)
In HVAC systems, motors, and other inductive load applications, run capacitors provide the phase-shifted current that motor windings need for efficient starting and continuous running. A bad run capacitor causes the motor to struggle on startup, draw higher-than-normal current, run at reduced efficiency, overheat, and potentially fail entirely. The symptoms include the AC compressor making a clicking or humming noise but not starting, the outdoor fan spinning slowly or in the wrong direction initially, the unit cycling on and off more frequently than normal, and energy bills rising without an increase in cooling output. In more obvious cases, the system simply won’t start at all.
### Intermittent Operation That Clears When Warm
Electrolytic capacitors that are near failure sometimes show worse ESR at cold temperatures (when the electrolyte viscosity is higher and ionic conductivity lower) and better performance once the board warms up. A circuit that refuses to start or shows errors during the first few minutes after power-on, then settles into stable operation, is a classic sign of marginally degraded electrolytic capacitors. Similarly, a circuit that works in warm weather but fails in cold is pointing at capacitors with temperature-sensitive ESR.
### Increased Output Voltage Ripple and Noise
If you probe a power rail with an oscilloscope and find more ripple than the datasheet or design spec allows — particularly ripple at the mains frequency (50/60Hz) or at the switching regulator frequency — filter capacitors are the primary suspects. A new 1,000µF electrolytic might produce 20–30mV of ripple; the same capacitor in poor condition may produce 500mV or more, which then couples into sensitive circuits as noise.
### Reduced Audio Quality (Audio Equipment)
In audio equipment, bad electrolytic capacitors in power supply filtering and signal coupling stages produce audible hum (at mains frequency) and distortion. The bass response weakens as coupling capacitors lose capacitance (increasing their impedance at low frequencies). A hum that wasn’t there when the equipment was new, or distortion that appears after years of service, is often the first practical bad capacitor symptom in consumer audio equipment.
## Bad Capacitor Symptoms by Application
Different equipment types produce different symptom profiles, but the same underlying failure mechanisms are at work. This table maps common symptoms to their most likely capacitor-related causes by context:
Bad Capacitor Symptoms by Equipment Type:
Application
Symptom
Likely Capacitor Location
Notes
PC Motherboard
Random crashes, POST failures, won’t boot
CPU VRM electrolytics, power connector caps
Check near CPU socket and power connectors first
PC Motherboard
Works cold, fails warm
CPU VRM electrolytics
Temperature-dependent ESR pattern
Switching Power Supply
High output ripple, output voltage low
Output filter electrolytic
Measure ripple with scope; ESR test cap
Switching Power Supply
Won’t start, SMPS clicks repeatedly
Input bulk electrolytic or output cap
Check bulk cap capacitance and ESR
HVAC / AC Unit
Compressor hums but won’t start
Run capacitor
Common single-phase motor failure; cap most likely cause
HVAC / AC Unit
AC turns on and off repeatedly
Run capacitor or start capacitor
Thermal protection tripping due to capacitor failure
HVAC / AC Unit
Higher energy bills, reduced cooling
Run capacitor
Reduced motor efficiency from degraded cap
Audio Amplifier
Mains-frequency hum in output
Power supply filter electrolytic
50/60Hz hum = inadequate filtering from high-ESR cap
Audio Amplifier
Reduced bass, distortion on low notes
Signal coupling electrolytic
Capacitance loss shifts coupling cap corner frequency
LCD/LED Monitor
Won’t power on, flashes briefly
Power board electrolytics
Very common failure mode in LCD backlights
LCD Monitor
Image stable but screen dims/flickers
Backlight inverter capacitors
Gradual ESR increase affects inverter regulation
Automotive ECU
Engine management errors, intermittent starting
Power supply decoupling caps
Vibration and heat accelerate cap aging in cars
Industrial Inverter/Drive
Output ripple, overcurrent trips
DC link capacitors
High-value electrolytics; measure capacitance and ESR
## How to Test for Bad Capacitors: Measurement Methods
### Visual Inspection First
Always begin with a thorough visual inspection under good lighting, with a flashlight at low angles. Look systematically across all electrolytic capacitors for bulging tops, tilted bodies, crust at the base, and corrosion on leads. This catches obvious failures in 30 seconds and tells you immediately if you have a confirmed bad capacitor. However — and this is critical — a visually normal capacitor is not confirmed good. Most bad capacitors fail electrically long before they show any physical signs.
### ESR Measurement: The Most Reliable Electrical Test
ESR (Equivalent Series Resistance) is the parameter that changes most dramatically and most reliably as an electrolytic capacitor ages. A capacitor with doubled ESR may still measure within 10% of its rated capacitance — and most bench multimeter capacitance checks will pass it. The same capacitor will fail an ESR check decisively.
Use a dedicated ESR meter or an LCR meter with ESR mode. Most ESR meters operate at approximately 100kHz and can test capacitors in-circuit without desoldering, because the 250mV or less test signal is too small to forward-bias surrounding semiconductor junctions. The practical rule: if measured ESR is more than 2–3× the new-condition specification for that value and type, the capacitor is degraded; more than 5× is failed regardless of how the capacitance looks.
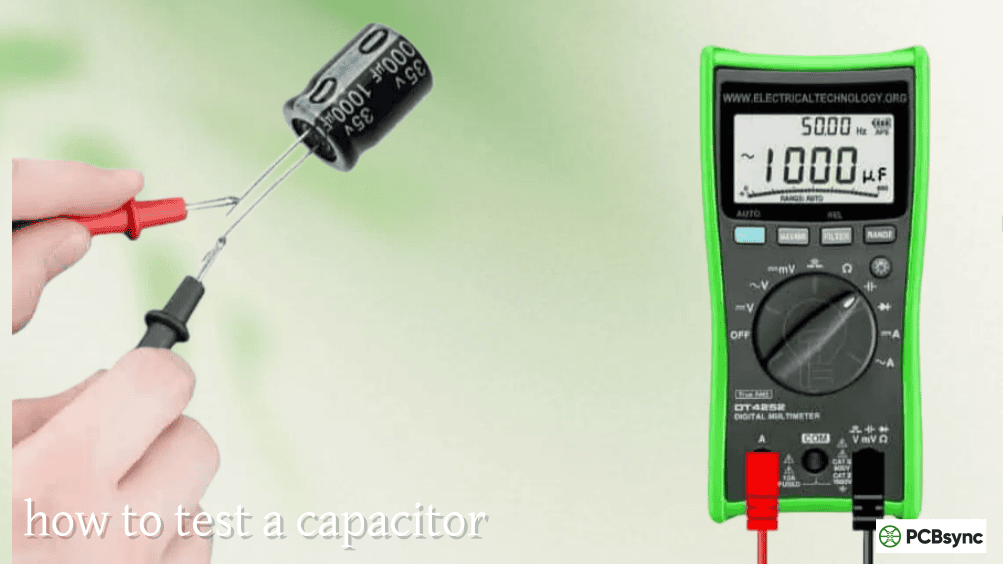
### Capacitance Measurement
A capacitance check catches capacitors that have lost significant capacitance — typically more than 20% below rated value. Most good-quality electrolytic capacitors measure at or slightly above their rated value when new. A reading 10–20% below rated value suggests aging; more than 20% below is a definite failure. Note that ESR failure precedes capacitance loss in most aging patterns, so capacitance testing alone misses many failing capacitors.
For HVAC run capacitors, measure the microfarad value and compare it to the rating printed on the capacitor label. A ±6% tolerance is standard for HVAC run capacitors; anything outside that range means replacement.
### HVAC Capacitor Testing Procedure
HVAC run capacitors hold significant charge even after power is removed. Always discharge a run capacitor safely before touching the terminals: use an insulated screwdriver to bridge across each pair of terminals for several seconds with power confirmed off. Then use a multimeter in capacitance mode (µF setting) to measure across the relevant terminals (C-FAN, C-HERM for dual capacitors) and compare against the rated µF value on the label. A reading significantly below spec — typically more than 10% low — means replacement.
Capacitor Testing Methods Summary:
Test Method
What It Catches
In-Circuit?
Equipment Needed
Best For
Visual inspection
Bulging, leaking, scorching, corrosion
Yes
Eyes + flashlight
Quick first-pass triage
ESR meter
ESR increase (primary aging indicator)
Yes (most cases)
Dedicated ESR meter or LCR meter
Electrolytic capacitors; most reliable
Capacitance check (multimeter)
Capacitance loss (>20%)
Sometimes
Multimeter with µF mode
HVAC caps; supplements ESR test
LCR meter (full)
ESR + capacitance + dissipation factor
With desoldering
LCR meter
Bench testing; comprehensive
Oscilloscope (ripple voltage)
In-circuit performance at operating frequency
Yes
Oscilloscope + current probe
Power supplies; real-world validation
Substitution
Bypasses measurement; tests by replacement
No
Replacement capacitor
When measurement is inconclusive
## The Critical Mistake: Trusting Visual Inspection Alone
This deserves its own section because it is the single most common diagnostic error. A capacitor that looks perfectly healthy — flat top, no leakage, sitting straight, clean leads — can have ESR ten times its original value and be the cause of a circuit that crashes randomly or refuses to start in cold weather.
The capacitor plague era demonstrated this conclusively: millions of boards failed with capacitors that appeared entirely normal until very late in the failure sequence. The electrolyte had degraded internally, ESR had climbed to several ohms from a fraction of an ohm, but the can showed no visible distortion. Only measurement exposed the fault.
In PCB repair and troubleshooting, the workflow should be: visual inspection to catch the obvious cases quickly, followed by ESR measurement on all suspicious electrolytic capacitors — particularly those near heat sources, those on power supply rails, and any that are more than 5–7 years old in equipment that runs continuously.
## Resources for Capacitor Troubleshooting and Diagnosis
Technical References
iFixit — Motherboard Has a Faulty Capacitor — Practical illustrated guide for identifying and replacing failed motherboard capacitors, including symptom identification and soldering guidance
Wikipedia — Capacitor Plague — Detailed history and technical analysis of the 1999–2007 widespread electrolytic capacitor failure event; excellent background on failure mechanisms and visual symptom identification
Peak Electronic Design — ESR Meters — Manufacturer of the ESR60 and ESR70, widely used in-circuit ESR meters for capacitor diagnosis; suitable for board-level repair without desoldering
Murata SimSurfing — Online tool for viewing impedance and ESR vs. frequency curves for Murata capacitors; useful for understanding expected performance characteristics
Component Sourcing for Replacement
DigiKey — Aluminium Electrolytic Capacitors — Parametric search with low-ESR filter; essential for sourcing correct replacement capacitors with matching or better ESR specifications
Q1: My capacitor looks completely normal — flat top, no leakage, sitting straight. Can it still be bad?
Yes, absolutely — and this is the most important thing to understand about capacitor diagnosis. Visual inspection only reveals late-stage or catastrophic failures. The primary electrical failure mode in ageing aluminium electrolytic capacitors is ESR increase driven by electrolyte evaporation, and this process is entirely internal. The can shows no external distortion until the gas pressure from boiling electrolyte builds up enough to deform the top — by which time the capacitor may have been electrically failed for months. Studies of the capacitor plague failures showed that many completely normal-looking capacitors had ESR values ten to twenty times their original specification. The safe diagnostic protocol is: visual inspection catches obvious cases, but any suspicious capacitor — one in a circuit that is misbehaving, one near a heat source, or one more than five to seven years old in continuous-use equipment — should be ESR-tested before being passed as good.
Q2: My power supply has a capacitor that passes the capacitance check on my multimeter but the power supply still doesn’t work properly. What should I check next?
Measure ESR. Capacitance and ESR are independent parameters, and the typical failure mode in switching power supply electrolytic capacitors is ESR increase well ahead of capacitance loss. A capacitor might measure 95µF against a 100µF rating — within 5% tolerance — while having ESR of 3Ω against an original specification of 50mΩ. At the switching frequency, the output ripple is dominated by V = I_ripple × ESR, so a 60× increase in ESR produces 60× more ripple voltage on the output rail regardless of the capacitance value. In a switching power supply, a capacitor with good capacitance but high ESR will produce excessive output ripple, cause the converter control loop to become unstable, and in some designs trigger overcurrent protection — all while the capacitance check passes cleanly. Get an ESR meter or an LCR meter with ESR mode, and test at 100kHz. If ESR is more than 2–3× the datasheet specification for that capacitor, replace it.
Q3: My AC unit hums loudly when I try to start it but the compressor won’t run. Is the capacitor always the cause of this?
A loud humming with no motor startup is the classic symptom of a failed or significantly degraded run capacitor in a single-phase AC motor. The humming is the motor attempting to start but failing because it lacks the phase-shifted magnetic field it needs — which the run capacitor provides. However, it is not always the capacitor. Other causes of the same symptom include a seized compressor (locked rotor condition, where the motor is trying to run but cannot because the mechanical components are stuck — distinguished by the current draw being very high from startup), a failed start relay or start thermistor in systems that use a separate start capacitor, and wiring faults to the capacitor terminals. The capacitor is by far the most common cause of this symptom in an otherwise-functioning HVAC system, and testing it is the logical first step. Measure the capacitor’s microfarad value and compare it to the rating on the label — more than 10% below spec means replacement. If the capacitor tests fine and the symptom persists, a locked rotor condition must be investigated, as continuing to run the motor in that state damages the windings.
Q4: A bad capacitor on my computer motherboard was causing random crashes. I replaced it but the crashes continue — did I miss something?
Several possibilities. First, there may be multiple failed capacitors — electrolytic capacitors on a motherboard of a given age and from a given era tend to fail as a group, not individually, since they were manufactured in the same batch under the same conditions. Inspect and ESR-test all electrolytics on the board, not just the ones that looked bad. Second, the electrolyte from the failed capacitor may have contaminated nearby PCB traces or through-holes — check for corrosion extending from the base of the old capacitor location. Third, the replacement capacitor itself may be a poor-quality part with inadequate ESR specifications for a switching power supply application — always replace with low-ESR types rated for SMPS service, not general-purpose electrolytics. Fourth, if the board is old and the crashes are intermittent and temperature-dependent, other components beyond capacitors (solder joint cracks from thermal cycling, aged voltage regulators, failing CPU socket contacts) may be contributing.
Q5: The HVAC run capacitor on my air conditioner measures slightly outside tolerance — the label says 35µF but it measures 32µF. My AC is still running. Do I really need to replace it?
Yes, and sooner rather than later. A run capacitor measuring 32µF against a 35µF rating is about 8.5% below nominal, which is already outside the ±6% tolerance standard for HVAC run capacitors. The immediate consequence is that your compressor motor and fan motor are receiving a phase-shifted current that is not at the designed magnitude — they are running less efficiently, drawing more current than they should, generating more heat internally, and experiencing greater electrical stress on the motor windings. The practical consequences are higher electricity bills and accelerated wear on the motor. The long-term consequence is that a capacitor that is already 8.5% below spec will continue to degrade, and when it fails completely the motor will either fail to start (humming noise, no rotation) or will start and overheat in a way that trips the thermal protection repeatedly — a condition that itself stresses the motor windings and eventually causes motor failure, which is a far more expensive repair than replacing the capacitor now while the motor is still healthy. Run capacitor replacement is one of the most cost-effective preventive maintenance steps in HVAC systems.
## Building Your Diagnostic Workflow
A reliable bad capacitor diagnosis follows a systematic path rather than jumping straight to replacement. Start with visual inspection — it takes two minutes and immediately separates the obvious failures from the cases requiring measurement. Then move to ESR testing on all suspect electrolytic capacitors, particularly those in power supply stages, near heat sources, and in older equipment. Add a capacitance check where the application warrants it (HVAC capacitors, large bulk electrolytics in power supplies). If measurements are borderline or equipment is old, trust them over the visual appearance. A visually healthy capacitor with ESR three times its specification is a bad capacitor, regardless of what it looks like.
The key insight that experienced repair technicians develop over time is that capacitors fail electrically before they fail visually. Build the habit of measuring before concluding a capacitor is good, and you will close more faults, avoid replacing good components, and stop blaming other parts for problems that are sitting right in front of you, looking perfectly fine.
Inquire: Call 0086-755-23203480, or reach out via the form below/your sales contact to discuss our design, manufacturing, and assembly capabilities.
Quote: Email your PCB files to Sales@pcbsync.com (Preferred for large files) or submit online. We will contact you promptly. Please ensure your email is correct.
Notes: For PCB fabrication, we require PCB design file in Gerber RS-274X format (most preferred), *.PCB/DDB (Protel, inform your program version) format or *.BRD (Eagle) format. For PCB assembly, we require PCB design file in above mentioned format, drilling file and BOM. Click to download BOM template To avoid file missing, please include all files into one folder and compress it into .zip or .rar format.


