Inquire: Call 0086-755-23203480, or reach out via the form below/your sales contact to discuss our design, manufacturing, and assembly capabilities.
Quote: Email your PCB files to Sales@pcbsync.com (Preferred for large files) or submit online. We will contact you promptly. Please ensure your email is correct.
Notes: For PCB fabrication, we require PCB design file in Gerber RS-274X format (most preferred), *.PCB/DDB (Protel, inform your program version) format or *.BRD (Eagle) format. For PCB assembly, we require PCB design file in above mentioned format, drilling file and BOM. Click to download BOM template To avoid file missing, please include all files into one folder and compress it into .zip or .rar format.
The first time I diagnosed a failed 45 5 capacitor in an air conditioning system, I was surprised how something so simple could bring an entire HVAC unit to its knees. The compressor wouldn’t start, the homeowner was sweating in 95°F heat, and all it took was a $25 capacitor to get everything running again. After years of working with electronics—from low-voltage circuits to industrial controls—I’ve come to appreciate that HVAC capacitors are one of the most critical yet frequently overlooked components in climate control systems.
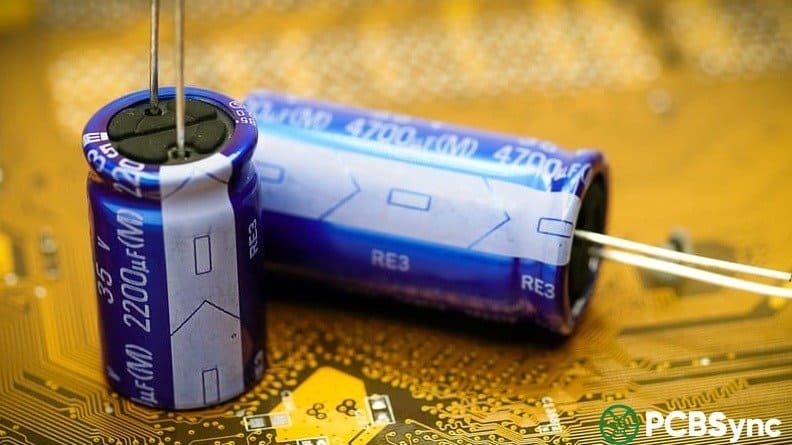
A 45/5 MFD dual run capacitor is the workhorse of residential and light commercial air conditioning systems. The “45/5” designation tells you this is a dual-section capacitor: 45 microfarads (MFD or µF) for the compressor motor and 5 microfarads for the fan motor. Understanding how these capacitors work, when they fail, and how to replace them properly can save you thousands in unnecessary service calls and prevent catastrophic motor damage.
Understanding the 45/5 MFD Dual Capacitor Configuration
Before we dive into applications and troubleshooting, let’s establish what makes a dual run capacitor different from other types. In my experience working with both electronics and HVAC systems, the dual run capacitor is essentially two capacitors in one package—a simple concept with significant practical benefits.
What Does 45/5 MFD Really Mean?
The notation “45/5 MFD” specifies two separate capacitance values in a single component:
45 MFD Section: This larger capacitance section connects to the compressor motor. The compressor is the heart of your AC system, pumping refrigerant and consuming the most power. It needs a substantial capacitor to provide the starting and running torque required.
5 MFD Section: This smaller section connects to the condenser fan motor. The fan motor requires less starting torque than the compressor, hence the smaller capacitance value.
The “MFD” marking stands for microfarads, though technically the correct abbreviation is µF. HVAC manufacturers have used “MFD” for decades, and it’s what you’ll see on replacement capacitors and in technical documentation. Don’t let this confuse you—MFD and µF are identical units.
Why Dual Instead of Two Separate Capacitors?
You might wonder why not just use two individual capacitors. I’ve asked myself this while cramped inside equipment panels, and the answers are practical:
Space Savings: HVAC equipment cabinets are surprisingly tight. A dual capacitor takes up less space than two separate units, allowing more room for other components and improving serviceability.
Cost Efficiency: Manufacturing one dual capacitor is cheaper than producing two separate units. This savings gets passed down through the supply chain.
Simplified Wiring: Fewer connections mean fewer potential failure points. The dual capacitor has a common terminal that both sections share, reducing the number of wires running through the cabinet.
Easier Troubleshooting: When you open an HVAC unit, seeing one dual capacitor versus two separate ones immediately tells you what to look for and what replacement part you need.
How Run Capacitors Work in HVAC Systems
To properly diagnose and replace 45 5 capacitors, you need to understand what they’re actually doing. Unlike starting capacitors that only operate during motor startup, run capacitors remain in the circuit continuously during operation.
The Electrical Function
Single-phase AC motors (used in residential HVAC) need help creating a rotating magnetic field. Three-phase motors naturally create this rotation, but single-phase motors require additional circuitry. The run capacitor provides this assistance by creating a phase shift in the current.
Here’s what happens: The capacitor creates a 90-degree phase shift between the current in the start winding and the run winding. This phase shift creates a rotating magnetic field that keeps the motor running efficiently. Without this phase shift, the motor would vibrate, run hot, draw excessive current, and eventually fail.
I’ve measured the difference with and without proper capacitance. A compressor with a failed 45 MFD capacitor draws 25-40% more current and runs hotter by 30-50°F. Left unchecked, this leads to premature motor failure—turning a $25 capacitor replacement into a $1,500 compressor replacement.
Why These Specific Values?
You might wonder why 45/5 specifically became so common. The answer lies in the typical motor sizes used in residential AC systems:
2-4 Ton AC Units: These dominate the residential market in the US. The compressor motors in this range typically need 40-50 MFD, with 45 MFD being the sweet spot. The condenser fans use 5 MFD almost universally.
Motor Design Standards: HVAC manufacturers have standardized around certain motor designs, and 45/5 MFD dual capacitors match the requirements of these standard motors. This standardization benefits everyone—manufacturers, distributors, technicians, and end users.
Common Specifications and Ratings
When selecting or replacing a 45 5 capacitor, understanding the specifications beyond just the capacitance values is crucial for proper operation and longevity.
Critical Specification Table
Specification
Typical Range
What It Means
Capacitance
45 MFD ±6% / 5 MFD ±6%
Actual capacitance tolerance
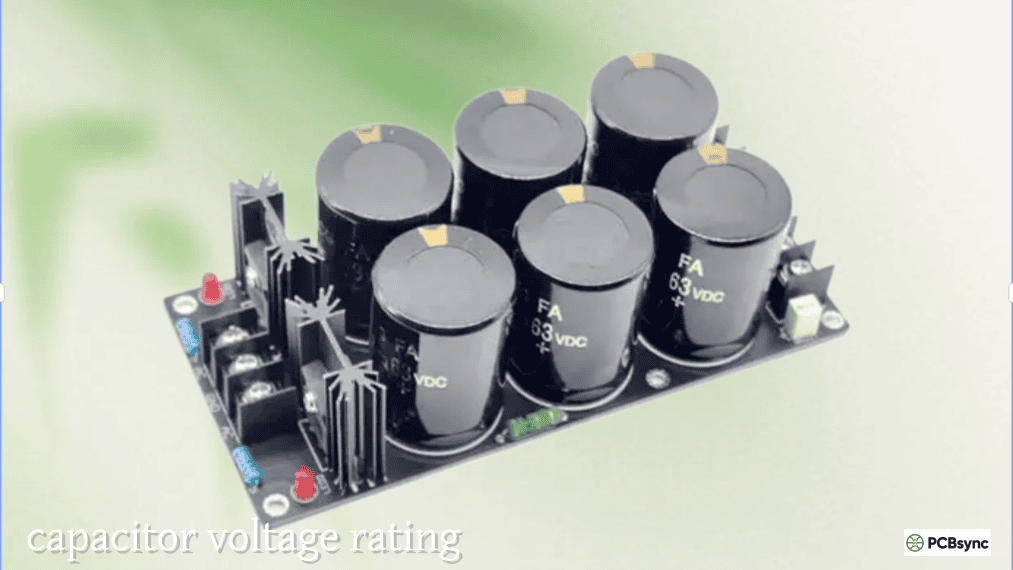
Voltage Rating
370VAC or 440VAC
Maximum continuous AC voltage
Temperature Rating
-40°F to 160°F (-40°C to 70°C)
Operating temperature range
Terminal Configuration
3 or 4 terminals
Common, HERM, FAN configurations
Physical Size
2″ x 4″ typical (oval)
Must fit in existing space
Mounting
Stud or bracket
Mechanical attachment method
Dielectric
Metallized polypropylene film
Construction technology
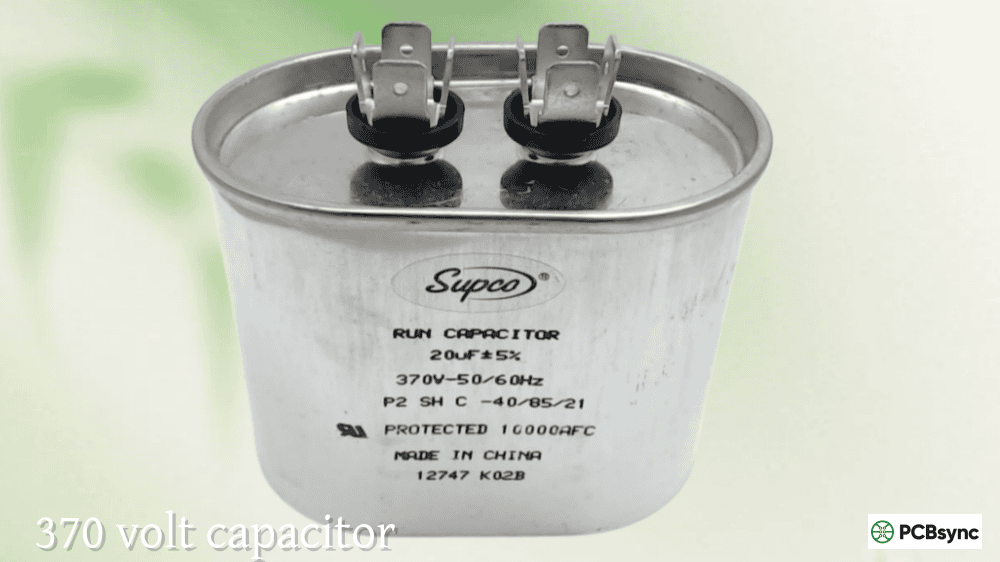
Voltage Rating: 370VAC vs 440VAC
This is where I see the most confusion, so let’s clear it up. The voltage rating indicates the maximum continuous AC voltage the capacitor can handle. In the US, residential systems typically operate on 208-240VAC nominal.
370VAC Capacitors: Designed for systems operating up to 370VAC. These are standard for most residential applications. They’re slightly smaller and less expensive than 440VAC units.
440VAC Capacitors: Designed for higher voltage applications. Here’s the key insight I’ve learned: you can always substitute a 440VAC capacitor in place of a 370VAC, but never the reverse.
Why use 440VAC in a 240V system? Several reasons:
Voltage Spikes: Electrical systems experience transient voltage spikes. A 440VAC capacitor has more margin to handle these without damage.
Longer Lifespan: Operating a capacitor below its maximum voltage rating extends its life. The dielectric experiences less stress, reducing degradation.
Universal Replacement: Many service techs carry only 440VAC capacitors because they work in all applications. This simplifies inventory.
In my experience, I always recommend 440VAC capacitors for replacement, even in 370VAC applications. The marginal cost increase ($2-3) is worth the added reliability.
Capacitance Tolerance
The ±6% tolerance is important to understand. A 45 MFD capacitor can actually measure anywhere from 42.3 to 47.7 MFD and still be within specification. Similarly, the 5 MFD section can range from 4.7 to 5.3 MFD.
I’ve measured hundreds of capacitors, and here’s what I’ve found: new capacitors typically read within 2-3% of nominal. As they age, capacitance decreases. When a 45 MFD section measures below 40 MFD, I replace it, even if technically still within the wide tolerance band. The motor performance has already degraded noticeably by that point.
Real-World HVAC Applications
Let me walk you through the actual systems where you’ll encounter 45 5 capacitors and what role they play.
Residential Central Air Conditioning
This is the primary application. A typical residential AC system consists of:
Outdoor Unit Components:
Compressor motor (uses the 45 MFD section)
Condenser fan motor (uses the 5 MFD section)
Contactor (switching relay)
Control board or thermostat interface
The 45 5 capacitor sits in the outdoor unit, usually mounted to the side panel or near the contactor. When the thermostat calls for cooling, the contactor closes, sending power to both the compressor and fan motor. The capacitor provides the phase shift both motors need to run efficiently.
I’ve worked on systems ranging from 1.5 tons to 5 tons, and the 45/5 configuration covers most residential installations. Smaller systems (under 2 tons) might use 35/5 or 40/5, while larger systems might use 50/5 or even 55/5, but 45/5 is by far the most common.
Heat Pump Systems
Heat pumps use the same basic configuration as air conditioners but with a reversing valve to switch between cooling and heating modes. The 45 5 capacitor requirements remain the same in both modes because the compressor and fan motors still need the same phase shift for proper operation.
One interesting note: heat pumps often work harder than straight AC units because they run year-round. I’ve noticed capacitors in heat pump applications tend to fail slightly more frequently—typically every 5-7 years versus 7-10 years in cooling-only systems.
Light Commercial Applications
Package units for small commercial buildings often use 45/5 or similar dual run capacitors. These might include:
Rooftop units for small retail spaces
Restaurant kitchen AC units
Small office building climate control
Mobile home package units
The principles remain the same, though commercial applications might see harder use with longer run times and less-controlled operating environments.
Troubleshooting and Diagnosing Failed 45/5 Capacitors
Capacitor failure is one of the most common HVAC issues, and recognizing the symptoms can save significant diagnostic time.
Classic Failure Symptoms
Symptom
Likely Cause
What’s Happening
Compressor won’t start, hums loudly
Weak or failed 45 MFD section
Insufficient starting torque
Fan runs but compressor doesn’t
Failed 45 MFD section
Fan circuit still functional
Compressor runs but fan doesn’t
Failed 5 MFD section
Compressor circuit still functional
Unit trips breaker immediately
Shorted capacitor
Drawing excessive current
System runs but short cycles
Weak capacitor
Reduced efficiency causes overheating
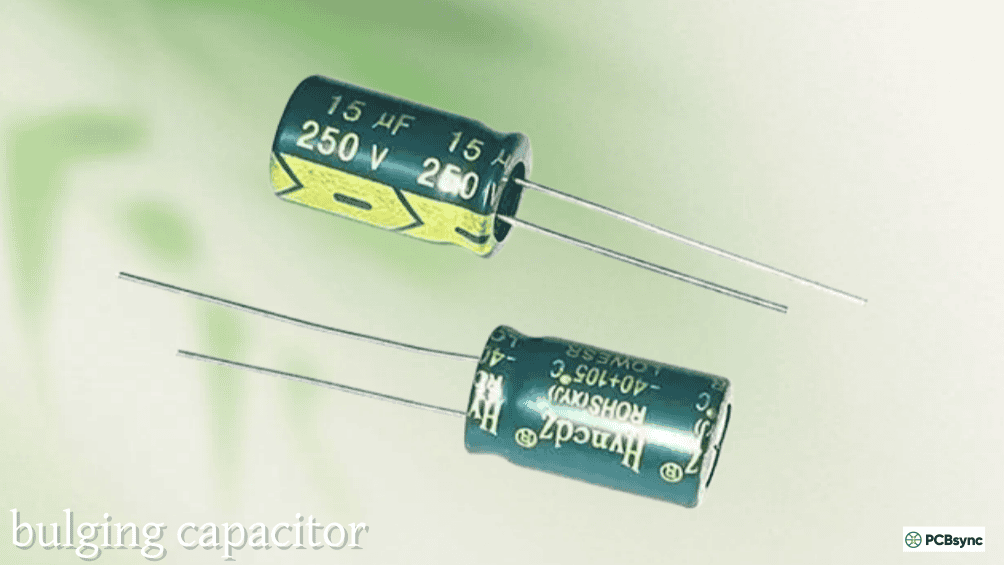
Bulged or leaking capacitor
Internal failure
Visible physical damage
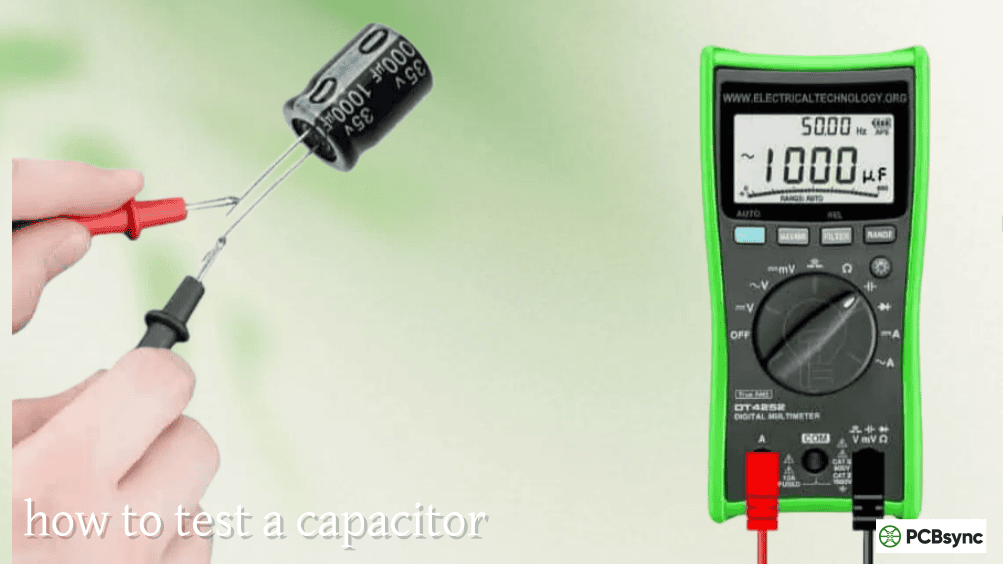
How to Test a 45 5 Capacitor
I always test capacitors when diagnosing HVAC issues. Here’s my systematic approach:
Visual Inspection First: Before any electrical testing, look at the capacitor. Bulging, leaking, or rust indicates immediate replacement. A capacitor should have flat surfaces—any swelling means internal pressure buildup from failure.
Voltage Safety: ALWAYS discharge the capacitor before testing. Even with power off, capacitors can hold dangerous voltage. I use an insulated screwdriver across the terminals (with gloves and safety glasses) or a proper discharge tool.
Capacitance Measurement: Using a multimeter with capacitance function or a dedicated capacitor tester:
Discharge the capacitor fully
Remove at least one wire from each section
Measure the 45 MFD section between HERM and C terminals
Measure the 5 MFD section between FAN and C terminals
Compare to specifications
Interpretation:
Within 10% of nominal: Generally acceptable
10-20% low: Replace soon, performance degraded
More than 20% low: Replace immediately
Any shorts or opens: Replace immediately
ESR Testing: Advanced technicians sometimes measure Equivalent Series Resistance (ESR). High ESR indicates internal degradation even if capacitance measures okay. I’ve found capacitors with correct capacitance but high ESR that still caused motor problems.
Environmental Factors Affecting Lifespan
Not all capacitor failures are created equal. Several environmental factors dramatically affect lifespan:
Heat: This is the killer. Capacitors mounted in direct sunlight or near hot compressors age faster. I’ve seen capacitors fail in 2-3 years in Arizona desert installations but last 10+ years in temperate climates.
Electrical Stress: Systems with frequent short cycling, voltage fluctuations, or improperly sized circuits stress capacitors. Installing a hard start kit or addressing electrical issues can extend capacitor life.
Vibration: The compressor creates significant vibration. Loose mounting or poor installation accelerates mechanical failure.
Moisture: While HVAC capacitors are rated for outdoor use, standing water or flooding can accelerate corrosion and failure.
Proper Replacement Procedures
Replacing a 45 5 capacitor isn’t complicated, but doing it correctly prevents problems and ensures safety.
Safety First: Critical Warnings
I cannot overstate this: HVAC systems operate at potentially lethal voltages (240VAC). Before working on any system:
Turn off power at the breaker: Not just the thermostat—the main breaker for the outdoor unit
Verify power is off: Use a voltmeter to confirm no voltage at contactor or capacitor
Discharge the capacitor: Even with power off, capacitors hold charge
Take photos: Before disconnecting anything, photograph the wiring
Step-by-Step Replacement Process
Materials Needed:
Replacement 45/5 capacitor (same voltage rating or higher)
Screwdriver set
Multimeter
Insulated gloves
Camera or phone for photos
Wire labels or tape
Terminal crimps or spade connectors (if needed)
Procedure:
Power Down: Turn off the breaker and verify with a meter
Access: Remove the service panel on the outdoor unit
Locate: Find the existing capacitor (usually cylindrical or oval, mounted near the contactor)
Document: Take clear photos of all wire connections
Discharge: Short the terminals with an insulated screwdriver
Label: Mark each wire with its terminal designation (C, HERM, FAN)
Disconnect: Remove wires from old capacitor
Remove: Unbolt or unclip the old capacitor
Install: Mount the new capacitor in the same position
Connect: Attach wires to correct terminals using your photos
Verify: Double-check all connections before powering up
Test: Turn power on and verify proper operation
Terminal Configuration: Understanding the Connections
The 45 5 capacitor typically has three or four terminals:
Common (C): Shared connection point for both capacitor sections. This connects to one side of the power supply.
HERM: Stands for “hermetic compressor.” This terminal connects to the compressor start winding and completes the 45 MFD circuit.
FAN: Connects to the fan motor start winding and completes the 5 MFD circuit.
C (second): Some capacitors have two separate common terminals instead of one shared terminal. They’re electrically connected internally.
The critical point: mixing up HERM and FAN connections won’t damage anything immediately, but the motors won’t run correctly. The compressor will get 5 MFD instead of 45 MFD and won’t start, while the fan gets 45 MFD instead of 5 MFD and might run faster or draw excess current.
Compatibility and Cross-Reference
One question I hear constantly: “Can I substitute a different capacitor rating?” Let’s address the common scenarios.
Can You Substitute Different Capacitance Values?
Exact Match Preferred: Always try to match the original specifications exactly. The motor manufacturer designed the system for specific capacitance values.
Minor Variations: If you cannot find an exact 45/5, here’s what’s typically acceptable:
40/5 through 50/5 for the compressor section (±10%)
4/5 through 6/5 for the fan section (±20%)
I’ve used 50/5 in place of 45/5 without issues when that’s what was available. The performance difference is minimal. Going too far outside this range can cause problems—using a 35/5 in place of 45/5 will reduce starting torque and efficiency.
Never Mix and Match: Some techs try using a single capacitor for one motor and running the other motor without capacitance. Don’t. Both motors need their proper capacitance for efficient operation.
Universal Replacement Capacitors
Some manufacturers sell “universal” or “multi-section” capacitors with multiple taps for different capacitance values. These work fine if properly configured, but I prefer standard capacitors for simplicity. Universal capacitors have more terminals to manage and more opportunities for incorrect connections.
Voltage Rating Substitution
As mentioned earlier:
440VAC can replace 370VAC (recommended)
370VAC cannot replace 440VAC
Never use a lower voltage rating than original
Maximizing Capacitor Lifespan
Through years of HVAC work, I’ve identified several practices that significantly extend capacitor life.
Environmental Protection
Shade: If possible, shade the outdoor unit from direct afternoon sun. A unit running 20°F cooler can double capacitor lifespan.
Drainage: Ensure proper drainage around the outdoor unit. Standing water accelerates corrosion.
Ventilation: Don’t block airflow around the unit with plants or debris. Good airflow keeps everything cooler, including capacitors.
Mounting: Ensure the capacitor is securely mounted. Loose capacitors vibrate excessively and fail faster.
Electrical System Optimization
Voltage Stability: Use a whole-house surge protector. Voltage spikes damage capacitors (and other HVAC electronics).
Proper Wiring: Undersized electrical service or corroded connections create voltage variations. Ensure clean, tight connections throughout.
Balanced Load: Don’t run major appliances on the same circuit as the AC system if possible. Voltage drops from other loads stress the capacitor.
Maintenance Schedule
Annual Inspection: Visually inspect the capacitor every spring before cooling season:
Check for bulging or leaking
Ensure secure mounting
Clean dust and debris from terminals
Test capacitance if equipment available
Proactive Replacement: Many techs recommend replacing capacitors every 7-10 years as preventive maintenance, even if they test okay. Given the low cost versus service call expense, this makes economic sense for commercial applications.
I’ve seen every possible capacitor-related mistake. Learn from others’ errors:
Mistake 1: Ignoring Polarity
Some people think capacitors have polarity like electrolytic capacitors in electronics. HVAC run capacitors are non-polarized—they work in either direction. However, the specific terminals (C, HERM, FAN) must connect to the correct wires. The issue isn’t polarity but correct circuit connections.
Mistake 2: Working on Live Circuits
This should be obvious, but I’ve witnessed techs “hot checking” connections. Don’t. HVAC voltages can kill. Always de-energize before working.
Mistake 3: Forgetting to Discharge
Even with power off, capacitors hold dangerous voltage. I know a tech who got shocked by a capacitor in a unit that had been off for a week. Always discharge before touching terminals.
Mistake 4: Over-tightening Terminals
Terminal screws on capacitors are relatively delicate. Over-tightening can crack the internal connections. Snug is sufficient—you don’t need gorilla force.
Mistake 5: Using Incorrect Voltage Rating
Installing a 370VAC capacitor in a 440VAC application leads to premature failure. Always match or exceed the voltage rating.
Selecting Quality Replacement Capacitors
Not all 45 5 capacitors are created equal. Quality varies significantly between manufacturers.
Manufacturer Tier Comparison
Tier
Examples
Expected Life
Price Range
Best For
Premium
Copeland, Emerson, GE
10-15 years
$25-$40
Long-term reliability
Mid-Range
Titan, Mars, Packard
7-10 years
$15-$25
Standard replacement
Budget
Generic Chinese brands
3-5 years
$8-$15
Budget-conscious repairs
My Recommendation: For my own equipment or quality installations, I use premium brands. The $10 difference between budget and premium is negligible compared to:
Service call cost ($75-$150)
Downtime and discomfort
Potential motor damage from marginal capacitors
Peace of mind
For rental properties or temporary solutions, mid-range brands represent good value. I avoid budget capacitors entirely—the failure rate doesn’t justify the savings.
Useful Resources and Tools
Here are the resources I rely on for working with HVAC capacitors:
Q1: Can I run my AC without a capacitor temporarily?
Short answer: No, don’t try it. Without the proper capacitor, single-phase AC motors cannot develop the rotating magnetic field needed for operation. The compressor might hum but won’t start, or if it does manage to start somehow, it will draw excessive current, overheat rapidly, and likely damage the motor windings within minutes.
I learned this the expensive way early in my career. A customer called late Friday afternoon with no cooling, and I confirmed a failed 45 5 capacitor. We didn’t have the correct replacement in stock, and no suppliers were open until Monday. The customer begged me to “just get it running somehow until Monday.” Against my better judgment, I tried bypassing the capacitor. The compressor hummed loudly, drew 60 amps (normal is 15-20 amps), and the breaker tripped after about 30 seconds. If the breaker hadn’t tripped, the compressor windings would have burned out in just a few minutes.
The physics is straightforward: single-phase motors need the phase shift that the capacitor provides. There’s no workaround, temporary fix, or “just for now” solution. If the capacitor is failed, the system must remain off until you install a proper replacement. Operating without it risks turning a $25 capacitor problem into a $1,500 compressor replacement.
Q2: Why do 45/5 capacitors fail more frequently than other HVAC components?
Capacitors fail frequently because they’re working hard in harsh conditions. Let me break down the failure mechanisms:
Heat Stress: The outdoor unit sits in direct sunlight, often reaching 130-150°F inside the cabinet. Capacitor dielectric material degrades faster at elevated temperatures. Every 18°F increase in operating temperature roughly halves the expected lifespan.
Electrical Stress: The capacitor experiences continuous AC voltage and current at 60 Hz. The dielectric material is constantly polarizing and depolarizing millions of times per day. This internal molecular activity gradually breaks down the dielectric, reducing capacitance and eventually causing failure.
Voltage Transients: Lightning strikes near power lines, utility switching operations, and other motors starting create voltage spikes. These transients stress the capacitor beyond its continuous rating.
Manufacturing Reality: Capacitors are relatively inexpensive components. Manufacturers balance cost versus performance, and the result is a component with a typical 7-10 year lifespan in normal conditions—much shorter than compressors or fan motors.
In my experience servicing HVAC systems for over 15 years, capacitors are the highest-failure-rate component, accounting for probably 30-40% of all service calls. The good news: they’re cheap and easy to replace. The bad news: you’ll replace them multiple times over the life of the system.
Q3: Is it okay to use a 50/5 capacitor when I need a 45/5?
Yes, using a 50/5 in place of a 45/5 is generally acceptable and won’t cause problems in most residential applications. Here’s my experience with this substitution:
The 10% higher capacitance on the compressor circuit (50 MFD instead of 45 MFD) provides slightly more phase shift and starting torque. In practice, the motor will start marginally easier and might run slightly more efficiently. I’ve never seen negative effects from this substitution in thousands of installations.
However, there are limits to acceptable substitution. Going too far—like using a 60/5 or 35/5—can cause issues:
Too high (60 MFD instead of 45 MFD): The motor might draw excess current and run hot. The windings experience higher magnetic forces than designed for.
Too low (35 MFD instead of 45 MFD): Reduced starting torque makes startup difficult or impossible, especially on hot days when compressor pressure is high. The motor will draw excess starting current and might not reach full speed.
My rule of thumb: ±10% is safe, ±20% is the absolute maximum I’d consider, and exact match is always preferred.
One important note: never mix manufacturers’ recommendations with field substitutions. If the manufacturer’s data plate says 45/5, don’t permanently install a 50/5 and update the label. Keep the original specification for future reference, but note the substitution in your service records.
Q4: How can I tell if my capacitor is starting to fail before it completely dies?
Great question—catching a failing capacitor before complete failure can prevent damage to motors and avoid emergency service calls during the hottest days. Here are the warning signs I’ve learned to recognize:
Physical Signs:
Bulging: The capacitor case should be perfectly flat. Any swelling indicates internal pressure from degradation
Rust or corrosion on terminals or case
Oily residue or actual leaking (the dielectric fluid leaking out)
Discoloration or burned appearance near terminals
Performance Symptoms:
Unit takes longer to start than normal
Compressor makes a humming sound for 2-3 seconds before starting (should be nearly instant)
System short-cycles more frequently
Higher electric bills without obvious cause (motor inefficiency)
Outdoor unit feels hotter than usual to the touch
Electrical Measurements (if you have test equipment):
Capacitance reading 10-20% below nominal value
Higher ESR than specification
Voltage reading across capacitor terminals shows ripple or instability
In my experience, the most reliable early warning is the delayed start. If you notice your AC unit hesitating 1-2 seconds before the compressor kicks in, test or replace the capacitor soon. This hesitation indicates the capacitor has weakened but hasn’t completely failed yet.
I recommend annual spring testing before cooling season if you have a multimeter with capacitance function. Catching a capacitor that’s dropped from 45 MFD to 38 MFD lets you replace it on your schedule, not at 8 PM on a 100°F Saturday when no suppliers are open.
Q5: Can I upgrade to a hard start kit instead of just replacing the capacitor?
Yes, and this is actually an excellent idea in many situations. A hard start kit includes both a start capacitor (much larger, typically 100-300 MFD) and a potential relay. The start capacitor provides extra starting torque, then the relay disconnects it once the motor reaches operating speed. The standard 45 5 capacitor (run capacitor) stays in the circuit continuously.
When I recommend hard start kits:
Weak Electrical Service: If the home has marginal electrical service (old wiring, long runs, etc.), the extra starting boost helps overcome voltage drop during startup.
Difficult Starting Conditions: Systems that run in hot climates where compressor pressure is high during startup benefit from the extra torque.
Aging Compressors: As compressors age, internal wear increases starting friction. A hard start kit can extend the life of a marginal compressor.
Frequent Failures: If you’re replacing the standard 45 5 capacitor every 2-3 years, adding a hard start kit might extend capacitor life by reducing the starting stress.
Cost Considerations: A hard start kit adds $30-$60 to the repair cost, but if it prevents one premature compressor failure ($1,500+), it’s paid for itself many times over.
Installation is straightforward—the hard start kit connects in parallel with the existing run capacitor. You keep the 45/5 dual run capacitor and add the start capacitor/relay assembly.
One caution: some compressor manufacturers void warranties if hard start kits are installed without authorization. Check your compressor warranty terms. For out-of-warranty equipment, I routinely install hard start kits as preventive maintenance, especially in commercial applications.
Conclusion: Mastering the 45/5 Capacitor
The humble 45 5 capacitor might be small and inexpensive, but it’s absolutely critical to HVAC system operation. Understanding how these dual run capacitors work, recognizing failure symptoms, and knowing how to properly test and replace them gives you the power to maintain your own system or troubleshoot professional installations.
Key takeaways from years of working with these components:
Prevention is Cheaper: Annual inspection costs nothing and catches problems before they become emergencies. A visual check takes 2 minutes and can reveal a bulging capacitor before it fails.
Don’t Compromise on Quality: Premium capacitors cost $10-$15 more but last twice as long as budget options. Do the math—premium makes sense.
Safety First, Always: 240VAC can kill. Never work on live circuits, always discharge capacitors, and verify voltage with a meter before touching anything.
Exact Replacement Preferred: While minor substitutions work, matching original specifications exactly ensures optimal performance and longevity.
Document Everything: Take photos before disconnecting anything. Five minutes of documentation prevents hours of troubleshooting incorrect connections.
Whether you’re an HVAC technician, facility maintenance professional, or adventurous homeowner, mastering 45/5 dual capacitor diagnosis and replacement is one of the highest-value skills in HVAC work. The components fail regularly, replacement is straightforward, and success means immediate cooling relief for grateful occupants.
The next time you hear that telltale humming of a compressor that won’t start, you’ll know exactly what to check and how to fix it. And trust me, being the person who restores air conditioning on a sweltering summer day feels pretty good.
Inquire: Call 0086-755-23203480, or reach out via the form below/your sales contact to discuss our design, manufacturing, and assembly capabilities.
Quote: Email your PCB files to Sales@pcbsync.com (Preferred for large files) or submit online. We will contact you promptly. Please ensure your email is correct.
Notes: For PCB fabrication, we require PCB design file in Gerber RS-274X format (most preferred), *.PCB/DDB (Protel, inform your program version) format or *.BRD (Eagle) format. For PCB assembly, we require PCB design file in above mentioned format, drilling file and BOM. Click to download BOM template To avoid file missing, please include all files into one folder and compress it into .zip or .rar format.


