Inquire: Call 0086-755-23203480, or reach out via the form below/your sales contact to discuss our design, manufacturing, and assembly capabilities.
Quote: Email your PCB files to Sales@pcbsync.com (Preferred for large files) or submit online. We will contact you promptly. Please ensure your email is correct.
Notes: For PCB fabrication, we require PCB design file in Gerber RS-274X format (most preferred), *.PCB/DDB (Protel, inform your program version) format or *.BRD (Eagle) format. For PCB assembly, we require PCB design file in above mentioned format, drilling file and BOM. Click to download BOM template To avoid file missing, please include all files into one folder and compress it into .zip or .rar format.
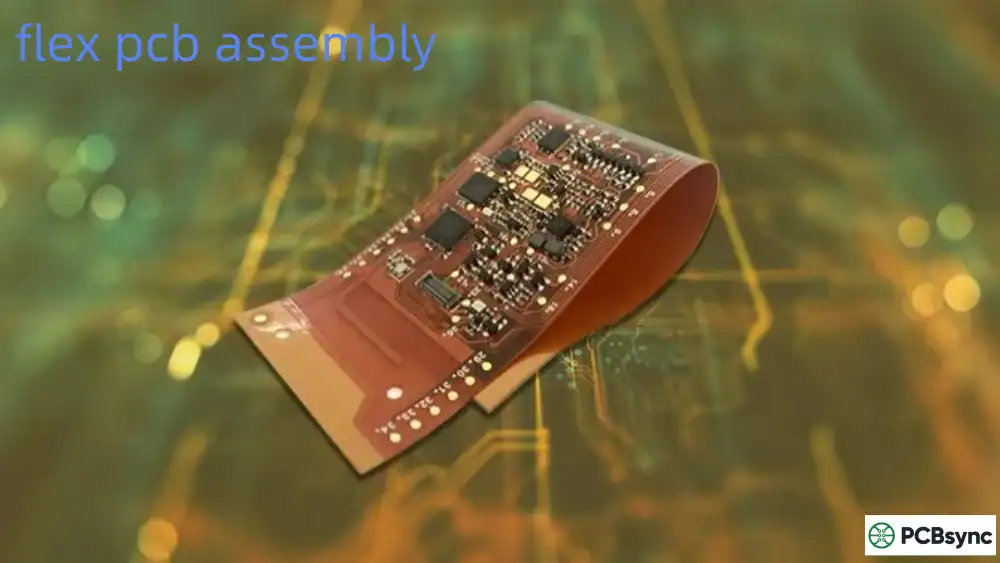
As someone who’s spent over a decade in PCB manufacturing, I’ve seen countless projects fail during the transition from prototype to mass production. The jump from assembling a few hundred boards to tens of thousands isn’t just about turning up the volume—it’s about fundamentally rethinking your entire approach to quality, process control, and cost management.
High volume PCB assembly typically involves producing 10,000+ units per production run, leveraging automated processes to deliver consistent quality at competitive prices. But here’s what most engineering teams don’t realize until it’s too late: scaling production successfully requires as much engineering discipline as designing the circuit itself.
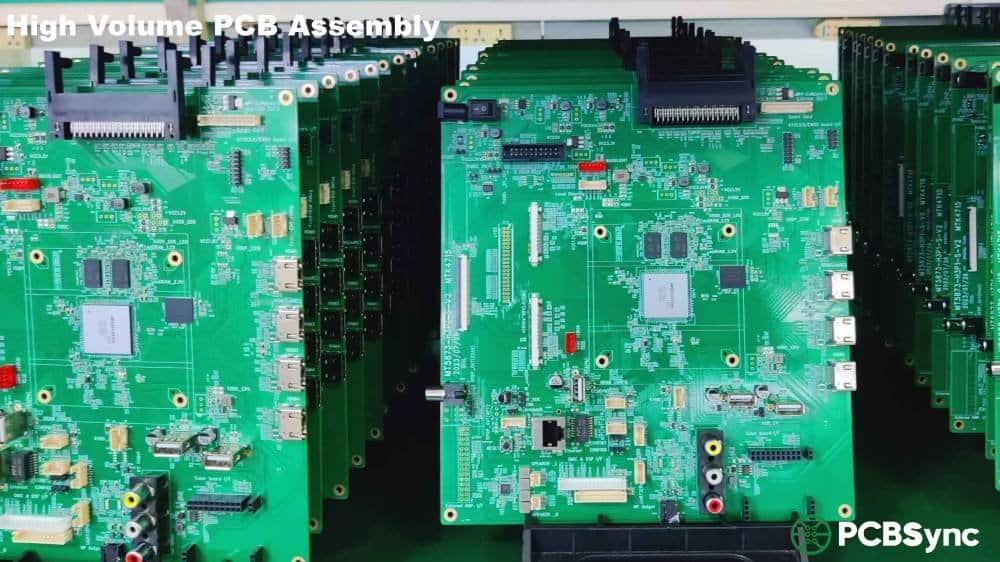
High volume PCB assembly represents the backbone of modern electronics manufacturing. Whether you’re producing consumer electronics, automotive components, or industrial controllers, the principles remain consistent: automation, standardization, and relentless attention to process control.
The industry has evolved significantly. What constituted “high volume” five years ago might be considered mid-volume today. Current production lines can handle 50,000+ components per hour with placement accuracies down to ±0.02mm. That level of precision isn’t optional anymore—it’s table stakes.
Volume Classifications and Their Implications
Understanding where your project fits helps set realistic expectations:
Production Volume
Units Per Run
Primary Assembly Method
Typical Cost Per Unit*
Setup Approach
Prototype
1-100
Manual/Semi-Auto
$15-$50
Custom tooling
Low Volume
100-1,000
Semi-Automated
$8-$20
Flexible fixtures
Mid Volume
1,000-10,000
Automated SMT
$3-$8
Standard tooling
High Volume
10,000-100,000
Full Automation
$0.80-$3.50
Dedicated lines
Mass Production
100,000+
Optimized Lines
$0.50-$2.00
Custom automation
*Costs based on standard 2-4 layer boards with typical component density
Each volume tier demands different optimization strategies. Trying to apply high-volume techniques to a 500-unit run is wasteful. Conversely, scaling a prototype-optimized design to 50,000 units without redesign is asking for trouble.
Design for Manufacturing: The Foundation of Scalability
Here’s a truth from the production floor: 70% of manufacturing defects originate in the design phase. I’ve personally witnessed $200,000 worth of boards scrapped because an engineer didn’t understand panelization constraints.
Critical DFM Principles for High Volume Production
Component Selection and Standardization
Every unique component in your Bill of Materials (BOM) adds complexity and cost. In high volume production, aim for 80% commonality across your component library. This doesn’t mean compromising performance—it means being strategic about where variation actually matters.
Standard package sizes (0402, 0603, 0805 for passives) assemble faster and cheaper than custom packages. Your 0.4mm pitch BGA might save 2mm² of board space, but it’ll add three days to your production schedule and require X-ray inspection that costs $0.40 per board.
Panelization Strategy
Efficient panelization can reduce your material costs by 15-25%. Here’s what works in practice:
Array configurations should maximize material utilization (aim for >85% panel usage)
Include tooling holes at consistent locations for automated handling
Add breakaway tabs that won’t stress components during depanelization
Position fiducial marks for each board and the overall panel
I recommend working with your CM (Contract Manufacturer) early on panel design. They know their equipment’s constraints better than any design guide.
Thermal Management Considerations
When you’re running reflow profiles at 2 meters per minute, thermal mass imbalances become critical. A heavy connector on one side of the board can create a 15°C temperature differential, leading to cold solder joints on smaller components.
Design with symmetric copper distribution across layers. If asymmetry is unavoidable, discuss copper balancing with your fabricator. It costs $50 in engineering time versus $5,000 in rework.
Quality Control Systems That Actually Work
In high volume production, you can’t inspect quality into your product—you have to build it in. But that doesn’t mean inspection is irrelevant. It means being strategic about where and how you test.
Multi-Stage Inspection Architecture
Inspection Stage
Method
Detection Rate
Cost Per Board
When to Use
Post Paste
SPI (3D)
95% paste defects
$0.05-$0.10
Always in high volume
Post Placement
2D/3D AOI
98% placement errors
$0.08-$0.15
Standard for all volumes
Post Reflow
AOI + AXI
99%+ solder defects
$0.15-$0.30
Critical applications
Electrical
ICT/Flying Probe
90-95% circuit faults
$0.20-$0.50
Depends on complexity
Functional
Custom Test Fixture
100% functional issues
$0.30-$2.00
Final verification
The key insight: early detection is exponentially cheaper than late detection. A solder paste defect caught at SPI costs $0.02 to fix. The same defect caught at functional test costs $3.50.
Implementing Statistical Process Control
In volumes above 10,000 units, you need SPC monitoring on critical parameters:
Solder paste deposit volume and height
Component placement offset (X, Y, and rotation)
Reflow temperature profiles at critical zones
AOI defect rates by component type
Set control limits at ±3σ and action limits at ±2σ. When a parameter hits the action limit, adjust the process before it goes out of control. This proactive approach reduced our defect rate from 1,200 PPM to 180 PPM over six months.
Cost Optimization Through Economies of Scale
The economics of high volume production are counterintuitive if you’re coming from low-volume work. Let me break down where the savings actually come from.
Real Cost Structure in High Volume Assembly
In a 50,000-unit production run for a typical 4-layer board:
Material costs: 40-50% (decreases with volume through bulk purchasing)
Assembly labor: 15-20% (dramatically reduced through automation)
Testing/QC: 10-15% (amortized across larger batches)
Setup/Tooling: 5-8% (fixed costs spread across more units)
Overhead/Margin: 20-25%
Volume-Based Cost Reduction Potential
Moving from 1,000 to 10,000 units typically yields:
20-35% reduction in material costs through bulk ordering
30-50% reduction in per-unit assembly costs through optimized line setup
40-60% reduction in amortized tooling costs
However, these savings only materialize if you’ve designed for manufacturability. A poorly optimized design might see only 10-15% cost reduction regardless of volume.
Strategic Component Procurement
At high volumes, component costs dominate your BOM. Here’s what works:
Timing Strategy: Purchase long-lead items 8-12 weeks ahead of assembly. Commodity parts (resistors, capacitors) can often be procured 2-3 weeks out, taking advantage of market fluctuations.
Vendor Diversification: For critical components, maintain 2-3 approved alternate manufacturers. This flexibility saved one of my clients $85,000 when their primary PMIC supplier had allocation issues.
Full Reel Purchasing: Buying components in full reels versus cut tape saves 15-25% on component costs. For a 10,000-unit run, this translates to $2,000-$5,000 in savings on a typical design.
Automation and Equipment Requirements
The equipment decisions you make have multi-year implications. Here’s what you actually need for reliable high volume production.
Essential Equipment Stack
SMT Line Configuration:
Automatic solder paste printer with closed-loop feedback
Post-reflow AOI (3D capable for critical applications)
Through-Hole Processing:
Selective wave soldering or robotic soldering for mixed assemblies
Wave soldering for pure THT designs
Test Equipment:
In-circuit tester with bed-of-nails fixture (for mature designs)
Flying probe tester (for flexibility across product variants)
Custom functional test fixtures
Don’t cheap out on SPI. A $40,000 3D SPI system will save you $100,000 annually in reduced defects. I’ve seen this calculation play out dozens of times.
Building Robust Process Documentation
In high volume, tribal knowledge kills scalability. Everything needs documentation.
Work Instruction Development
Create visual work instructions for every manual operation:
Component orientation requirements
Fixture loading procedures
Test point access requirements
Handling precautions for ESD-sensitive components
Use actual photos from your production line, not generic stock images. Operators need to see exactly what they’re working with.
Solder paste specifications and handling procedures
Reflow profiles with thermocouple placement diagrams
AOI program settings and acceptable defect thresholds
Test procedures with expected results ranges
Revision control is critical. I use PLM software to manage process documentation, but even a well-organized SharePoint can work for smaller operations.
Supplier Qualification and Partnership
Your CM choice makes or breaks high volume success. Here’s how to evaluate potential partners.
Before committing to a 100,000-unit contract, do a 5,000-10,000 unit trial. This reveals problems your audit never will:
How they handle engineering changes
Their actual lead time performance under pressure
Real defect rates versus claimed rates
Communication effectiveness when problems arise
We once discovered a CM’s actual first-pass yield was 87% versus their claimed 96%—only because we did a comprehensive trial run.
Common Scaling Challenges and Solutions
Let me share the mistakes I’ve seen repeatedly, so you can avoid them.
Challenge 1: Inadequate Inventory Management
Problem: Running out of a $0.05 capacitor halts a $50,000 production run.
Solution: Implement min/max inventory levels with automated reorder points. For components used across multiple products, maintain safety stock equal to 2 weeks of consumption plus lead time.
Challenge 2: Process Drift Over Time
Problem: Quality slowly degrades as operators take shortcuts or equipment drifts out of calibration.
Solution: Scheduled maintenance and calibration protocols. Our checklist includes:
Daily: Stencil cleaning verification
Weekly: Pick-and-place vision system calibration check
Monthly: Reflow oven profiling verification
Quarterly: Full equipment calibration
Challenge 3: Insufficient Test Coverage
Problem: Defects escape to field, triggering expensive recalls or warranty claims.
Solution: Develop comprehensive test strategy balancing coverage and cost:
Statistical sampling (AQL-based) for cost-sensitive consumer products
100% functional testing for all products before shipment
The goal isn’t zero defects (impossible in high volume)—it’s controlled, predictable quality levels.
Continuous Improvement Frameworks
High volume production isn’t static. The best manufacturers improve 5-10% year-over-year on key metrics.
Implementing Practical Lean Manufacturing
Start with these high-impact initiatives:
Value Stream Mapping: Document your current process from order receipt to shipment. Identify non-value-adding steps. We eliminated 3 days from our cycle time by removing unnecessary approval loops.
5S Workplace Organization: A cluttered production floor breeds defects. Implement systematic organization:
Sort: Remove unnecessary items
Set in Order: Organize remaining items logically
Shine: Clean thoroughly
Standardize: Create standards for the above
Sustain: Maintain through audits
Kaizen Events: Monthly focused improvement sessions on specific issues. Our last event reduced changeover time from 4 hours to 90 minutes, increasing line utilization by 18%.
Udemy/Coursera: PCB design for manufacturing courses
Frequently Asked Questions
Q1: What’s the minimum volume that justifies dedicated tooling and fixtures?
From a purely economic standpoint, dedicated tooling typically pays for itself around 5,000-10,000 units, depending on board complexity. However, I recommend considering tooling at 3,000+ units if you anticipate repeat orders or product variations that can share tooling. The breakeven calculation should factor in reduced cycle time and improved yield, not just direct tooling costs.
Q2: How do I balance cost reduction with quality requirements when scaling to high volume?
This is the wrong question—they’re not in opposition. Proper high volume techniques (automation, DFM optimization, statistical process control) simultaneously reduce costs and improve quality. Where cost-quality tradeoffs do exist, establish clear quality targets first (e.g., <500 PPM defect rate), then optimize costs within those constraints. Never compromise on quality targets to hit cost goals—it backfires in warranty costs and reputation damage.
Q3: What’s the typical timeline from design freeze to first high volume production run?
For a new design with moderate complexity (4-6 layers, 200-400 components), expect 8-12 weeks:
Weeks 5-6: Tooling fabrication and process development
Weeks 7-8: First article build and validation
Weeks 9-10: Process optimization and operator training
Weeks 11-12: Production ramp-up
This assumes no major design issues surface. Add 2-4 weeks for complex designs or if significant design changes are needed.
Q4: Should I use a domestic or offshore CM for high volume production?
This depends on several factors beyond just cost. Offshore (primarily China/Southeast Asia) makes sense when:
Production volumes exceed 20,000+ units
Lead time flexibility exists (add 4-6 weeks for shipping)
Design is mature and stable (minimal engineering support needed)
Cost savings justify shipping and communication overhead (typically 30-50% savings)
Domestic manufacturing is often better for:
Rapid iteration products requiring close engineering collaboration
Products with strict IP protection requirements
Smaller volumes (5,000-20,000 units) where cost differential is minimal
Quick-turn requirements or JIT delivery needs
Many companies use a hybrid approach: domestic for new product introduction and low-volume specialty products, offshore for mature high-volume products.
Q5: How do I transition from prototype/low volume to high volume without starting over?
The key is designing for scalability from the start. During initial design:
Use standard assembly processes (avoid exotic components requiring specialized equipment)
Design panel arrays even for prototype runs
Specify components available in high volume (check vendor stocking and lead times)
Include test points and functional test considerations in the initial design
When transitioning, conduct a formal DFM review with your high volume CM. Budget 2-4 weeks for optimization iterations. Typical changes include:
Panel layout optimization for material efficiency
Component substitutions for better availability or cost
Test coverage enhancements
Documentation updates for production-grade work instructions
The design changes are usually minor if you’ve followed DFM principles from the start. Expect 5-15% of components to change and layout tweaks affecting <5% of the board area.
Inquire: Call 0086-755-23203480, or reach out via the form below/your sales contact to discuss our design, manufacturing, and assembly capabilities.
Quote: Email your PCB files to Sales@pcbsync.com (Preferred for large files) or submit online. We will contact you promptly. Please ensure your email is correct.
Notes: For PCB fabrication, we require PCB design file in Gerber RS-274X format (most preferred), *.PCB/DDB (Protel, inform your program version) format or *.BRD (Eagle) format. For PCB assembly, we require PCB design file in above mentioned format, drilling file and BOM. Click to download BOM template To avoid file missing, please include all files into one folder and compress it into .zip or .rar format.


