Inquire: Call 0086-755-23203480, or reach out via the form below/your sales contact to discuss our design, manufacturing, and assembly capabilities.
Quote: Email your PCB files to Sales@pcbsync.com (Preferred for large files) or submit online. We will contact you promptly. Please ensure your email is correct.
Notes: For PCB fabrication, we require PCB design file in Gerber RS-274X format (most preferred), *.PCB/DDB (Protel, inform your program version) format or *.BRD (Eagle) format. For PCB assembly, we require PCB design file in above mentioned format, drilling file and BOM. Click to download BOM template To avoid file missing, please include all files into one folder and compress it into .zip or .rar format.
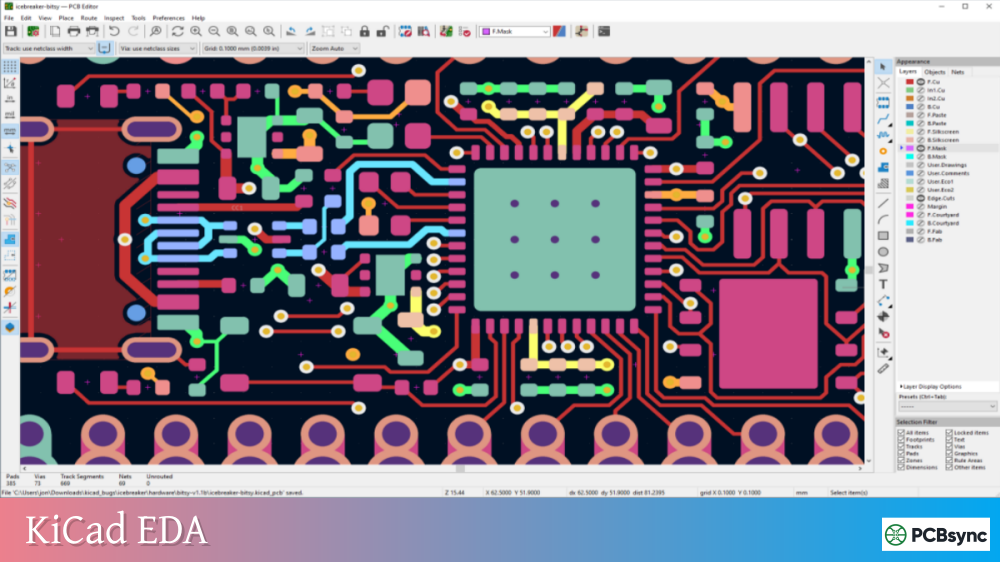
Working with ESP32 modules in KiCad used to be a frustrating experience. Back in 2016 when the ESP32 first launched, you had to hunt down community-made footprints of questionable accuracy or spend hours drawing your own. Things have changed dramatically since then.
Today, Espressif maintains an official KiCad library covering everything from bare ESP32 chips to complete development boards like the ESP32-S3-DevKitC and ESP32-C3-DevKitM. Combined with community libraries for popular boards like the DOIT ESP32 DevKit V1, you can now find symbols and footprints for virtually any ESP32 variant.
This guide walks you through every library source, installation method, and verification step you need to confidently design PCBs with ESP32 modules. Whether you’re working with the classic ESP32 WROOM, the USB-native ESP32-S3, the cost-effective ESP32-C3, or camera-equipped ESP32-CAM boards, I’ll show you exactly where to find what you need.
Understanding ESP32 Module Variants and Their KiCad Libraries
Before diving into library sources, understanding which ESP32 variant you’re working with matters because the libraries are organized by chip family and form factor.
ESP32 Family Overview
Chip Family
Core
Key Features
Common Modules
ESP32 (Original)
Dual Xtensa LX6
WiFi + Bluetooth Classic/BLE
WROOM-32E, WROVER-E
ESP32-S2
Single Xtensa LX7
WiFi, USB OTG, no Bluetooth
MINI-1, WROOM (S2)
ESP32-S3
Dual Xtensa LX7
WiFi + BLE 5.0, USB OTG, AI acceleration
MINI-1, WROOM-1, WROOM-2
ESP32-C3
Single RISC-V
WiFi + BLE 5.0, low cost
MINI-1, WROOM-02
ESP32-C6
Single RISC-V
WiFi 6 + BLE 5.0 + 802.15.4
MINI-1, WROOM-1
ESP32-H2
Single RISC-V
BLE 5.0 + 802.15.4, Thread/Zigbee
MINI-1
Each family has multiple module variants (WROOM, MINI, WROVER) and development kit versions. The official Espressif library covers most of these, while community libraries fill gaps for third-party development boards.
Official Espressif KiCad Library Installation
Espressif now maintains comprehensive KiCad libraries through the Plugin and Content Manager (PCM), making installation straightforward for KiCad 8 and later versions.
Method 1: Install via KiCad Plugin and Content Manager
This is the recommended approach for most users. The PCM handles updates automatically and keeps your libraries current.
Step 1: Open the Plugin and Content Manager
In KiCad’s main window, click the “Plugin and Content Manager” button in the toolbar or navigate to Tools → Plugin and Content Manager.
Step 2: Search for Espressif
In the search bar, type “Espressif” to find the official library package.
Step 3: Install the Package
Click on the Espressif library entry and click “Install.” KiCad downloads and configures the library automatically.
Step 4: Verify Installation
After installation, the library appears under the “Installed” tab. In your schematic editor, the symbols appear as “PCM_Espressif” in the symbol browser. In the PCB editor, footprints appear under the same prefix.
Method 2: Manual Installation from GitHub
For those who need the absolute latest updates or are running older KiCad versions, manual installation from the GitHub repository works well.
Download the Library:
Visit github.com/espressif/kicad-libraries and download the latest release ZIP file (espressif-kicad-addon.zip).
Install in KiCad:
In KiCad’s main window, open the Plugin and Content Manager. Click “Install from File” and select the downloaded ZIP. Do not extract the ZIP—KiCad handles this automatically.
For Legacy KiCad Versions (6.x and earlier):
The repository maintains a legacy branch specifically for older KiCad versions. Clone or download from the legacy branch and follow the manual library path configuration in Preferences → Manage Symbol/Footprint Libraries.
Complete List of ESP32 KiCad Components
The official Espressif library includes an impressive range of components. Here’s what’s available:
ESP32 SoC Symbols and Footprints
Component
Symbol
Footprint
Package
ESP32
Yes
Yes
QFN-48
ESP32-PICO-V3
Yes
Yes
LGA-48
ESP32-S2
Yes
Yes
QFN-56
ESP32-S3
Yes
Yes
QFN-56
ESP32-C3
Yes
Yes
QFN-32
ESP32-C6
Yes
Yes
QFN-40
ESP32-H2
Yes
Yes
QFN-32
ESP32-P4
Yes
Yes
BGA
ESP32 WROOM Module Library
Module
Symbol
Footprint
Antenna
ESP32-WROOM-32E
Yes
Yes
PCB
ESP32-WROOM-32UE
Yes
Yes
U.FL
ESP32-WROOM-DA
Yes
Yes
Dual
ESP32-S3-WROOM-1
Yes
Yes
PCB
ESP32-S3-WROOM-1U
Yes
Yes
U.FL
ESP32-S3-WROOM-2
Yes
Yes
PCB (16MB)
ESP32-C3-WROOM-02
Yes
Yes
PCB
ESP32-C6-WROOM-1
Yes
Yes
PCB
ESP32 WROVER Module Library
Module
Symbol
Footprint
PSRAM
ESP32-WROVER-E
Yes
Yes
8MB
ESP32-WROVER-IE
Yes
Yes
8MB (IPEX)
ESP32-WROVER-B
Yes
Yes
8MB
ESP32 MINI Module Library
Module
Symbol
Footprint
Size
ESP32-S2-MINI-1
Yes
Yes
15.4×20.5mm
ESP32-S2-MINI-1U
Yes
Yes
U.FL variant
ESP32-S3-MINI-1
Yes
Yes
15.4×20.5mm
ESP32-S3-MINI-1U
Yes
Yes
U.FL variant
ESP32-C3-MINI-1
Yes
Yes
13.2×16.6mm
ESP32-C6-MINI-1
Yes
Yes
13.2×16.6mm
ESP32 DevKit Board Symbols
Development Kit
Symbol
Footprint
Pins
ESP32-DevKitC
Yes
Yes
38
ESP32-DevKitM-1
Yes
Yes
40
ESP32-S2-Saola-1
Yes
Yes
38
ESP32-S2-DevKitC-1
Yes
Yes
44
ESP32-S2-DevKitM
Yes
Yes
40
ESP32-S3-DevKitC
Yes
Yes
44
ESP32-C3-DevKitM
Yes
Yes
32
ESP32-C6-DevKitC-1
Yes
Yes
40
ESP32-C6-DevKitM-1
Yes
Yes
36
Finding KiCad ESP32 DevKit V1 and Third-Party Boards
The official Espressif library focuses on Espressif’s own development boards. For popular third-party boards like the DOIT ESP32 DevKit V1, you’ll need community libraries.
DOIT ESP32 DevKit V1 KiCad Library
The DOIT ESP32 DevKit V1 remains one of the most popular ESP32 boards, but its footprint differs from official Espressif DevKits. Several community members have created libraries for this specific board.
This repository provides both the schematic symbol and PCB footprint for the 30-pin DOIT ESP32 DevKit V1. Download the .lib and .pretty files and add them to your KiCad libraries manually.
A corrected version of the DOIT footprint that addresses pin spacing issues found in earlier community libraries.
ESP32-CAM KiCad Footprint
The ESP32-CAM board (typically featuring the OV2640 camera) requires a specific footprint due to its unique form factor and pin arrangement. While not included in the official Espressif library, you can find it through:
SnapMagic (SnapEDA): Search for “ESP32-CAM” to find community-contributed symbols and footprints. Verify pin assignments against your specific board variant, as multiple manufacturers produce slightly different versions.
Creating Your Own: For production designs, I recommend measuring your actual ESP32-CAM board and creating a custom footprint. The camera connector position and pin headers vary between manufacturers.
ESP32 WROOM KiCad Components
The ESP32-WROOM-32E and its variants are fully covered in the official library. These surface-mount modules are the most common choice for custom PCB designs.
Key Considerations:
The WROOM footprint includes a large ground pad underneath the module that requires proper via stitching for thermal and RF performance. The official footprint follows Espressif’s recommended land pattern from the datasheet.
For hand soldering, look for the HandSoldering variants in the library (when available) which feature extended pads for easier manual assembly.
Installing and Using ESP32 KiCad Symbols
Once you’ve installed the libraries, using ESP32 symbols in your schematics follows standard KiCad workflow.
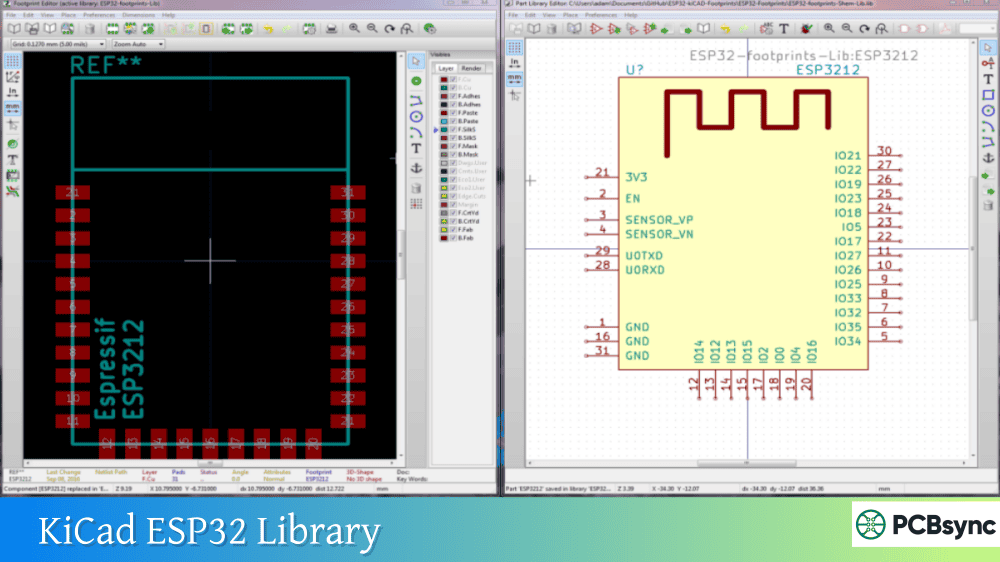
Adding ESP32 Symbols to Schematics
Step 1: Open Symbol Browser
In the schematic editor, press ‘A’ to add a symbol or go to Place → Add Symbol.
Step 2: Search for ESP32
Type “ESP32” in the search field. If using the PCM-installed library, look for entries prefixed with “PCM_Espressif.”
Step 3: Select the Correct Variant
Choose the specific module or chip you’re using. Pay attention to the suffix:
“E” suffix: PCB antenna
“UE” or “U” suffix: U.FL connector for external antenna
Numbers in the name often indicate flash size variations
Step 4: Place and Connect
Place the symbol and connect to your circuit. The symbols include all GPIO pins, power pins, and special function pins labeled according to Espressif’s datasheet conventions.
Symbol Pin Grouping
The ESP32 symbols use functional grouping to organize pins logically:
Group
Pins Included
Power
VDD, GND, 3V3, EN
GPIO
GPIO0-GPIO39 (varies by chip)
UART
TX, RX, RTS, CTS
SPI
MOSI, MISO, CLK, CS
I2C
SDA, SCL
ADC/DAC
ADC channels, DAC outputs
Strapping
GPIO0, GPIO2, GPIO12, GPIO15
Working with ESP32 KiCad Footprints
Proper footprint selection and placement ensure reliable PCB manufacturing and assembly.
Footprint Selection Guidelines
For Modules (WROOM, WROVER, MINI):
Use the module footprint matching your exact part number. The “E” variants have integrated PCB antennas requiring specific keep-out zones. The “U” variants need space for an external antenna connection.
For Development Boards:
When designing carrier boards for DevKits, use through-hole footprints matching the board’s pin header arrangement. Most DevKits use 2.54mm (0.1″) pitch headers.
For Bare Chips:
The ESP32 QFN footprints require careful attention to the exposed pad. Always include thermal vias connecting to internal ground planes.
Critical Layout Considerations
Antenna Keep-Out Zone:
For modules with PCB antennas, maintain the keep-out area specified in the datasheet. No copper, components, or ground plane should exist in this zone. The official footprints include courtyard markings showing this area.
Ground Plane Requirements:
The ESP32 modules require a solid ground plane beneath them for proper RF performance. The library footprints assume a four-layer stackup typical for WiFi designs.
Crystal and Flash Routing:
For bare ESP32 chips, external crystal and flash IC placement follows specific routing guidelines. Review the ESP32 Hardware Design Guidelines on Espressif’s website.
3D Models for ESP32 KiCad Components
The official Espressif library includes STEP format 3D models for all components. These models enable accurate mechanical fit verification in KiCad’s 3D viewer.
Configuring 3D Model Paths
After installing via PCM, the 3D models should load automatically. For manual installations:
Step 1: Set Environment Variable
Go to Preferences → Configure Paths in KiCad.
Step 2: Add ESPRESSIF_3D Path
Create a new environment variable pointing to your 3D models folder:
Name: ESPRESSIF_3D
Path: /path/to/kicad-libraries/3d
Step 3: Verify in 3D Viewer
Open a PCB with ESP32 components and press Alt+3 to view in 3D. The modules should appear with accurate dimensions and shapes.
Troubleshooting Common ESP32 Library Issues
Missing Footprints After Library Installation
If symbols load but footprints don’t appear, the footprint library path may not be configured. Go to Preferences → Manage Footprint Libraries and verify the Espressif library appears in the list.
Pin Assignment Mismatches
When using third-party DevKit libraries, always verify pin assignments against your actual board. Different manufacturers sometimes swap pin positions or use different naming conventions.
Footprint Dimensions Don’t Match Board
This commonly happens with generic “DevKit V1” boards. Measure your actual board’s pin spacing and overall dimensions before committing to a footprint. The cheap boards from various sellers aren’t all identical.
3D Models Not Displaying
Check that the 3D model path environment variable is set correctly. Also verify the STEP files exist in the expected location. Some libraries only include WRL format models, which also work in KiCad.
Symbols, footprints, 3D models for many ESP32 variants
Ultra Librarian
Manufacturer-verified CAD models
Component Search Engine
Free symbol/footprint downloads
Verifying Footprints Before Manufacturing
Never trust a downloaded footprint blindly, especially for high-density modules like the ESP32.
Verification Checklist
Check
Method
Pad dimensions
Compare to datasheet land pattern
Pin 1 marking
Match orientation in datasheet
Antenna keep-out
Verify courtyard covers required area
Ground pad
Ensure thermal via pattern
Overall dimensions
Print 1:1 and check against physical module
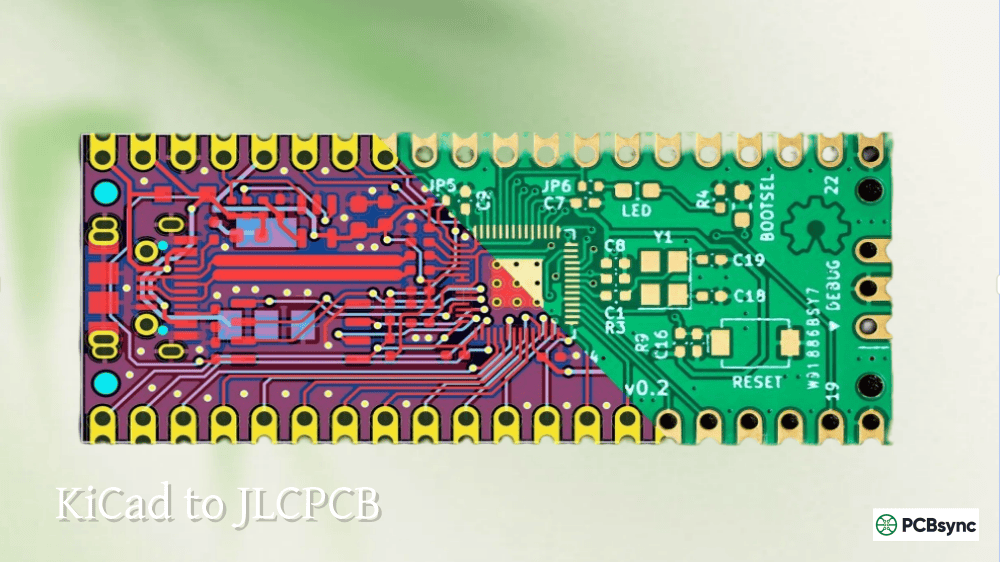
Creating Test Prints
Before ordering PCBs, print the footprint at 1:1 scale on paper. Place your actual ESP32 module on the printout to verify alignment. This simple step has saved me from ordering unusable boards multiple times.
Frequently Asked Questions
Where can I find the KiCad ESP32 DevKit V1 footprint?
The official Espressif library includes ESP32-DevKitC footprints, but the popular DOIT ESP32 DevKit V1 requires a community library. Download from github.com/davidkleymann/doit-esp32-devkit-kicad for the 30-pin version. Always verify pin assignments match your specific board, as “DevKit V1” boards from different manufacturers may have slight variations.
Does the ESP32 WROOM KiCad library include 3D models?
Yes, the official Espressif library includes STEP format 3D models for all ESP32-WROOM variants including the WROOM-32E, WROOM-32UE, and newer S3/C3/C6 WROOM modules. After PCM installation, models load automatically in KiCad’s 3D viewer.
How do I add ESP32-S3 KiCad symbols to my project?
Install the Espressif library via KiCad’s Plugin and Content Manager, then search for “ESP32-S3” in the symbol browser. You’ll find both the bare ESP32-S3 chip symbol and module variants like ESP32-S3-WROOM-1 and ESP32-S3-MINI-1. The library also includes development kit symbols like ESP32-S3-DevKitC.
Is there an ESP32-CAM KiCad footprint available?
The ESP32-CAM isn’t included in the official Espressif library since it’s manufactured by third parties like AI-Thinker. Check SnapMagic or create your own footprint by measuring your specific board. The camera modules vary between manufacturers, so verify dimensions carefully before manufacturing.
Can I use ESP32 KiCad libraries with older KiCad versions?
Yes, the Espressif GitHub repository maintains a legacy branch specifically for KiCad 6.x and earlier versions. Visit the repository, switch to the legacy branch, and follow the manual installation instructions. Note that some newer ESP32 variants (like ESP32-C5 and ESP32-P4) may only be available in the latest library version for KiCad 8.
Advanced ESP32 PCB Design Considerations
Beyond simply placing footprints, successful ESP32 designs require attention to RF layout, power supply decoupling, and signal integrity.
RF Design Best Practices
When using ESP32 modules with integrated PCB antennas (like ESP32-WROOM-32E), the antenna radiation pattern extends beyond the module edge. The official footprints include courtyard markers showing the minimum keep-out zone, but for optimal range, extend this even further.
Ground Plane Cutouts:
Some designers cut away the ground plane under the antenna area. While Espressif’s reference designs show this approach, it’s optional for most applications. The key requirement is no copper or components in the immediate antenna projection zone.
External Antenna Considerations:
For products requiring better range or specific antenna patterns, use the “U” suffix modules (ESP32-WROOM-32UE, ESP32-S3-WROOM-1U) which include a U.FL connector. Route the coax to an edge-mount SMA or directly to a flex PCB antenna. Keep the transmission line impedance at 50 ohms.
Power Supply Layout
ESP32 modules draw significant current during WiFi transmission peaks, up to 500mA for some variants. Your power supply design and decoupling directly impact wireless performance.
Decoupling Capacitor Placement:
Place bulk capacitors (10-100µF) near power input and ceramic capacitors (100nF) as close as possible to the module’s power pins. The official footprints don’t include recommended decoupling positions, so add these based on the reference schematic.
Power Trace Width:
Use wide power traces (20+ mils for 3.3V supply) to minimize voltage drop during transmission bursts. IR drop during WiFi transmission can cause brownouts and connection issues.
USB and Programming Interface
ESP32-S2, ESP32-S3, and ESP32-C3 variants include native USB support, eliminating the need for external USB-to-UART bridges. When designing with these chips, pay attention to USB differential pair routing and ESD protection.
Building Your ESP32 Component Library
As you work on more ESP32 projects, maintaining an organized library strategy saves time and prevents errors.
Recommended Library Organization
Create a project-specific or personal library for ESP32 components you use frequently:
Copy and verify footprints you download before adding them to your personal library. This way you build a trusted collection of components you’ve actually tested.
Version Control Your Libraries
Keep your custom libraries under version control (Git). When you fix a footprint issue or add a new component, the history helps track changes and allows rollback if something goes wrong.
The ESP32 ecosystem continues expanding with new chips and modules releasing regularly. The ESP32-C5 and ESP32-P4 recently joined the family, and Espressif maintains their KiCad libraries to keep pace. By establishing a solid library workflow now, you’ll be ready to incorporate new variants as they become available.
Whether you’re designing a simple IoT sensor board with an ESP32-C3 MINI, a complex audio project with ESP32 WROVER’s extra PSRAM, or a machine learning edge device with ESP32-S3’s vector instructions, the KiCad ecosystem has the symbols and footprints you need. Start with the official Espressif library, supplement with verified community resources for third-party boards, and always verify before you fabricate.
Inquire: Call 0086-755-23203480, or reach out via the form below/your sales contact to discuss our design, manufacturing, and assembly capabilities.
Quote: Email your PCB files to Sales@pcbsync.com (Preferred for large files) or submit online. We will contact you promptly. Please ensure your email is correct.
Notes: For PCB fabrication, we require PCB design file in Gerber RS-274X format (most preferred), *.PCB/DDB (Protel, inform your program version) format or *.BRD (Eagle) format. For PCB assembly, we require PCB design file in above mentioned format, drilling file and BOM. Click to download BOM template To avoid file missing, please include all files into one folder and compress it into .zip or .rar format.


