Inquire: Call 0086-755-23203480, or reach out via the form below/your sales contact to discuss our design, manufacturing, and assembly capabilities.
Quote: Email your PCB files to Sales@pcbsync.com (Preferred for large files) or submit online. We will contact you promptly. Please ensure your email is correct.
Notes: For PCB fabrication, we require PCB design file in Gerber RS-274X format (most preferred), *.PCB/DDB (Protel, inform your program version) format or *.BRD (Eagle) format. For PCB assembly, we require PCB design file in above mentioned format, drilling file and BOM. Click to download BOM template To avoid file missing, please include all files into one folder and compress it into .zip or .rar format.
Every modern processor, FPGA, and high-performance IC I’ve worked with in recent years has come in a BGA package. Once you understand how to design with Ball Grid Arrays, you unlock the ability to work with the most powerful components available—from smartphone chipsets to server processors. But they do require careful attention to PCB design, assembly, and inspection.
This guide covers everything you need to know about ball grid array explained from a practical PCB engineering perspective: the fundamentals, package types, design guidelines, assembly considerations, and inspection methods that will help you successfully implement BGAs in your designs.
A BGA package is a type of surface-mount packaging used for integrated circuits. Unlike traditional packages with leads extending from the edges (like QFPs or SOICs), a BGA has an array of tiny solder balls arranged in a grid pattern on the underside of the package.
These solder balls serve as both the electrical connection and the mechanical attachment to the PCB. During reflow soldering, the balls melt and fuse with pads on the circuit board, creating solid solder joints. Surface tension in the molten solder actually helps self-center the package during reflow—a nice bonus for assembly.
The BGA evolved from the Pin Grid Array (PGA), replacing the fragile pins with robust solder spheres. This seemingly simple change revolutionized IC packaging, enabling the high-density, high-performance electronics we rely on today.
Why Use BGA Packages?
BGAs have become the package of choice for complex ICs for several compelling reasons:
Higher I/O Density
The entire bottom surface of a BGA can accommodate connections, not just the perimeter. A 15mm × 15mm BGA can support over 400 connections at 0.8mm pitch, while a QFP of the same size might manage only 160 pins around its edges. This density is essential for modern processors and FPGAs with hundreds or thousands of I/O pins.
Superior Electrical Performance
The distance from the die to the PCB is shorter than with leaded packages, reducing inductance and improving high-speed signal performance. This matters tremendously for GHz-class signals where every millimeter of trace length affects signal integrity.
Better Thermal Performance
Heat flows more efficiently from the IC through the solder balls and into the PCB copper. Many BGAs include thermal pads or exposed die pads that further improve heat dissipation. The short thermal path helps keep hot chips cooler.
Improved Reliability
No leads to bend, break, or bridge during handling. The solid solder balls are far more robust than the fine-pitch leads on QFPs. Package coplanarity issues that plague leaded parts are virtually eliminated.
Smaller Footprint
BGAs achieve higher pin counts in smaller areas. A component that would require a massive QFP can fit in a much more compact BGA, saving precious board real estate.
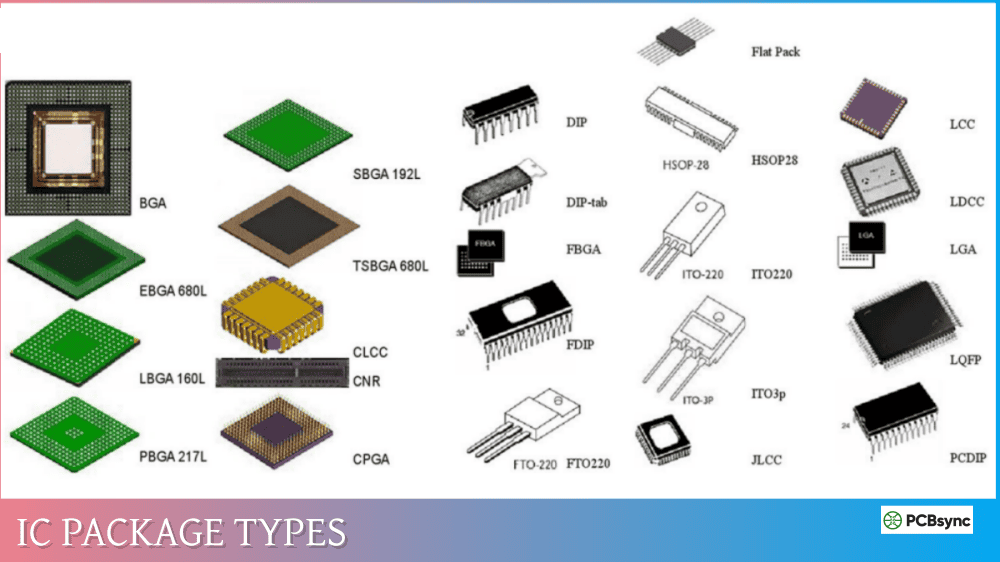
BGA Package Types
The ball grid array explained in detail includes several variations, each optimized for different applications:
Plastic Ball Grid Array (PBGA)
The most common and cost-effective BGA type. PBGA uses a plastic laminate substrate (typically BT resin) with the die wire-bonded or flip-chip mounted. Ball pitches typically range from 1.27mm down to 0.8mm.
Best for: Consumer electronics, networking equipment, general-purpose applications
Ceramic Ball Grid Array (CBGA)
Uses a ceramic substrate offering superior thermal conductivity and mechanical stability. The ceramic construction handles thermal cycling better but costs significantly more than plastic.
Best for: High-reliability applications, aerospace, military, automotive
Tape Ball Grid Array (TBGA)
Uses a flexible tape substrate, resulting in a thinner, lighter package. The flexibility provides some stress relief during thermal cycling.
Best for: Thin devices, mobile electronics, applications requiring thin profiles
Flip-Chip Ball Grid Array (FCBGA)
The die is flipped and mounted directly to the substrate using solder bumps rather than wire bonds. This provides the shortest possible signal path and best electrical performance.
Best for: High-performance processors, GPUs, high-speed communications
Package-on-Package (PoP)
Multiple BGA packages stacked vertically, with the upper package soldered to the lower one. Commonly used to stack memory on top of processors in mobile devices.
Best for: Smartphones, tablets, space-constrained mobile applications
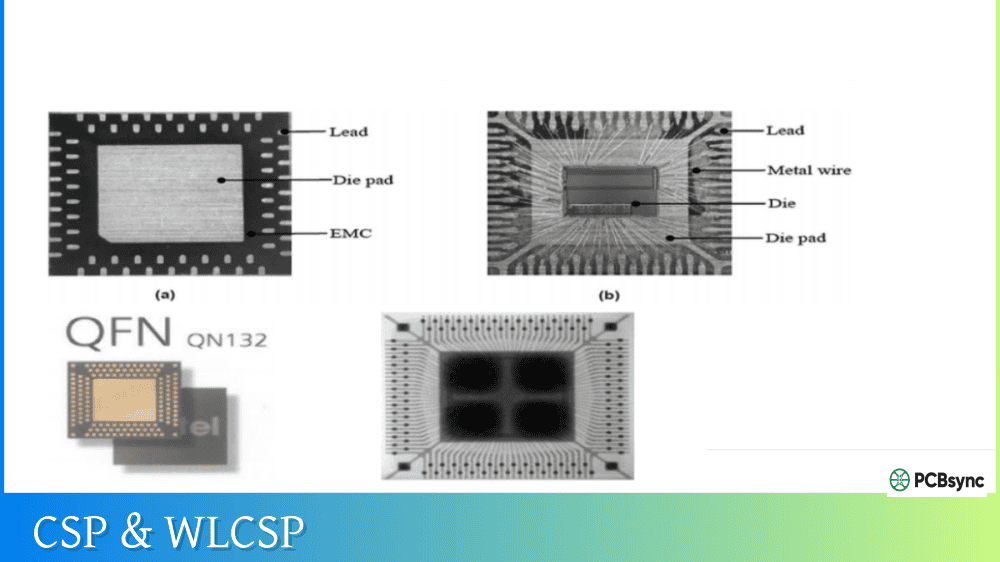
Micro BGA (µBGA) and Fine-Pitch BGA
Smaller versions with ball pitches of 0.5mm or less. These approach chip-scale packaging (CSP) where the package is nearly the same size as the die itself.
Best for: Ultra-compact devices, wearables, medical implants
Designing a PCB for BGA components requires careful attention to several key areas:
Land Pattern Design
The copper pad pattern on the PCB must match the BGA ball array. Two pad styles are used:
Non-Solder Mask Defined (NSMD): The solder mask opening is larger than the copper pad. This is the preferred approach because copper etching is more precise than solder mask registration, and NSMD provides a larger soldering area.
Solder Mask Defined (SMD): The solder mask overlaps the copper pad. This provides better pad adhesion to the PCB but reduces the effective soldering area.
Most manufacturers recommend NSMD pads with:
Pad diameter equal to the BGA ball diameter
Solder mask opening 0.1mm larger than the pad
Escape Routing Strategies
Getting signals out from under a BGA is called “escape routing” or “fanout.” The strategy depends on ball pitch:
Dog-bone Fanout (≥0.8mm pitch): A short trace connects each pad to a via placed beside it, resembling a dog bone shape. This is the simplest approach when space permits routing between pads.
Via-in-Pad (≤0.65mm pitch): The via is placed directly in the center of the pad. This saves space but requires the vias to be filled and planarized to prevent solder wicking. More expensive but necessary for fine-pitch BGAs.
Staggered Escape: Vias are staggered between rows rather than directly under pads, providing more routing channels on inner layers.
Layer Planning
High pin-count BGAs require multiple routing layers. A rough formula:
Provide solid reference planes adjacent to signal layers
Match lengths for differential pairs and parallel buses
Avoid routing high-speed signals through via fields that disrupt return paths
For complex programmable logic devices, Altera FPGA packages often include detailed PCB design guidelines in their datasheets covering power distribution, decoupling, and high-speed routing recommendations.
BGA Assembly Process
Soldering BGAs requires more precision than standard SMT components but follows the same general reflow process:
Solder Paste Application
A stainless steel stencil applies solder paste to the PCB pads. For BGAs:
Use laser-cut, electropolished stencils for best paste release
Typical stencil thickness: 0.1-0.15mm (4-6 mil)
Aperture size: 85-90% of pad area
Round apertures match round pads for uniform deposition
Component Placement
Pick-and-place machines position BGAs using vision alignment systems. Key considerations:
BGA self-centering during reflow allows 50% misalignment tolerance
Optimal placement force prevents solder paste squeeze-out
Reflow Soldering
A controlled temperature profile melts the solder and forms joints:
Preheat: Gradual temperature rise to activate flux and equalize board temperature
Soak: Temperature stabilization period (150-200°C for 60-120 seconds)
Reflow: Peak temperature above solder melting point (typically 235-250°C for lead-free)
Cooling: Controlled cool-down to solidify joints
Surface tension during reflow helps self-center the package on its pads—one of BGA’s assembly advantages.
Post-Assembly Inspection
Because solder joints are hidden under the package, visual inspection isn’t possible. Methods include:
X-ray Inspection: The gold standard for BGA inspection. X-ray imaging reveals solder joint quality, bridging, voids, and missing balls. Automated X-ray inspection (AXI) can handle production volumes.
Boundary Scan (JTAG): Electrical testing using IEEE 1149.1 standard can verify connections without physical access. Many BGAs include JTAG capability.
Acoustic Microscopy: Uses ultrasound to detect voids and delamination in solder joints.
Dye and Pry (Destructive): For failure analysis, the BGA is immersed in dye, then pried off. Dye presence in solder joints indicates cracks or incomplete bonds.
BGA Rework
When a BGA fails inspection or testing, it can often be reworked rather than scrapping the entire board:
Removal
A rework station uses controlled hot air or infrared heat to reflow the solder while a vacuum pickup lifts the component. Bottom-side preheating prevents board warpage and thermal shock.
Site Preparation
After removal, the site must be cleaned:
Remove residual solder using solder wick or vacuum desoldering
If the original BGA is being reused, it needs new solder balls. Reballing involves:
Cleaning old solder from the package
Applying flux and placing new solder spheres
Reflowing to attach new balls
Many contract manufacturers specialize in BGA reballing for high-value components.
Replacement
The new or reballed component is placed, fluxed, and reflowed using the rework station. Temperature profiling is critical—the rework profile must melt the BGA solder without damaging adjacent components.
BGA Challenges and Solutions
Solder Joint Voids
Air trapped in solder joints creates voids that weaken connections and impede thermal transfer.
Solutions:
Optimize solder paste and stencil design
Extend soak time in reflow profile
Use vacuum reflow for critical applications
IPC recommends maximum 25% void area
Head-in-Pillow Defects
The solder ball and paste don’t fully merge, leaving a “pillow” appearance. Common with lead-free solder and warped components.
Solutions:
Ensure package and board coplanarity
Optimize reflow profile
Control humidity (bake moisture-sensitive components)
Use nitrogen atmosphere during reflow
Thermal Mismatch
Different coefficients of thermal expansion between the BGA and PCB can stress solder joints during temperature cycling.
Work closely with your PCB manufacturer on BGA designs. They can advise on:
Via-in-pad capabilities and costs
Minimum trace/space for your layer count
Appropriate surface finishes (ENIG is commonly recommended for BGAs)
Frequently Asked Questions
What is the minimum pitch BGA I can use without HDI technology?
Standard PCB manufacturing can typically handle BGAs down to 0.8mm pitch using dog-bone fanout with through-hole vias. Below 0.65mm pitch, you’ll generally need via-in-pad with filled vias, blind/buried vias, or microvias—all of which are HDI (High-Density Interconnect) features that increase cost. Discuss your specific BGA requirements with your PCB manufacturer early in the design process.
How do I inspect BGA solder joints if I can’t see them?
X-ray inspection is the primary method for non-destructive BGA inspection. It reveals solder joint quality, voids, bridges, and missing balls. For electrical verification, boundary scan testing (JTAG) checks connectivity through the component’s built-in test logic. In-circuit testing can verify some connections. For failure analysis, acoustic microscopy and destructive dye-and-pry testing provide detailed information about joint integrity.
Can I hand-solder a BGA package?
Technically, yes, but it’s extremely difficult and not recommended for production or even most prototyping. You need a hot-air rework station with precise temperature control, a way to apply solder paste uniformly, and proper alignment. Most hobbyists and even professional engineers send BGA assembly to contract manufacturers with proper equipment. Hot-plate reflow methods exist for DIY assembly but require significant practice.
Why do some BGA packages require baking before assembly?
Many BGAs are moisture-sensitive (MSL rated). The plastic package absorbs atmospheric moisture over time. During reflow soldering, this trapped moisture can vaporize rapidly, causing “popcorning”—internal delamination or cracking of the package. Baking at 125°C for 24-48 hours drives out moisture before assembly. Always check the component’s MSL rating and handle accordingly, especially if packages have been opened from their sealed packaging for more than the allowed floor life.
How many PCB layers do I need for a BGA design?
Layer count depends on the BGA’s pin count, ball pitch, and required routing channels. A rough guideline: add one signal layer for every two rows of BGA pins that need routing, plus power and ground planes. A 256-ball BGA at 1.0mm pitch might route on 6 layers, while a 1000-ball BGA at 0.5mm pitch could require 12 or more layers. Your PCB design software can help verify routability, and you should always discuss layer stack-up with your fabricator.
Conclusion
The BGA package has become essential for high-density, high-performance electronic design. While they present challenges that leaded packages don’t—hidden solder joints, complex routing, specialized inspection—the benefits in I/O density, electrical performance, and thermal management make them indispensable for modern electronics.
Key takeaways for working with ball grid array components:
Choose the right BGA type (PBGA, CBGA, FCBGA, etc.) based on your thermal, reliability, and cost requirements
Plan escape routing and layer stack-up early in the design process
Use NSMD pad definitions with properly sized solder mask openings
Implement thermal management with thermal vias and copper planes
Work closely with your PCB fabricator on via-in-pad, HDI features, and surface finish
Invest in proper X-ray inspection capability or partner with assemblers who have it
Follow IPC standards for acceptance criteria and handling procedures
With proper planning and attention to these guidelines, BGA assembly can achieve the same or better yields than traditional leaded packages while enabling designs that simply wouldn’t be possible otherwise.
Inquire: Call 0086-755-23203480, or reach out via the form below/your sales contact to discuss our design, manufacturing, and assembly capabilities.
Quote: Email your PCB files to Sales@pcbsync.com (Preferred for large files) or submit online. We will contact you promptly. Please ensure your email is correct.
Notes: For PCB fabrication, we require PCB design file in Gerber RS-274X format (most preferred), *.PCB/DDB (Protel, inform your program version) format or *.BRD (Eagle) format. For PCB assembly, we require PCB design file in above mentioned format, drilling file and BOM. Click to download BOM template To avoid file missing, please include all files into one folder and compress it into .zip or .rar format.


