Inquire: Call 0086-755-23203480, or reach out via the form below/your sales contact to discuss our design, manufacturing, and assembly capabilities.
Quote: Email your PCB files to Sales@pcbsync.com (Preferred for large files) or submit online. We will contact you promptly. Please ensure your email is correct.
Notes: For PCB fabrication, we require PCB design file in Gerber RS-274X format (most preferred), *.PCB/DDB (Protel, inform your program version) format or *.BRD (Eagle) format. For PCB assembly, we require PCB design file in above mentioned format, drilling file and BOM. Click to download BOM template To avoid file missing, please include all files into one folder and compress it into .zip or .rar format.
After fifteen years of watching products fail in the field, I can tell you that vibration testing isn’t just another checkbox on your qualification list. It’s the difference between a product that survives real-world conditions and one that comes back as a warranty claim. I’ve seen beautifully designed PCBs crack at solder joints within months because nobody thought to shake them properly during development.
This guide breaks down everything you need to know about vibration testing, from the basic methodologies to the specific standards that govern different industries. Whether you’re qualifying automotive electronics, aerospace components, or consumer devices, you’ll find practical guidance you can actually use.
Vibration testing subjects products and components to controlled mechanical oscillations that simulate real-world conditions. The goal is simple: find weaknesses before your customers do.
Every product faces vibration during its lifecycle. Electronics in vehicles experience road vibrations. Aerospace components endure turbulence and engine harmonics. Consumer devices get dropped, shaken, and transported thousands of miles. According to U.S. Air Force data, approximately 20% of electronic equipment failures relate directly to vibration and shock, while another 55% stem from temperature cycling, which vibration testing often accompanies.
The business case for vibration testing is compelling. Studies from the International Organization for Standardization indicate that manufacturers implementing rigorous vibration testing protocols can reduce warranty claims by up to 30%. That’s not just cost savings; it’s customer retention and brand protection.
For PCB assemblies specifically, vibration testing reveals critical issues that static testing simply cannot detect:
Solder joint fatigue and micro-cracking
Component lead fractures
Via barrel cracking
Board delamination
Connector loosening
Resonance-induced failures
The electronics market continues expanding rapidly, with estimates projecting the global electronic components market to reach approximately $372 billion by 2033. As devices shrink and density increases, proper vibration testing becomes even more critical for maintaining reliability.
Understanding the physics helps explain why vibration is so damaging. Vibration creates dynamic deflections within products. These deflections and their associated velocities and accelerations contribute to structural fatigue and mechanical wear. Dynamic deflections can cause impacts between internal elements or disrupt function through intermittent connections.
Core Vibration Testing Methodologies
Understanding the three primary vibration testing methods helps you select the right approach for your application. Each methodology reveals different failure modes and suits different testing objectives.
Sinusoidal Vibration Testing
Sinusoidal testing, often called “sine testing,” represents the oldest and most straightforward vibration testing method. The shaker applies a single-frequency vibration that produces a clean sine wave on the oscilloscope.
You’ll typically use sine testing in two ways:
Fixed frequency dwell tests hold the vibration at a specific frequency to stress components at known resonances. If your field data shows failures at 47 Hz, you can dwell there and accelerate the damage mechanism.
Swept sine tests move the frequency across a range, typically 5 Hz to 2000 Hz, to identify resonances and evaluate structural response across the spectrum. This is your primary tool for characterizing how your product actually behaves.
Sine testing excels at finding resonant frequencies and verifying that products can withstand sustained vibration at specific frequencies. However, it doesn’t represent real-world conditions particularly well since actual environments rarely produce clean single-frequency excitation.
Random Vibration Testing
Random vibration testing applies all frequencies within a defined range simultaneously, weighted according to a power spectral density (PSD) profile. This more accurately simulates real-world environments where multiple frequencies combine chaotically.
When you’re riding in a vehicle, your electronics don’t experience a clean 50 Hz sine wave. They experience road surface variations, engine harmonics, suspension responses, and aerodynamic buffeting all mixed together. Random vibration captures this complexity.
Random testing is specified in terms of G² per Hz (the PSD) and overall Grms (root mean square acceleration). A typical automotive random vibration profile might specify 0.5 Grms across 10-2000 Hz, with specific frequency breakpoints defining the spectral shape.
For automotive electronics, random vibration testing has become the primary qualification method because it better replicates actual road conditions than sine testing alone.
Composite Vibration Testing
Real operating environments often combine characteristics that neither pure sine nor pure random testing captures. Composite methods address this limitation.
Sine-on-Random (SoR) superimposes sinusoidal tones on a random background. This replicates scenarios like helicopter rotor harmonics combined with turbulence or engine firing frequencies combined with road vibration.
Random-on-Random (RoR) combines multiple random profiles, useful for simulating complex multi-source environments.
The specific composite approach depends entirely on your actual operating environment. When possible, collect field data and build a profile that genuinely represents what your product will experience.
Vibration Testing Equipment and Setup
Setting up a proper vibration test requires understanding the equipment chain and how each component affects your results.
Electrodynamic Shaker Systems
The electrodynamic shaker forms the heart of most vibration testing setups. These systems work similarly to audio speakers, using electromagnetic forces to move an armature that transmits vibration to your test article.
Key specifications to understand when selecting or using shakers:
Parameter
What It Means
Typical Ranges
Force Rating
Maximum force the shaker can deliver
100 N to 290 kN (22 lbf to 65,000 lbf)
Frequency Range
Usable frequency bandwidth
5 Hz to 3000 Hz typical
Maximum Acceleration
Peak G-level capability
Up to 100+ G for small payloads
Stroke
Maximum displacement
25 mm to 75 mm peak-to-peak
Payload Capacity
Maximum mass on armature
Up to 5000 kg for large shakers
Smaller air-cooled shakers handle most component-level testing. Larger water-cooled systems accommodate full assemblies or heavy payloads. The shaker must deliver the required force across the entire frequency range while carrying your test article, fixture, and any instrumentation.
Vibration Controllers
Modern vibration testing relies on closed-loop control systems that continuously adjust the drive signal to maintain specified vibration levels at the control point. The controller reads accelerometer feedback and compensates for system dynamics, fixture resonances, and load effects.
Without proper control, you might think you’re running a 2 Grms random test when you’re actually delivering 5 Grms at certain frequencies due to fixture resonances.
Fixtures and Mounting
Here’s where many engineers get into trouble. A poorly designed fixture can completely invalidate your test results.
The fundamental requirements for vibration fixtures:
Rigidity — The fixture’s first resonant frequency should be well above your test frequency range. A fixture that resonates within your test band will amplify certain frequencies and attenuate others, distorting the input your product actually receives.
Low mass — Every gram of fixture mass requires additional shaker force. Heavy fixtures limit your achievable acceleration levels and reduce system responsiveness.
Proper load path — The fixture must transmit vibration efficiently from the shaker to your product. Overly complex load paths introduce compliance and unwanted dynamics.
Material selection significantly affects fixture performance:
Material
Advantages
Disadvantages
Aluminum
Light weight, easy to machine, good stiffness-to-weight
Lower strength than steel
Magnesium
Best strength-to-weight ratio, excellent damping
Expensive, harder to machine, flammable chips
Steel
High strength, inexpensive
Heavy, can introduce resonances at high frequencies
Always run a fixture characterization test before using a new fixture. A low-level random sweep with accelerometers on the fixture reveals resonances and helps you understand what the system will actually do during testing.
Accelerometer mounting significantly impacts measurement accuracy. Poor mounting can shift the measured resonant frequency by hundreds of Hz or introduce spurious resonances that don’t actually exist in your product.
The stud mounting method provides the best frequency response, enabling accurate measurements up to the sensor’s rated frequency. Adhesive mounting works well for lighter sensors when stud mounting isn’t practical. Magnetic mounts and handheld probes work for quick characterization but limit usable frequency range.
For PCB testing, I typically use small triaxial accelerometers adhesive-mounted directly on the board. Position them at the locations of greatest concern, usually the corners and center of the board, and near large heavy components.
Critical Vibration Testing Standards
Different industries maintain their own vibration testing standards, each tailored to specific operating environments and reliability requirements.
MIL-STD-810H (Military Standard)
MIL-STD-810 has become the de facto standard for environmental testing across many industries, not just military applications. Method 514.8 specifically addresses vibration.
The standard defines four main procedures:
Procedure
Application
Key Characteristics
Procedure I
General vibration for secured cargo or vehicle-mounted equipment
Covers both transport and operational conditions
Procedure II
Loose cargo transportation
For unsecured items in trucks or trailers
Procedure III
Large assembly transportation
Wheeled and tracked vehicle environments
Procedure IV
Aircraft store captive carriage
Fixed-wing aircraft and missile applications
MIL-STD-810 emphasizes tailoring tests to actual operating conditions rather than blindly applying standard profiles. The standard provides guidance for developing realistic test specifications based on measured field data or environmental characterization.
Typical MIL-STD-810 random vibration testing spans 5 Hz to 2000 Hz, with test durations of 60 minutes per axis for acceptance testing. Qualification and reliability demonstration tests run longer.
IEC 60068 (International Standard)
The IEC 60068 series provides internationally recognized environmental testing procedures used widely in commercial and industrial applications.
Key vibration-related parts:
IEC 60068-2-6: Sinusoidal vibration testing
IEC 60068-2-27: Shock testing
IEC 60068-2-64: Random vibration (broadband)
These standards work well for commercial electronics qualification and are often specified for products sold into European markets. The procedures are well-documented and widely understood by test laboratories globally.
Automotive Standards
Automotive electronics face particularly challenging vibration environments, from engine compartment components experiencing constant excitation to body-mounted modules subjected to road inputs.
Standard
Scope
Key Features
ISO 16750-3
Road vehicle electrical/electronic equipment
Defines severity levels based on mounting location; 10 Hz to 2000 Hz range
GMW3172
General Motors global specification
Based on IEC 60068; location-specific requirements
SAE J1211
Automotive electronic systems recommended practice
Design guidance for vibration environments
LV 124
German automotive (VW, BMW, Mercedes)
Comprehensive environmental requirements
For automotive PCB assemblies, test durations can extend to several hours per axis, simulating years of real-world exposure in an accelerated timeframe.
Aerospace and Aviation Standards
Aviation components face strict certification requirements due to safety implications.
RTCA DO-160G defines environmental test procedures for airborne equipment, covering everything from light aircraft to commercial jets. Section 8 specifically addresses vibration, with test categories based on equipment location and aircraft type.
NASA-STD-7001 addresses launch vehicle and spacecraft qualification, specifying both acoustic and random vibration requirements. Payload components often face acceleration levels of 10+ Grms during launch.
Vibration Testing for PCB Assemblies
PCB assemblies present unique challenges for vibration testing because failures often occur at solder joints, which are hidden from view and difficult to inspect nondestructively.
Understanding PCB Dynamic Response
Before discussing failures, it’s worth understanding how PCBs behave under vibration. A PCB acts as a thin plate that bends and flexes when excited. The board’s natural frequency depends on its dimensions, thickness, material properties, boundary conditions (how it’s mounted), and the mass of attached components.
For a simply supported rectangular board, natural frequency increases with:
Increased board thickness
Reduced board area
Stiffer laminate materials
More constrained edge conditions
Most PCBs have first-mode natural frequencies between 100 Hz and 500 Hz, though this varies widely with design. When excitation frequency matches a natural frequency, the board experiences resonance, dramatically amplifying the response.
Board deflection during vibration creates strain in solder joints. The strain magnitude depends on the mode shape, deflection amplitude, and component package characteristics. Larger deflections create larger strains, and larger strains accelerate fatigue damage.
Common PCB Failure Modes
Vibration-induced PCB failures typically manifest in several ways:
Solder joint fatigue remains the primary failure mechanism. Differential motion between the component and PCB creates cyclic stress in solder joints. BGA packages are particularly susceptible because their solder balls experience both shear and tensile loading during board flexure.
Research on automotive PCB assemblies shows that components in the central region of the board often fail first because board deflection, and thus solder stress, is greatest at the board’s center when edges are constrained. This finding has important implications for component placement during design.
The failure progression typically follows a Weibull distribution, with an increasing failure rate over time. Studies have shown Weibull shape parameters (β) around 1.2 to 1.5 for vibration-induced solder failures, indicating wear-out type failures where damage accumulates progressively.
Solder alloy effects matter significantly. Lead-free solders like SAC305 (Sn-3.0Ag-0.5Cu) generally show better resistance to random vibration fatigue than traditional Sn63Pb37, but the opposite is true for thermal cycling. This means your solder selection involves tradeoffs depending on your dominant stress environment.
Component body cracking affects ceramic capacitors and other brittle components. Board flexure can crack component bodies, causing immediate or latent failures.
Wire bond failures in components like QFNs and flip chips can result from excessive board flexure, particularly when boards flex during handling or testing.
Design Considerations for Vibration Robustness
Good vibration performance starts at the design stage, not in the test lab.
Board stiffness directly affects natural frequency and thus vibration response. Thicker boards, stiffeners, and proper mounting all increase natural frequency, pushing it away from likely excitation frequencies.
Component placement matters more than most engineers realize. Heavy components near board edges or corners, where mounting constraints limit deflection, experience less stress than those at the board center.
Consider these placement guidelines:
Place large, heavy components near board supports or edges
Avoid placing critical components at maximum deflection points
Orient rectangular components with long axis parallel to shorter board dimension
Group related components to minimize trace lengths and potential crack paths
Underfill dramatically improves BGA reliability under vibration by distributing stress across the entire package footprint rather than concentrating it at corner balls. Studies have shown vibration fatigue life improvements exceeding four times with properly applied underfill.
Corner bonding provides a less expensive alternative to full underfill for some applications, though with less dramatic improvement.
Test Monitoring for PCBs
Simply running the vibration profile isn’t enough. You need to detect failures as they occur.
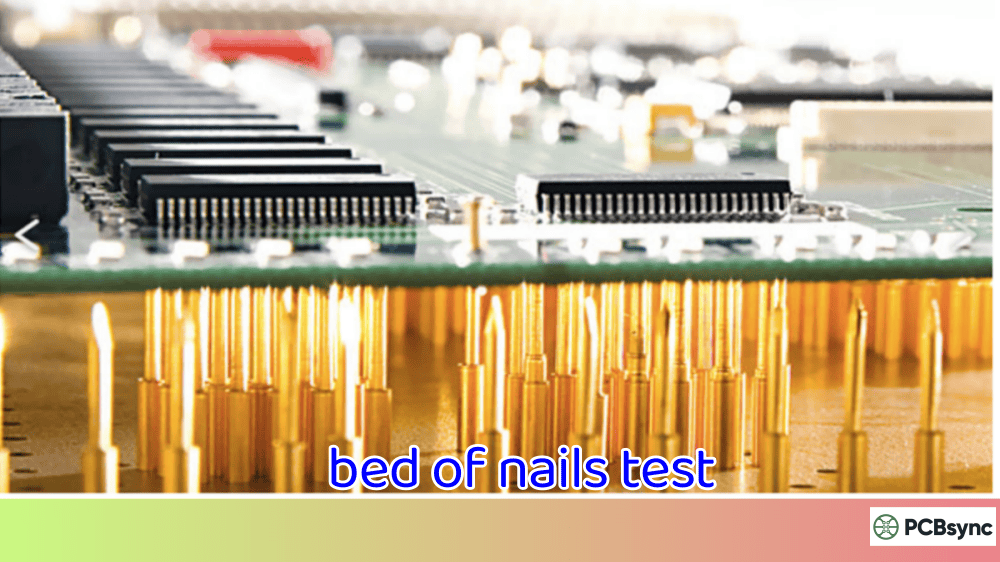
Daisy-chain monitoring uses dedicated test boards with components wired in series. Resistance increases indicate developing cracks before complete electrical opens occur.
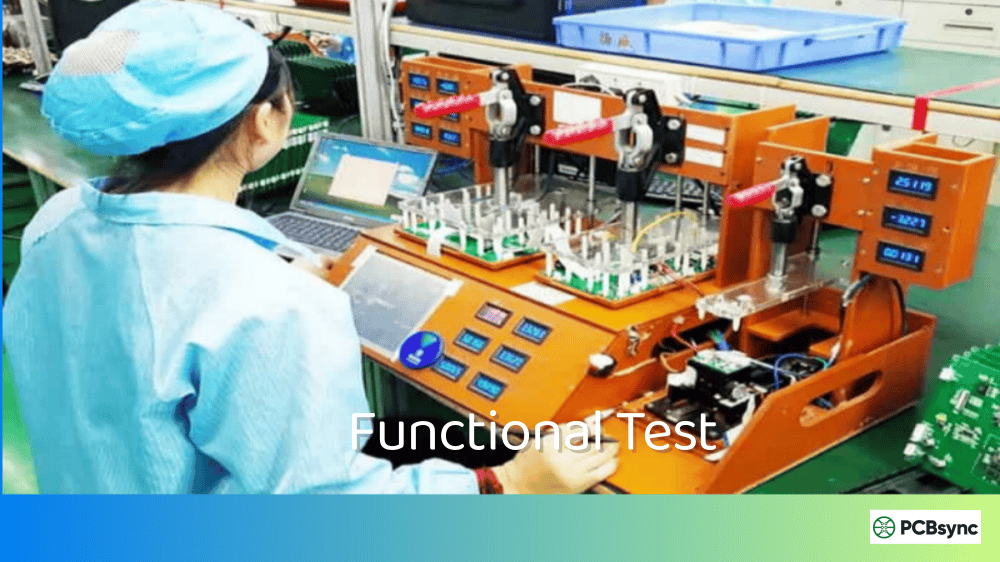
In-situ functional testing checks actual circuit operation during vibration. This catches failures that might intermittently appear during vibration but recover at rest.
Strain gauging measures actual board deflection during testing, providing data for correlation with finite element analysis and helping identify overstressed areas.
Event detection systems can flag resistance increases or intermittent opens with microsecond resolution, enabling precise identification of when failures initiate.
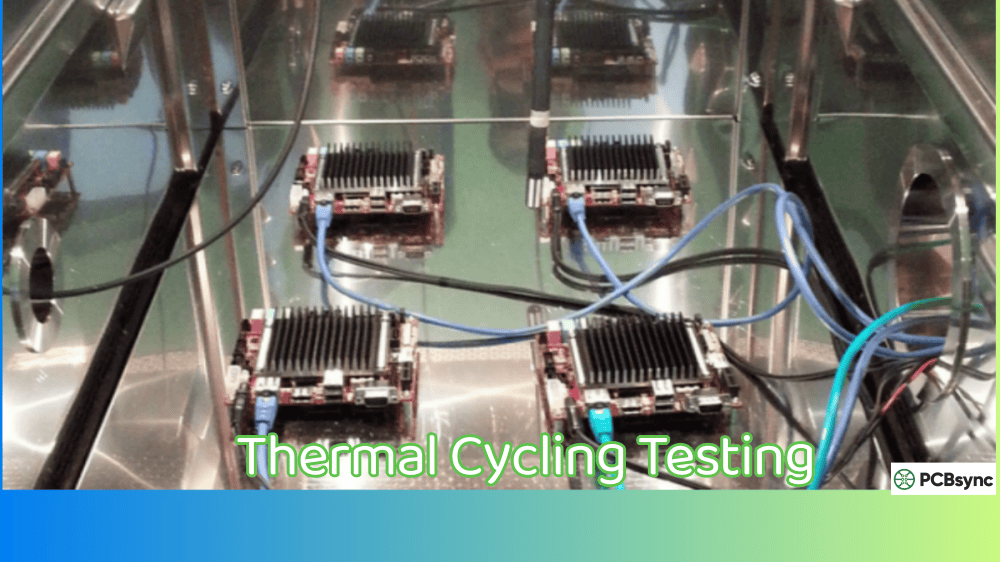
HALT and HASS Testing Methods
Highly Accelerated Life Testing (HALT) and Highly Accelerated Stress Screening (HASS) represent specialized applications of vibration testing focused on finding design weaknesses and manufacturing defects. These methodologies have transformed how leading manufacturers approach reliability.
HALT (Highly Accelerated Life Testing)
HALT pushes products beyond their design specifications to find operational and destruct limits. The approach uses combined temperature and vibration stresses, typically in a chamber with six-degree-of-freedom pneumatic vibration capability.
Unlike traditional single-axis shaker testing, HALT chambers use pneumatic actuators to deliver multi-axis excitation simultaneously. This more realistically stresses the product because real-world vibration rarely occurs in just one direction. The repetitive shock profile used in HALT produces high acceleration levels with broad frequency content.
A typical HALT sequence includes:
Cold step stress (decreasing temperature until failure)
Hot step stress (increasing temperature until failure)
Rapid thermal transitions (thermal shock)
Vibration step stress (increasing Grms until failure)
Combined temperature and vibration stress
Each step identifies specific limits:
Limit Type
Definition
Significance
Lower Operating Limit (LOL)
Lowest temperature where product functions
Design margin below specification
Upper Operating Limit (UOL)
Highest temperature where product functions
Design margin above specification
Lower Destruct Limit (LDL)
Temperature that causes permanent damage (cold)
Identifies weak components
Upper Destruct Limit (UDL)
Temperature that causes permanent damage (hot)
Identifies thermal vulnerabilities
Vibration Destruct Limit
Acceleration level that causes failure
Reveals structural weaknesses
HALT isn’t a pass/fail test. The goal is finding weaknesses and fixing them. Every failure provides information for design improvement. Products that survive severe HALT testing with good margin typically perform well in the field.
The key to successful HALT is the “find and fix” mentality. When something fails, stop the test, analyze the failure, implement a corrective action, and resume testing to find the next weakness. A HALT that finds no failures has been poorly executed; there’s always something to find if you push hard enough.
HASS (Highly Accelerated Stress Screening)
HASS applies during manufacturing to screen out workmanship defects before shipment. Based on HALT results, engineers establish stress levels that catch defective units without damaging good ones.
The process involves two types of screens:
The precipitation screen applies combined thermal and vibration stress to convert latent defects into detectable failures. This might be a thermal cycle between -40°C and +80°C combined with 10 Grms vibration, repeated for several cycles.
The detection screen identifies affected units through electrical testing performed during or immediately after the stress application. Intermittent connections, marginal solder joints, and other defects manifest during the screen and can be detected electrically.
Establishing safe HASS levels requires proof of screen testing to demonstrate that the screen stresses don’t consume excessive product life. This typically involves exposing a sample of good units to many times the intended screen duration and verifying they remain functional and undamaged.
HASS is most valuable for high-reliability applications where field failures carry significant consequences, such as aerospace, medical, and military electronics. The screening cost is easily justified by avoiding a single field failure.
Practical Vibration Testing Best Practices
After running thousands of vibration tests, certain practices consistently produce better results.
Before Testing
Know your environment — Gather actual field data when possible. Don’t assume standard profiles represent your specific application.
Characterize your fixture — Run a low-level resonance survey before any qualification test. Know where your fixture resonates.
Document everything — Record test article serial numbers, fixture configurations, accelerometer positions, and any anomalies observed.
During Testing
Start low — Begin at reduced levels and incrementally increase. This catches setup problems before they cause damage.
Monitor continuously — Watch control accelerometers, abort limits, and any functional parameters throughout testing.
Inspect at intervals — For long-duration tests, periodic visual inspection and functional checks catch developing problems.
After Testing
Post-test inspection — Examine test articles thoroughly, including X-ray or cross-sectioning of solder joints when warranted.
Correlate with analysis — Compare measured responses with finite element predictions. Discrepancies indicate model improvements.
Document failures thoroughly — Failure analysis provides the most valuable information. Don’t just note that something failed; understand why.
Useful Resources for Vibration Testing
The following resources provide additional depth on vibration testing topics:
Standards Documents (Primary Sources)
Standard
Description
Source
MIL-STD-810H
Military environmental test standard
ASSIST Database (free download)
IEC 60068-2-6
Sinusoidal vibration procedures
IEC Webstore
IEC 60068-2-64
Broadband random vibration
IEC Webstore
ISO 16750-3
Automotive electrical/electronic testing
ISO Store
RTCA DO-160G
Airborne equipment environmental test
RTCA, Inc.
Technical References
Resource
Description
Access
Vibration Research Testing Standards
Comprehensive standards list with summaries
vibrationresearch.com/testing-standards
NASA Technical Standards
Spacecraft and payload requirements
standards.nasa.gov
VibrationData Toolbox
Free PSD analysis software
vibrationdata.com
enDAQ Blog
Practical vibration analysis articles
blog.endaq.com
SAE MOBILUS
Automotive technical papers
saemobilus.sae.org
Industry Organizations
Organization
Focus
Website
IEST (Institute of Environmental Sciences and Technology)
Environmental testing standards and education
iest.org
ISTA (International Safe Transit Association)
Package and transportation testing
ista.org
SAE International
Automotive and aerospace standards
sae.org
IPC
Electronics manufacturing standards
ipc.org
Frequently Asked Questions About Vibration Testing
What frequency range should vibration testing cover?
Most standards specify testing from 10 Hz (or lower) to 2000 Hz, which captures the primary structural resonances of electronic assemblies and accounts for typical transportation and operational environments. Some applications require testing to 3000 Hz or beyond, particularly aerospace equipment exposed to acoustic and aerodynamic excitation. Below 10 Hz, displacement limitations often constrain testing. The key is matching your test frequency range to your actual operating environment.
How long should vibration tests last?
Test duration depends on your objective and applicable standard. Acceptance tests per MIL-STD-810 typically run 60 minutes per axis. Qualification tests often extend to several hours per axis. Automotive qualification can require 8+ hours per axis to simulate vehicle lifetime exposure. HALT tests continue until finding operational and destruct limits rather than running fixed durations. The general principle is that longer tests better represent accumulated fatigue damage, but accelerated testing uses higher levels for shorter durations based on fatigue equivalence calculations.
Can vibration testing be combined with temperature testing?
Yes, and combined testing often reveals failures that single-environment tests miss. Thermal-vibration combined testing is standard practice in HALT and HASS. Many test chambers integrate heating, cooling, and vibration capability. Combined testing is particularly important for solder joint qualification because thermal cycling creates different damage mechanisms than vibration alone, and the combination can produce synergistic effects. Some automotive and aerospace standards specifically require combined environmental testing.
What’s the difference between G-peak and Grms?
G-peak measures the maximum acceleration amplitude, while Grms (G root mean square) represents the statistical average of a random vibration signal. For sinusoidal vibration, G-peak is the amplitude of the sine wave. For random vibration, Grms characterizes overall severity. A 6 Grms random profile might produce instantaneous peaks of 18 G or higher (the peak-to-rms ratio, called crest factor, is typically about 3 for random vibration). When specifying tests, always clarify whether levels are peak or rms.
How do I know if my product passed vibration testing?
Define pass/fail criteria before testing starts. Common criteria include no structural damage observed, no electrical failures during or after testing, functional parameters remain within specification, and no resonances within restricted frequency bands. Simply surviving the test duration isn’t always sufficient. Post-test inspection should verify structural integrity, and functional testing should confirm operational performance hasn’t degraded. For products with safety implications, acceptance criteria are typically defined in applicable standards or customer specifications.
Moving Forward With Vibration Testing
Vibration testing represents an essential investment in product reliability. The cost of proper testing during development pales compared to field failures, warranty claims, and damaged reputation.
Start with a clear understanding of your product’s operating environment. Collect field data when possible, or use industry-standard profiles that represent your application. Select appropriate test standards and tailor them to your specific conditions. Invest in proper fixtures and instrumentation; cutting corners here invalidates your results.
For engineers new to vibration testing, I recommend starting with these steps:
Review applicable industry standards for your product category
Conduct a resonance survey to characterize your product’s dynamic behavior
Start with low-level testing and incrementally increase severity
Document everything, including setup photos, accelerometer positions, and test anomalies
Analyze failures thoroughly; they contain the most valuable information
Most importantly, treat every failure as an opportunity to improve your design. The products that perform reliably in the field are the ones that have been thoroughly shaken, stressed, and validated before they ever reach customers.
The vibration testing field continues evolving with advances in multi-axis testing, real-time monitoring through IoT sensors, and improved simulation capabilities through finite element analysis. Staying current with these developments helps you make better testing decisions and design more robust products.
That’s what vibration testing ultimately provides: confidence that your product will work when it matters, in the hands of customers who depend on it.
Inquire: Call 0086-755-23203480, or reach out via the form below/your sales contact to discuss our design, manufacturing, and assembly capabilities.
Quote: Email your PCB files to Sales@pcbsync.com (Preferred for large files) or submit online. We will contact you promptly. Please ensure your email is correct.
Notes: For PCB fabrication, we require PCB design file in Gerber RS-274X format (most preferred), *.PCB/DDB (Protel, inform your program version) format or *.BRD (Eagle) format. For PCB assembly, we require PCB design file in above mentioned format, drilling file and BOM. Click to download BOM template To avoid file missing, please include all files into one folder and compress it into .zip or .rar format.


