Inquire: Call 0086-755-23203480, or reach out via the form below/your sales contact to discuss our design, manufacturing, and assembly capabilities.
Quote: Email your PCB files to Sales@pcbsync.com (Preferred for large files) or submit online. We will contact you promptly. Please ensure your email is correct.
Notes: For PCB fabrication, we require PCB design file in Gerber RS-274X format (most preferred), *.PCB/DDB (Protel, inform your program version) format or *.BRD (Eagle) format. For PCB assembly, we require PCB design file in above mentioned format, drilling file and BOM. Click to download BOM template To avoid file missing, please include all files into one folder and compress it into .zip or .rar format.
One question I get asked frequently by fellow engineers is: “Is 0.8mm PCB the standard thickness for circuit boards?” The short answer is no—but it’s becoming increasingly popular for good reasons. At exactly half the thickness of the traditional 1.6mm standard, 0.8mm boards offer a compelling balance between space savings and manufacturability that many modern applications demand.
In this guide, I’ll share everything I’ve learned about designing and manufacturing 0.8mm PCB boards over the years. Whether you’re working on a smartwatch, a Bluetooth module, or any space-constrained device, understanding when and how to use half-thickness boards can significantly improve your product design.
A 0.8mm PCB is a printed circuit board with a finished thickness of 0.8 millimeters (approximately 0.031 inches). This measurement includes all the layers that make up the board: the FR-4 substrate, copper traces, prepreg (for multilayer boards), solder mask, and surface finish.
To put this in context, 0.8mm is exactly half of the industry-standard 1.6mm thickness. This isn’t a coincidence—the dimensions evolved from standardized core materials that manufacturers keep in stock. When you need something thinner than standard but still rigid enough for conventional assembly processes, 0.8mm hits a sweet spot.
Is 0.8mm PCB a Standard Thickness?
Here’s where things get interesting. While 1.6mm (0.063 inches) remains the most common “default” thickness that originated from early bakelite sheet manufacturing, 0.8mm is absolutely considered a standard option by virtually all PCB manufacturers today.
In fact, most fabricators maintain the following as their standard thickness offerings:
Thickness
Classification
Primary Use Cases
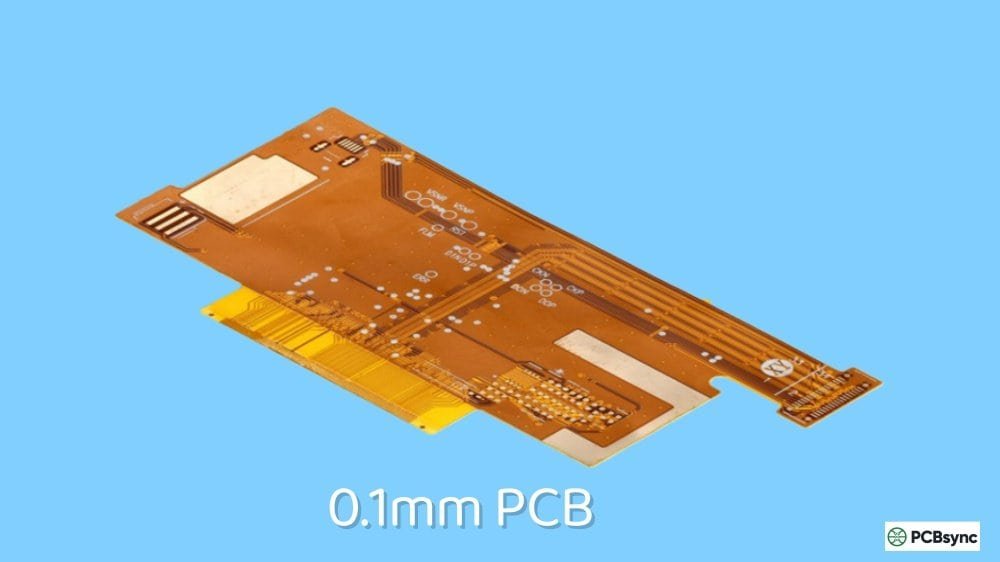
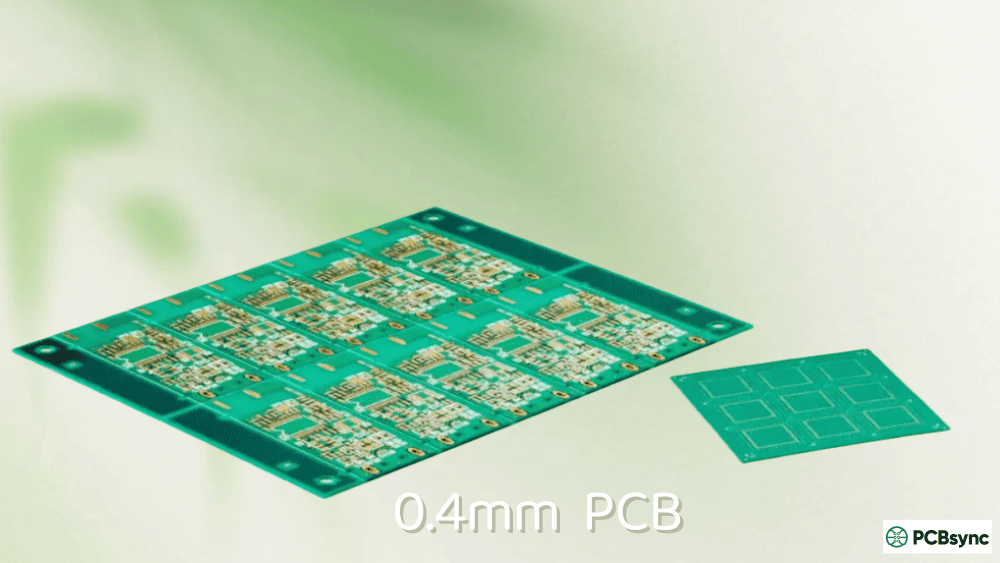
0.4mm
Ultra-thin
Flexible electronics, SIM cards
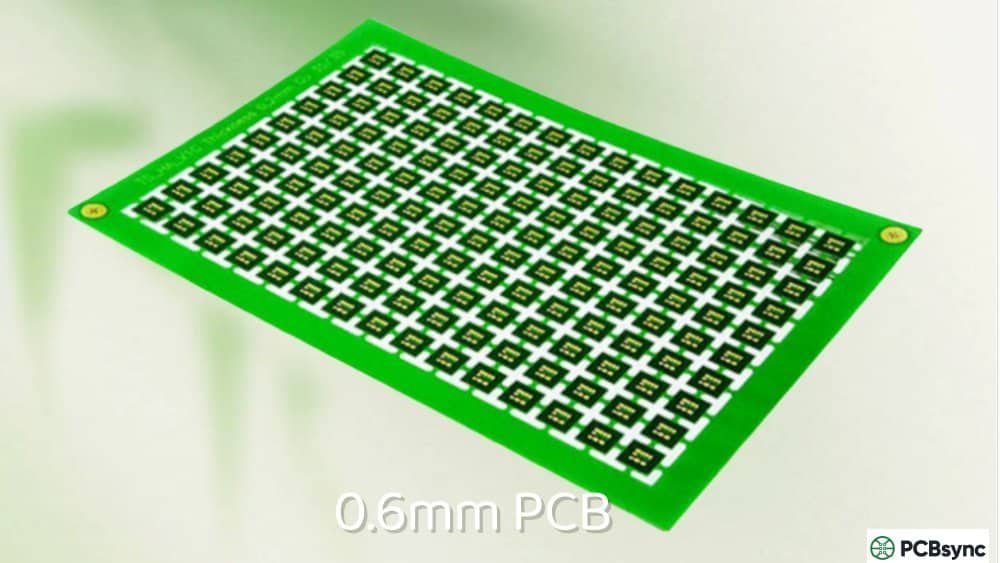
0.6mm
Thin
Compact sensors, card devices
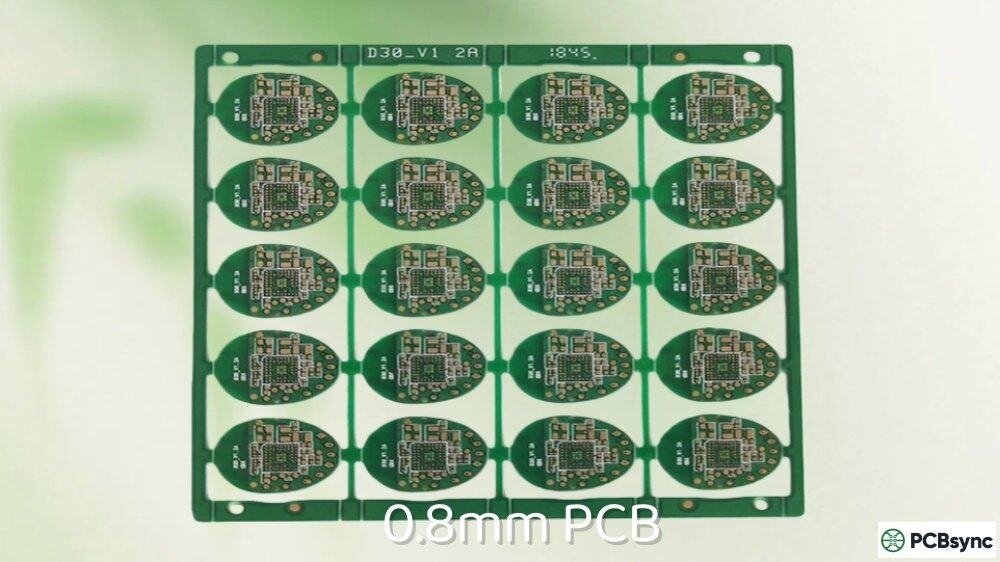
0.8mm
Half-standard
Smartphones, wearables, IoT modules
1.0mm
Light
Tablets, portable electronics
1.2mm
Medium
General consumer electronics
1.6mm
Industry standard
Most general-purpose applications
2.0mm+
Thick
Industrial, automotive, power electronics
So while 0.8mm isn’t “the” standard, it’s definitely “a” standard—and one that’s becoming more prevalent as devices shrink.
0.8mm PCB vs 1.6mm: Key Differences
Before committing to half-thickness boards, you need to understand exactly what you’re trading off. Here’s a practical comparison based on real-world design experience:
Factor
0.8mm PCB
1.6mm PCB
Weight
~50% lighter
Standard weight
Rigidity
Moderate flex under pressure
Rigid, minimal flex
Max practical layers
4 layers (6 possible but challenging)
8+ layers common
Aspect ratio limit
~8:1 (min hole ~0.1mm)
~10:1 (min hole ~0.15mm)
Component support
Light to medium components
Heavy components supported
Warping risk
Higher during reflow
Lower, more stable
Cost (2-layer)
Similar to 1.6mm
Baseline
Cost (4-layer)
5-15% premium
Baseline
Surface finish options
Most available
All available
Lead time
Standard
Standard
The key takeaway? A 0.8mm PCB works well for designs with moderate complexity (up to 4 layers typically), lighter components, and where space or weight reduction matters. For high-layer-count designs or boards carrying heavy transformers and connectors, stick with 1.6mm or thicker.
When to Use 0.8mm PCB: Ideal Applications
Over the years, I’ve found certain applications where 0.8mm thickness genuinely makes sense—not just because it’s possible, but because it improves the final product.
Smartphones and Tablets
Modern smartphones demand thin internal boards to maximize battery capacity and minimize device thickness. An 0.8mm PCB for the main logic board or sub-boards (like antenna modules) can free up 0.8mm of internal space—which might not sound like much until you realize that’s enough room for a larger battery or better speaker.
Wearable Electronics
Smartwatches, fitness trackers, and health monitors benefit enormously from thin boards. When your device straps to someone’s wrist, every fraction of a millimeter affects comfort. The 0.8mm thickness provides enough rigidity for SMT assembly while keeping the overall device slim.
Bluetooth and WiFi Modules
Wireless communication modules are often designed as drop-in components for other products. Using 0.8mm PCB for these modules means they integrate more easily into space-constrained host devices. Many commercial Bluetooth Low Energy (BLE) modules use 0.8mm boards for exactly this reason.
IoT Sensors and Edge Devices
Internet of Things applications frequently require compact sensors that fit behind wall plates, inside equipment, or within existing infrastructure. Half-thickness boards make these installations feasible without modifications to the host environment.
LED Lighting Modules
Thin PCBs work well for LED applications where the board needs to fit into narrow fixtures or conform to specific profiles. The reduced thermal mass of 0.8mm boards can actually improve heat transfer to metal housings in some LED designs.
Medical Devices
Portable and wearable medical equipment—glucose monitors, ECG patches, pulse oximeters—prioritize patient comfort. Thin boards contribute to devices that are less obtrusive and more comfortable for extended wear.
0.8mm PCB Stackup Options
Getting the stackup right is essential for half-thickness boards because you have less material to work with. Here are practical stackup configurations I’ve used successfully.
2-Layer 0.8mm PCB Stackup
The simplest and most cost-effective option uses a single 0.6mm core:
Layer
Material
Typical Thickness
Surface Finish
ENIG/OSP
~0.05mm
Top Solder Mask
LPI
~0.02mm
Top Copper
Cu (1oz)
0.035mm
Core
FR-4
0.6mm
Bottom Copper
Cu (1oz)
0.035mm
Bottom Solder Mask
LPI
~0.02mm
Surface Finish
ENIG/OSP
~0.05mm
Total
~0.8mm
This configuration is widely available and doesn’t carry any cost premium over standard thickness for most manufacturers.
4-Layer 0.8mm PCB Stackup
Four-layer boards at 0.8mm require thin cores and prepreg. Here’s a typical arrangement:
Layer
Material
Thickness
Top Copper (Signal)
Cu (0.5oz)
0.018mm
Prepreg
1080
0.075mm
Layer 2 (Ground)
Cu (0.5oz)
0.018mm
Core
FR-4
0.4mm
Layer 3 (Power)
Cu (0.5oz)
0.018mm
Prepreg
1080
0.075mm
Bottom Copper (Signal)
Cu (0.5oz)
0.018mm
Total (before finish)
~0.62mm
After adding solder mask and surface finish, you’ll reach approximately 0.8mm. Note the use of 0.5oz copper—this is standard for thin multilayer boards and you’ll need to account for it in your current-carrying calculations.
Layer Configuration Guidelines for 0.8mm PCB
When designing multilayer 0.8mm boards, follow these layer arrangement principles:
Half-thickness boards are more demanding to manufacture than standard boards. Understanding these challenges helps you design boards that yield well and perform reliably.
Panel Handling and Warping
The biggest PCB manufacturing challenge with 0.8mm PCB is warping. Thin panels flex more during thermal processing, and any differential stress between copper-heavy and copper-light areas becomes more pronounced.
Design tips to minimize warping:
Balance copper distribution between top and bottom layers
Use hatched polygons instead of solid copper pours where possible
Avoid asymmetric copper on inner layers
Specify a maximum warpage tolerance (typically 0.75% for thin boards)
Drilling and Aspect Ratio
The aspect ratio (board thickness to hole diameter) affects plating quality. For 0.8mm PCB, you can use smaller holes while maintaining good plating:
Hole Size
Aspect Ratio at 0.8mm
Plating Quality
0.3mm
2.7:1
Excellent
0.25mm
3.2:1
Excellent
0.2mm
4:1
Good
0.15mm
5.3:1
Acceptable
0.1mm
8:1
Marginal (laser drill preferred)
For reliable through-hole plating, keep your aspect ratio below 8:1. This means minimum hole sizes of 0.1mm are achievable, though 0.15-0.2mm is more practical for standard manufacturing.
Surface Finish Compatibility
Good news: most surface finishes work fine at 0.8mm thickness. Here’s the compatibility breakdown:
When assembling components on 0.8mm boards, consider these factors:
Reflow soldering: Thin boards have lower thermal mass, so they heat up faster. Your reflow profile may need adjustment—specifically, slower ramp rates during preheat to prevent thermal shock.
Component weight: Avoid heavy through-hole components like large transformers or tall electrolytic capacitors if possible. If you must use them, add mechanical support (standoffs, adhesive, or enclosure features).
Depanelization: V-scoring works at 0.8mm, but the thinner material requires careful score depth control. Tab routing with mouse bites often yields better results for thin boards.
Design Tips for Successful 0.8mm PCB Projects
Based on my experience with dozens of thin-board designs, here are practical tips that make a real difference:
Tip 1: Verify Stackup Early
Don’t design your entire board and then ask the manufacturer if they can build it. Send your preliminary stackup requirements before you start routing. Most fabricators will provide a recommended stackup for your layer count and thickness combination.
Tip 2: Mind Your Via Sizes
Smaller vias are tempting on thin boards, but each via size has manufacturing implications. For 0.8mm PCB, I recommend:
Standard vias: 0.3mm drill / 0.6mm pad
Small vias: 0.2mm drill / 0.45mm pad
Minimum vias: 0.15mm drill / 0.35mm pad (verify with manufacturer)
Tip 3: Add Fiducials Generously
Thin panels can shift slightly during handling. More fiducials (and larger ones) give pick-and-place machines better registration. I typically use three global fiducials plus local fiducials near fine-pitch components.
Tip 4: Consider Stiffeners for Critical Areas
If certain areas of your board will experience mechanical stress—connector regions, mounting holes, areas under heavy components—consider adding stiffener material. Your manufacturer can laminate FR-4 stiffeners to specific regions.
Tip 5: Test Prototypes Under Stress
Don’t just test electrical functionality. Subject your prototypes to thermal cycling, drop testing, and flex testing (if applicable). Thin boards reveal their weaknesses under mechanical stress faster than thick boards do.
Cost Considerations for 0.8mm PCB
One question I always get: “Does 0.8mm cost more than 1.6mm?”
The answer depends on configuration:
2-layer boards: Generally no premium. You’re using less material, and 0.8mm cores are standard stock items.
4-layer boards: Expect a 5-15% premium. The thinner cores and prepreg needed for 0.8mm multilayer boards are less common and require more careful process control.
6+ layer boards: Significant premium (20%+) and limited availability. At this complexity level, most manufacturers prefer to work with 1.0mm minimum thickness.
Volume matters: For high-volume production, manufacturers can optimize their processes for your specific thickness, potentially eliminating the premium entirely.
Useful Resources for 0.8mm PCB Design
Here are tools and references I find helpful when working with thin boards:
Impedance Calculators
JLCPCB Impedance Calculator – Free online tool with their standard stackups
Saturn PCB Toolkit – Comprehensive Windows application for PCB calculations
Sierra Circuits Stackup Planner – Interactive layer planning tool
Design Standards
IPC-2221B – Generic Standard on Printed Board Design
IPC-6012E – Qualification and Performance Specification for Rigid Printed Boards
Most manufacturers can produce 4-layer boards at 0.8mm thickness reliably. Six-layer 0.8mm boards are possible but challenging—they require ultra-thin cores and careful process control. Beyond 6 layers, you’ll typically need to increase thickness to 1.0mm or more. For designs requiring many layers in thin profiles, consider HDI technology with laser-drilled microvias.
Can I use 2oz copper on a 0.8mm PCB?
Using 2oz (70μm) copper on 0.8mm PCB is possible but limited. For 2-layer boards, 2oz copper on both sides works with an appropriate thin core. For 4-layer boards, 2oz copper is typically only practical on outer layers, with 0.5oz or 1oz on inner layers. Heavy copper significantly affects your stackup options and may require moving to a thicker overall board.
How does 0.8mm PCB affect controlled impedance?
Thinner boards mean thinner dielectrics between signal layers and reference planes. This affects trace width requirements for controlled impedance. For example, a 50Ω microstrip on a 1.6mm board might need a 0.3mm trace, while the same impedance on 0.8mm might require a 0.15mm trace. Always run impedance calculations specific to your actual stackup and verify with your manufacturer.
Is 0.8mm PCB suitable for through-hole components?
Yes, but with considerations. Through-hole leads will have shorter barrel lengths in the plated holes, potentially affecting solder joint strength. For critical through-hole connections, use larger annular rings, consider adding additional mechanical retention, or design with SMT alternatives where possible. Connectors with board-lock features work well on 0.8mm boards.
What causes warping in 0.8mm PCB and how do I prevent it?
Warping in thin boards results from uneven thermal expansion between copper and laminate, asymmetric copper distribution, and manufacturing process stress. Prevention strategies include: balancing copper weight between layers, using symmetrical stackups, specifying materials with matched CTE (coefficient of thermal expansion), choosing ENIG over HASL surface finish, and working with your manufacturer to optimize lamination parameters.
Conclusion
Choosing 0.8mm PCB for your design means accepting some constraints in exchange for valuable space and weight savings. At half the standard thickness, these boards work exceptionally well for smartphones, wearables, wireless modules, and IoT devices—applications where compact form factor directly improves the product.
The key to success with half-thickness boards is understanding their limitations and designing accordingly. Keep your layer count reasonable (4 layers maximum for most applications), balance your copper distribution, specify appropriate via sizes, and work closely with your manufacturer on stackup selection.
If you’re starting a project that might benefit from 0.8mm thickness, my advice is to get your manufacturer involved early. Share your layer count requirements, impedance needs, and component list. A good fabricator will help you select a stackup that’s both manufacturable and optimized for your design goals.
Done right, 0.8mm PCB opens up design possibilities that simply aren’t achievable with standard-thickness boards. And in today’s electronics market, that competitive edge can make all the difference.
Inquire: Call 0086-755-23203480, or reach out via the form below/your sales contact to discuss our design, manufacturing, and assembly capabilities.
Quote: Email your PCB files to Sales@pcbsync.com (Preferred for large files) or submit online. We will contact you promptly. Please ensure your email is correct.
Notes: For PCB fabrication, we require PCB design file in Gerber RS-274X format (most preferred), *.PCB/DDB (Protel, inform your program version) format or *.BRD (Eagle) format. For PCB assembly, we require PCB design file in above mentioned format, drilling file and BOM. Click to download BOM template To avoid file missing, please include all files into one folder and compress it into .zip or .rar format.


